Showing posts with label crafting. Show all posts

Friday, December 6, 2024

Autistic Crafting

In the last few years, I have been reading and researching autism. It started out simple. I wondered why my partner struggled to stay focused long enough to complete a full load of dishes when I asked. Why was it a hassle? I dove into the research on ADHD and learned that neurodivergence can make easy chores, like washing dishes, feel world-ending. It was a lot to adapt to at first, but nearly 3 years later, the dishes just get done now. Then a friend asked me whether I had considered myself autistic. Well, no, considering that this was the first time it had occurred to me to think about it. I didn’t have any developmental delays or any other stereotypical signs. And then I was handed a list of testimonials and asked whether I related to any of them. As it turns out, I related to the majority of them.

handspun hand woven blue texel wool yarn

I have already spoken about this on my Patreon page, so please head there if you’d like to read it in full. I felt like the only way to solve some of my life problems was to understand what autism actually is (and not my un-researched perception of it), decide whether I thought I was autistic, and what I might do about it if so. After a year of fairly intense research, looking at medical reviews of autism in adult women, testimonials, and just reflecting on frustrating interactions I had had in my life and feeling massively misunderstood, I accepted that I was probably autistic. In April 2023, I began implementing strategies to listen to my body and assess how different experiences manifested certain symptoms: extreme fatigue, weight gain, muscle and joint inflammation, anxiety, and brain fog.

After a full year of understanding myself as autistic, I can say that I have no doubt that this is the label that describes me best. I am not diagnosed but my 3 years of research is sufficient for me to say that I would receive a positive diagnosis with a professional. I would like to get diagnosed officially, but the NHS wait times are on the order of 9 months to several years and private options are pricey. Until then, I will continue living my life as an autistic person.

handspun blue texel wool


I have titled this blog entry as ‘Autistic Crafting’ for a specific reason. You may have heard me casually mention the difficulty I sometimes have when trying to make slubby art yarns. My main preference for yarns is that they’re spun consistently. I’ve been told to try spinning with my non-dominant hand (which is a fantastic idea!) so I’m a bit more loose and less controlling of the final result. However, this is something that is natural to me. In a world of chaos, autistic people tend to prefer being able to control their environment where possible. My personal obsession for perfectly even yarns likely stems from my need to form structure and order from chaos. It is how I meditate. I can spin endless miles of plain white wool into a fine yarn and be happy. I can do it while listening to the chaos around me, so long as I can make the perfect yarn.

My repeatable hand dyed yarns are another example of how autism comes into my crafting. I love the idea of randomly dyed yarn, but I can’t bring myself to just…jump into it. Even at the very start, in 2010, I had to exert total control over my dyeing method in order to feel confident that my art could be consistent. My recipes and method of dyeing are the scientific backbone of my business, but equally, it satisfies my autistic need for control over the results. And the artistry created in the resulting hand dyed yarn, well, that’s the anticipated chaos that drew me into hand dyeing yarn in the first place. I have always said I use Science to create Art, hence the brand Expertly Dyed: Art by Science. I feel a bit like I’ve come full circle in understanding myself as a crafter. My brain has been providing subtle hints over the years, but it’s only now clicked.

I could go on, and I probably will comment on autism in crafting in future updates, but for now, consider this an interesting twist to resuming blogging after 2 whole years.

Thursday, May 28, 2015

Tinsel Art Yarn: Getting the Babe Tutorial Ready!

I had a backlog of things I needed to get done since I recovered from the holidays (and I'm here in Korea again with my Babe wheel), but now I've started working on 'What to do with leftover Christmas Tinsel?' which I talked about in this video:


My container of random bits of wool and silk and yarn (which I used to make pottage batts) was majorly overflowing, so I grabbed my hackle and threw on a bunch of interesting things. These rovings have merino wool, cormo/mohair/cotswold locks, silk, tencel, angelina, firestar, silk ribbons, yarn scraps, and, of course, tinsel. I have a diz (the tool used to remove fiber from tools like a hackle, and it produces a short roving), but it didn't have a large enough hole for all of this texture. To remove the fiber, I grabbed a small bit of fiber in my hand, gave it a half turn, then pulled a little. Short twist, then pulled. A long, fat, artsy roving about four feet long was the result. I did that twice to get two different rovings. Here's how they turned out:


The pink one had more shorter fibers than the blue one, so I pulled off the short fibers, placed them on the hackle again, then drafted them out into a lumpy roving:


As part of the tutorial, I will be showing you how to spin the pink one (my favorite) in real time, but I will also show you how I spun the blue one in time lapse. I've been thinking of adding time lapse videos to my tutorial series to show you more examples of how to spin various kinds of yarn (and for further examples of carding or blending or whatever else seems appropriate). The demonstrations I do are great, but I know that some of you just want to watch the process for longer. I think this is a good trade-off: I can give you the extra content you need without making you sit and watch a thirty minute video of me rambling while I spin. :)

I already filmed the first yarn, and I will be filming the second yarn on Monday. Here's a sneak peek at how the blue yarn turned out!:


I used the plying thread which had sequins already spun into the thread. Here's a better picture of my plying thread here.


I was a little concerned at first that the tinsel would feel scratchy against my neck, since it is designed to be haphazardly thrown over a tree, but it's actually quite soft. It reminds me of angelina fibers, which are designed to be soft and pliable.

I haven't completely committed to this idea yet, but I kind of want to use this yarn for a future weaving project. It'll provide a ton of interesting texture. Or, and this is why I'm not completely committed to the weaving idea yet, I might knit it as fringe on the end of another large shawl I want to make. I love how the striped Cora shawl turned out, and I like how the heaviness on the bottom stretched the stitches slightly so it looked more lacy, yet substantial. Here's the one I'm talking about:


If you would like to add in specific requests for this Babe art yarn tutorial, be sure to let me know in the next day or two so I can get it included in the video!

Monday, April 20, 2015

Photo Tutorial: Upcycling a Cashmere Sweater into a Tote

I really like the idea of upcycling old clothes and fabrics and turning them into awesome accessories and concept designs. When you rework small pieces of fabric, inevitably you create something unique and custom. One of my goals with a project like this is to practice cutting up old clothes confidently--it's about learning how to see past the shapes or construction of another garment and imagining how it could look with some tweaking. 

So, this will be a photo tutorial in a light sense, meaning that I won't be showing you exactly how to do this. Rather, I'll be showing you how I did the whole process so you can get an idea of how to do this yourself. I began with an old turtle neck cashmere sweater:


Some tools you'll find useful:
  • Sharp scissors or a rotary cutter
  • Pins
  • Self-healing cutting mat
  • Ruler and French curve
  • Sewing machine
First, I cut off the sleeves. I kept these aside and later turned them into arm warmers.


Sometimes it's good to pin things occasionally with a project of this nature. Cashmere isn't slippery, but I wanted neat, even edges. I started by pinning the bottom together:


Then I folded the sweater in half and pinned it together. The ruler is there for me to make a mark where the handles will eventually be formed. I made this point even with the bottom curve of the sleeve:


I just adjusted the French curve over and over until I got the curve I wanted. You may want to draw part of the curve, adjust, draw some more, to get the kind of curve you want. For my sweater, I had plenty of extra fabric at the top so I could make my curve in one go...but it'll depend on your starting piece:


This is how it looked when you open it up. This is the front of the sweater:


To make sure all of the curves are equal, I cut open the top of the sweater where the shoulder is. I pinned the armpit part of the sleeves on top of each other:


The central seam in this photo is actually the side seam:


Once pinned, fold it in half so that you can even up all of the curves. For a really thick sweater, this won't work. You may need to make a template.


See how uneven they are?:


Here are the edges all trimmed up:


Trim up the former shoulder of the sweater:


I am preparing to sew the sweater by pinning the bottom of the sweater closed. I tested some stitches on spare sweater fabric. This is important for testing sewing tension:


Baste!


I went for an overlapped strap with top stitching (like you see on jeans), but you could choose any other seaming method you desire. I connected the front shoulder pieces together to form the handle and the back shoulder pieces together to form the other handle. This allows the tote to be opened completely without the handles getting in the way:


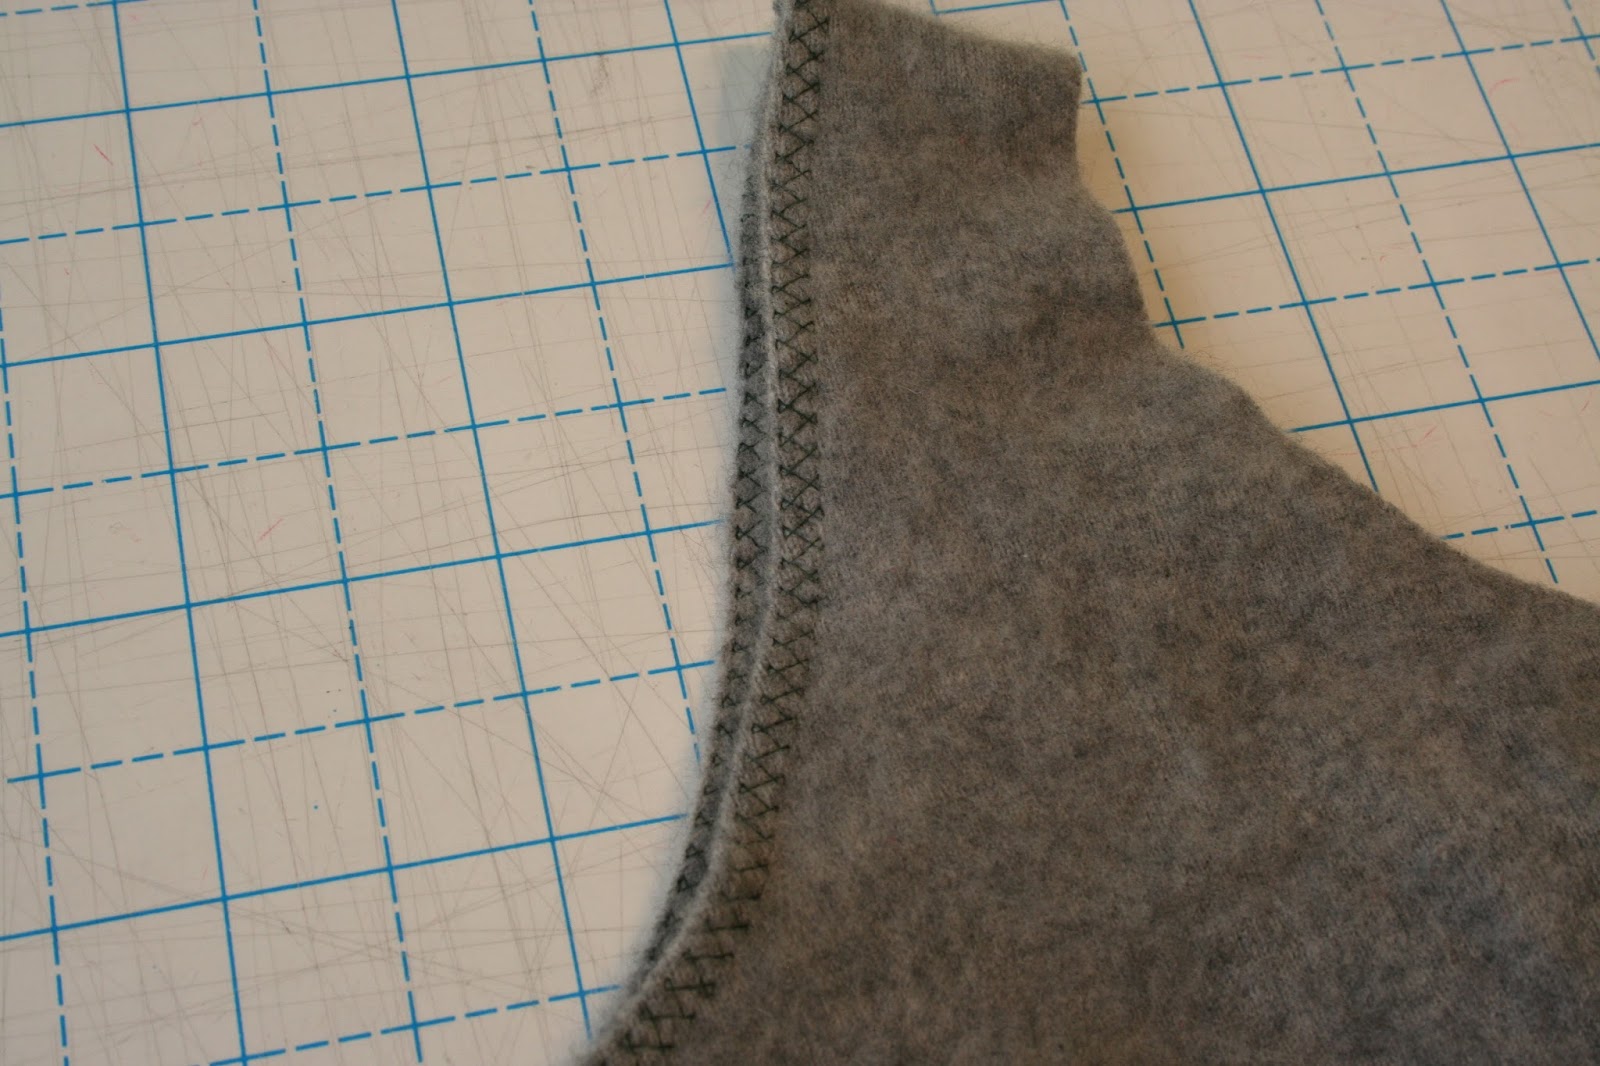
I chose a cool celtic stitch pattern in green because I wanted it to stand out a bit:


Then I curled the seam under and seamed the edges:


When you're done seaming, clean up the inside edges (if you want). I think it looks better trimmed up:


Now that all of the seaming is done, you have your tote! My sweater was a touch flimsy at first, so I felted it to give the tote more stability. Use the extra pieces to decorate, add pockets, etc. I will be back to show off the kinds of decoration I end up putting on my tote. For now, it'll hold my current knitting and spinning projects.


If you liked this photo tutorial, let me know and I will make more of them in the future! Let's stay crafty. :)

Tuesday, April 14, 2015

Let's Wash a Merino Fleece: Final Step, Storage

You have finished all of the washing and drying of your merino fleece, but you already have several projects lined up which don't include using your freshly washed merino wool. I've been there! Proper storage of any wool craft is important to prevent pests from getting into your stash and damaging it, but it's also a crucial step if you want to know the details of the fleece a year from now...a lot can happen in a year, and we can forget minute details. Now we will talk a little about proper fleece storage based on my own research (partially from my Museum Studies MSc program, partially from being scared to death that my fiber will get eaten!), though there are other acceptable methods for storage too.

Here are the things I used when storing away Orry:

  1. Old pillow cases, cleaned
  2. Notecards, Hole Punch, and Marking tool (pen, marker, quill, etc.)
  3. String or yarn to close up the pillow case
  4. Sachet of good smelling stuff (ie, pest deterrent): lavender, neem oil/leaves, cedar chips--no mothballs, please

Be sure your fleece is absolutely dry. When I no longer feel like the wool is wet, I place it in a large, clean box and rotate it every 12 hours for 2 days, just to be absolutely certain. If you pack damp wool, you'll get mold growth on it in just a few days. I like to take a notecard, fold it in half and write the fleece type, year, and washed conditions on the front.


I keep records of Orry elsewhere because I have bought so many of his fleeces in the past. I'm quite familiar with his wool, so I'm really just concerned with which year this fleece came from (because wool characteristics can change from year to year, and as the animal ages, for some breeds of sheep) and how much the fleece weighed.

Other information you might want to include:

  1. Name of farm or shepherd
  2. Micron count (if known, or a guess if you want to do that)
  3. Name of sheep, and any other breed history you have access to (something like, sire was 100% merino and...mother?...was 75/25 merino/cormo)
  4. Whether it was the first clip or second clip....etc.
  5. Lamb v. Adult (lamb fleeces tend to be softer than the adult version in some breeds)
On the inside of the card, I record information about what I put in the bag, which will vary depending on which bag I'm holding. In this particular case, I wrote that this bag contains the prime cut of the fleece and how much it weighed. Because my fleece was heavily skirted before I got it, my prime fleece comprises most of my washed merino wool. Further, it was extremely clean to begin with, so I don't need to add many extra details to this part of the notecard. I don't have any specific projects in mind yet, so I didn't write that information down either. 

But, here is a list of things you might want to add to your own labels:
  1. How clean is it? If it has a lot of vegetable matter, you might want to include this here so you can decide when you plan to work on it..it'll take longer to get it free of vm.
  2. Is it matted or cotted? You may want to indicate that this bag is reserved for things like socks, mittens, or felting projects.
  3. Did you have to split your fleece into several bags? Indicate that with something like '1 of 2'.
  4. Will this be two sweaters some day? Write down the amounts of washed wool are needed for each project, just so you can get an idea for how much fleece will be leftover.


There is a lot of information you can include for your washed fleece before it heads into storage. Take mine as an example and develop your own record keeping system. I can tell you that I have absolutely no mystery wool in my stash...whatever does find its way in there, it was mystery wool before it came into my possession.


You can choose to store your wool in a cardboard box or a plastic tote, but with either method, you should check your stash every few months (if you can!) and clean the area around it to prevent pests from setting up their homes near your precious wool. I typically store my longer-term wool in a new cardboard box, like the kinds you get at U-Haul. You just want a sturdy box with thick walls, and preferably one large enough for you store the whole fleece of a single animal. I place a lavender sachet (like the one I made below) at the bottom of the box, place my fleece bundles, and put a sachet on either side of the box, respectively. Finish it off my placing one more sachet at the top. Close all openings with packing tape, especially the bottom.

The permeable characteristic of the cardboard will allow the wool inside to change relative humidity with temperature and environmental changes. This is important so that the wool won't become too wet or too dry while it's being stored..think about how erratic your hair becomes when the weather changes!

If you plan to store your wool in a tote, many of my methods will still apply. You should add in a couple of clean towels to the storage tote to help manage the relative humidity. The plastic won't allow the inside contents manage the relative humidity as easily, so if it becomes too moist inside, the water vapor will condense onto whatever is inside...gulp...your wool. It happens infrequently, but occasionally people discover that their wool has felted or become musty in plastic totes, and not properly managing the relative humidity inside the tote is the most likely cause. I prefer to store my short-term wool in plastic totes so I can grab a little bit here and there as needed for projects.

The lavender sachets I used were made from scrap fabric and lavender from my own garden. Each sachet contains a large handful of dried lavender leaves. Now, you don't need to go to this extreme since many Etsy shops sell lavender (and neem leaf) sachets inexpensively. You can even use lavender essential oil on some paper towels instead of sachets, though you'll need to reapply the essential oil every month or so to keep the fragrance strong.


Your fleece is now safely stored away, to be used when you're inspired or when you find a break in life. Wool can be stored in this way for many years. I can't really say what the shelf-life of wool really is, since it's contingent on many factors. But, if you keep it clean, check it regularly, and manage the relative humidity, you might be able to store a fleece for 30+ years!

I hope you have found this tutorial series useful and easy to follow. I know what it's like staring at your first fleece, not sure how you should proceed. :) Thanks for reading! Join me over on Facebook and Ravelry if you want to share your own fleece storage tips..there's so much we can learn from each other.

Tuesday, March 24, 2015

Let's Wash a Merino Fleece: Step 3, Mesh Washing

Okay, so you have divided up your merino fleece, very carefully. Now, I prefer to wash in a mesh bag because it helps preserve the lock integrity. You can certainly wrap up the wool in some muslin and place it in the mesh bag to further preserve the lock structure, but it will take longer. I suggest doing this if you have the time, since it's completely worth the effort (+Kim Degener mentioned that she pulls out the individual locks, wraps it in some cloth, then washes it in Orvus paste). The end result will still maintain the lock so you can pull them out and spin them quickly and easily.

Before I wash the seconds, I do a small (super tiny, maybe 10 grams) test to get an idea of the number of washes I will need to do. It also lets me know how effective the soap is that I'm using. This isn't a necessary step, but it's a great one for beginners. It's a baby step. Sometimes we need those.


Now that I've tested the fleece, I think I'm probably going to need 3 washes to the lanolin mostly removed. (This was some organic brand I've never used before--the professional washing agent I used before might have done a better job.) I don't want my merino to feel gummy. Place your fleece into the mesh bag in an organized fashion. I make sure all of the points of the fleece are sticking up:


Be sure to push the ends of the fleece patch into the very bottom of the mesh bag so you can maximize how you use the interior space. You really want your fleece to have breathing room in the bag, so don't over fill it.


Now that it's full, I've pulled the drawstrings closed. It looks puffy, but that's only because the locks are standing straight up:


You can see here that it's only 1 lock high:


If you are washing a fleece with less grease than a fine wool fleece, you can start by doing the cold soak method, which loosens and removes dirt. I have found that fleeces with lots of lanolin, they tend to float rather than soak with the cold soak method. If your particular merino fleece is dirty (perhaps it was uncoated and thus dirtier), you might want to fill small water bottles with plain water and place over the mesh bag so it can soak.

If you plan to scour your fleece, select your soap and wash basin. I'm using a laundry/work sink and some un-scented, dye-free laundry soap. Fill the tub/sink full enough so that: 1) the water will retain its heat; and 2) there is space between the fleece and the dirt which will settle to the bottom.

I let it soak on one side for about 10 minutes, then gently flipped the whole bag over (do this slowly rather than quickly so you don't rustle the locks too much) and let it sit for an additional 5-10 minutes. When it's ready to remove, I fold the bag gently in half, lift the whole bundle straight up out of the water, then drain the tub and let the bag hang over the faucet to drip for a minute. DON'T SQUEEZE!

Refill, wash, place bag, 10 mins, flip, 5-10 mins, fold bag, lift, drain. Repeat. Then comes the rinsing. Do everything you did for the washing, except don't add in the soap. Be sure that you remove ALL of the remaining soap from the fleece. I did two plain water rinses, then I added 1/2 cup of vinegar to the final rinse to make sure I neutralized any remaining soap residue. The pH of soap is damaging to wool fibers, so it's important to remove as much of it as possible. Additionally, the acidity of vinegar is similar in pH to that of the wool, so it's fine if you just eyeball that 1/2 cup.

After the final rinse, let the wool hang in the bag until it stops dripping and cools slightly. Don't handle a hot wet fleece too much, and try not to squeeze it much. If you must squeeze, do it gently.

Lay it out on a screen if you have one, or lay it out on a large towel and roll it up. I let the towel absorb the moisture without additional squeezing. Lay out the fleece on a clean, dry towel and let it air dry.


The locks will be loose and wobbly, but they get their spring back when they're fully dry. I flip the whole thing over about every 6-8 hours so I can get even drying. This is when a drying screen comes in handy (no flipping needed)! Continue this washing and drying process with the rest of your fleece. I'll be back in the next installment to share some tips and details about storing your washed fiber. Are you feeling a bit less nervous about washing your first fleece? I hope so! But if you still have questions or you want further clarification with a specific breed of sheep, let me know. Ask me at expertlydyed@zoho.com, or share them on Facebook. Good Luck!