Showing posts with label weaving. Show all posts

Friday, December 6, 2024

Autistic Crafting

In the last few years, I have been reading and researching autism. It started out simple. I wondered why my partner struggled to stay focused long enough to complete a full load of dishes when I asked. Why was it a hassle? I dove into the research on ADHD and learned that neurodivergence can make easy chores, like washing dishes, feel world-ending. It was a lot to adapt to at first, but nearly 3 years later, the dishes just get done now. Then a friend asked me whether I had considered myself autistic. Well, no, considering that this was the first time it had occurred to me to think about it. I didn’t have any developmental delays or any other stereotypical signs. And then I was handed a list of testimonials and asked whether I related to any of them. As it turns out, I related to the majority of them.

handspun hand woven blue texel wool yarn

I have already spoken about this on my Patreon page, so please head there if you’d like to read it in full. I felt like the only way to solve some of my life problems was to understand what autism actually is (and not my un-researched perception of it), decide whether I thought I was autistic, and what I might do about it if so. After a year of fairly intense research, looking at medical reviews of autism in adult women, testimonials, and just reflecting on frustrating interactions I had had in my life and feeling massively misunderstood, I accepted that I was probably autistic. In April 2023, I began implementing strategies to listen to my body and assess how different experiences manifested certain symptoms: extreme fatigue, weight gain, muscle and joint inflammation, anxiety, and brain fog.

After a full year of understanding myself as autistic, I can say that I have no doubt that this is the label that describes me best. I am not diagnosed but my 3 years of research is sufficient for me to say that I would receive a positive diagnosis with a professional. I would like to get diagnosed officially, but the NHS wait times are on the order of 9 months to several years and private options are pricey. Until then, I will continue living my life as an autistic person.

handspun blue texel wool


I have titled this blog entry as ‘Autistic Crafting’ for a specific reason. You may have heard me casually mention the difficulty I sometimes have when trying to make slubby art yarns. My main preference for yarns is that they’re spun consistently. I’ve been told to try spinning with my non-dominant hand (which is a fantastic idea!) so I’m a bit more loose and less controlling of the final result. However, this is something that is natural to me. In a world of chaos, autistic people tend to prefer being able to control their environment where possible. My personal obsession for perfectly even yarns likely stems from my need to form structure and order from chaos. It is how I meditate. I can spin endless miles of plain white wool into a fine yarn and be happy. I can do it while listening to the chaos around me, so long as I can make the perfect yarn.

My repeatable hand dyed yarns are another example of how autism comes into my crafting. I love the idea of randomly dyed yarn, but I can’t bring myself to just…jump into it. Even at the very start, in 2010, I had to exert total control over my dyeing method in order to feel confident that my art could be consistent. My recipes and method of dyeing are the scientific backbone of my business, but equally, it satisfies my autistic need for control over the results. And the artistry created in the resulting hand dyed yarn, well, that’s the anticipated chaos that drew me into hand dyeing yarn in the first place. I have always said I use Science to create Art, hence the brand Expertly Dyed: Art by Science. I feel a bit like I’ve come full circle in understanding myself as a crafter. My brain has been providing subtle hints over the years, but it’s only now clicked.

I could go on, and I probably will comment on autism in crafting in future updates, but for now, consider this an interesting twist to resuming blogging after 2 whole years.

Monday, April 13, 2020

Handwoven Cotton Tea Towels

I have decided that handwoven tea towels is my new favorite thing to weave. If you have dipped your toe into weaving projects, you’ve probably made a few scarves—but have you tried making towels? Tea towels are easy to come by at stores, but a good one that’s absorbent and looks nice might set you back $10. Cotton yarn is relatively cheap and available in a variety of colors (sure, perhaps not in as many colors as we find for wool/silk) and you might be able to make two towels for the same price. The selling feature isn’t the cheap price; I think it resides in the wonderful material qualities of a handwoven towel.


I made two tea towels for about $10 when I was at a weaving workshop at the guild back in late 2017. We followed a series of exercises devised by our teacher, Wendy, to explore the ways we can alternate colors to create interesting patterns. As many of you know, I struggle with anything intricate (eg, lace, colorwork) or requires me to me to be random. Having a method to follow in a sequence (pattern block A, pattern block B…) was great and my towels don’t look too boring. Note: if you want the pattern exercises I followed to make your own sample towels, let me know and I can see about getting permission to publish them.

Aside from the simplicity of the pattern and ease of weaving in tabby, they have held up very well. At first, I was skeptical that they’d last and I did treat them differently as compared to my store-bought towels. After a few months and a few washes, I stopped caring because they held up very well! Two and a half years later, they still look great despite a few spots where the yarns are starting to fray. The fringe, which I was certain would start to fall apart after a few washes, has held together very well too. Overall, I am very please with the result and I hope that I have inspired others to pursue making handwoven tea towels.


Saturday, November 23, 2019

Experimental Archaeology and Textile Studies: Part 3

Here's what I did. I made a 16 thread tablet woven starting border. I made 144 warp threads. I cut one end of the warp thread loops to create 72 long threads. I took my needle and threaded each warp thread into the band individually. I sewed this long strip of warp threads onto my loom beam, then carefully separated the warps into front and back threads. 72 in the front, 72 in the back. I tied a loomweight to each bundle, resulting in two loomweights with 72 threads each. 

This was a clunky solution to the problem. I had to deal with an issue I hadn't considered, but now that it was a potential problem I needed to think about for the Stage 2 of the experiment, I had a chance to form a contingency plan for it. The important point here is that I still managed to arrive at the proper setup I required and everything was ready for heddling and weaving. 

Here's where experimental archaeology in academia is very tedious and tiring. If this parameter had been an essential variable, I would not be able to devise such a solution. If I was working with a scrap of textile that had this warp density and a tablet woven starting band, I would not be justified in 'faking' it. As it stands for this experiment, however, it gave me an excellent question to ask senior textile studies researchers what they thought but didn't otherwise impede my progress or time tabling.

The actual weaving process for the Stage 1 pre-experiment went very smoothly. The sample was about 6cm wide and about a meter long. And it looked like a linen seat belt. Lol. Maybe that idea is worth exploring later when the automobile industry looks into more sustainable construction materials for their electric cars... I used a wooden weaving sword to push the weft into place, but archaeologically, there is no evidence for this at my case study sites.  How did an Iron Age weaver push the weft into place? Is a tool even needed? Can an iron/bronze weaving sword do the job? Again, it's something to consider with future research because in this case, it does impact the cloth I was making. 

I finished the strip after a week of weaving 'in my spare time', cut it off the loom, and marveled at what I did. Here are some thoughts I had:


  1. Is the heaviness of a loomweight important to consider by itself, or is it more important to consider how mass is distributed across the thickness more important? At the start of this experiment, it was generally understood that heavy loomweights = coarse fabrics, but a 0.7mm thread is about a fingering weight yarn.
  2. If you can weave with heavy loomweights and linen threads, what happens if you use wool? Wool, as many of you know, is far more elastic than linen.
  3. What is the upper bound of tension that a linen thread can handle which considers its gauge. In other words, how much tension can a 0.7mm linen single handle before it breaks?
  4. How might people have use this very dense cloth? It turned out warp faced, but is that a desirable outcome for an Iron Age population?
And I had more thoughts afterwards too, but these were the ones that seemed most interesting to pursue for now. Because the Stage 1 experiment did what it needed to do to convince me that I had worked out the potential bugs, I could do some creative things with the finished piece. I washed some pieces and left others unwashed. I experimented with different hemming principles and finishing techniques. Here are those results:

This is the finished piece that was folded on itself to show how rigid and dense the cloth was.

Here is a close up of the finished weaving to illustrate how dense the warps are. You can barely see the wefts!


This is a steromicroscopic image (apologies for the quality) of one woven sample that was washed. Note how the yarns have flattened out slightly
This is another steromicroscopic image of the sample where I smoothed the surface with a polished stone. It is more flattened than the above washed sample and the resulting fabric is very soft to the touch.


On this sample, I smeared a stick of beeswax over the surface after the cloth was washed. I thought about how someone might try to waterproof a cloth after it was woven. This is one way to do that, another way might be to dip the cloth in hot beeswax and allow it to dry flat. Anyway, it has a very strange surface, like touching a candle!

I'm sure by now that you probably want more details about the experiment. I'm writing up the parameters of my experiment and the reasons why in more detail, along with the insights this experiment garnered, to be put into a publishable format for a journal (still deciding where to send it). So many nuanced decisions were made during this process and it does convey the complexity involved in textile production--no surprise there, but it does make it difficult to maintain transparency in my methods without having to write an entire book that describes my reasoning to the fullest extent possible. 

I have presented a 'lite' version of this experiment (Stage 2, actually) while I was in Edinburgh at the end of October and got some great feedback, including positive words from Susanna Harris (who helped examine the Must Farm textiles). I've also submitted an abstract to a student conference for experimental archaeology scheduled for March 2020 in Sheffield. I'm hoping that with all the feedback from these sources, I'll get the paper written and submitted to a journal by summer next year. I'm thinking of EXARC as my first choice, but I'm open to other options too.

That itself is another point to make. Publishing the results of experimental work in academia can be very time consuming as well. It could be a full year or so from the time I started the experiment until it is published, if I'm lucky. And here I am publishing some of the details on my blog inside of two months. Also, some of you may recall that I have talked about loomweights and warp-weighted experiments in the past. I did! I have a blog (Part 0, Part 1, Part 2, Part 3, Part 4, Part 5) and video post about it as well. Check those out to see how far I have come with my research and experimental pursuits. I say some wrong things but getting access to academic material was very hard for me in those days.


I'll post more updates about the progress of this project as I make new videos and write up more about the Stage 2 of the experiments. Let me know what you guys thought about this content and whether you thought it was too long/short, too detailed/too vague. Thanks for reading!

Experimental Archaeology and Textile Studies: Part 2

With all the parameters outlined for the experiment design and the research question formatted to be a suitable hypothesis for the experiment, now came the hard part: how does it all 'work' together? Within every experiment, there are several small decisions made as part of this process. For all the preparation made prior to beginning, there will inevitably be contingencies you did not entirely account for.

For example, I decided to begin the warping process by making a tablet woven starting band, performed in the manner as seen by the Lapp weavers from Norway (Hoffman, 1974). To produce their wadmal and grene, they often wove a starting band while simultaneously integrating the warp. Not all weavers that Hoffman studied performed this method, but it does have archaeological presence in other parts of Europe. 


You can see in this photo how dense I needed the warp to be. The starting band also struggled to cope with the heaviness of the loomweight, but this is not a reflection on the experiment, just an issue with how to attach the warp to the loom.

I planned for as many of the possible contingencies I could think of that might go wrong. So, I made sure I had plenty of time to warp. I also had my assorted tools, including scissors, a needle, and my cup of water (for drinking!). I measured my warping pegs on my Kromski Harp loom (32") to confirm that I would get the correct length for my warp (side note: I have no idea how Iron Age people dealt with their warping problems, but this works for the experiment). My tablets (made of thick cardstock) were threaded with the same linen and stretched between two warping pegs. Then I began weaving and warping. After about 10 warps (or five times around the setup), I quickly realized that I wasn't going to achieve the correct density of warp threads I needed. Not even by a long shot!

I had a contingency for which I had no plan. I ended up unweaving everything, calling in my partner to help me (how much 'help' did any individual receive during Iron Age textile production?!), crying, and feeling hopeless. I was time pressed and didn't know how smoothly the rest of the experiment would go if I was already waylaid early on in the process. But, you adapt to adversity. I decided that no matter how I set up the tablet band, the way the cards turn prevents you from achieving a dense weaving setup. How can I get the density I wanted and also get the warp threads onto the loom? 

Let me back up to describe what I wanted the setup to be for the warp tension. After deciding on the loomweight shape and mass, and the spindle and spun yarn I needed, I had to calculate the warp tension for the setup. To keep the tension per thread no higher than 30g per thread, I determined that this would result in 72 threads per loomweight, or 144 threads for the woven fabric (tabby weave setup). This warp tension of 30g was determined by the Center for Textile Research (CTR) experiments to be a suitable upper limit for optimal weaving with wool. Why 72? The CTR experiments also determined that the starting width of your setup should be approximately equal to the total width of your loomweights (again, for optimal weaving). For a 2kg loomweight and a goal of 30g of tension per thread, that meant 72 threads (of about 0.9mm maximum gauge) would be ideal. This is tricky because there's a point where you can't get the warp threads so close that they either overlap or their fiber halo (more prominent in wool threads than in linen threads) causes them to stick and abrade as weaving commences. I spun a yarn that was about 0.7mm and bought a yarn that was similar in gauge (0.6-0.8mm). 


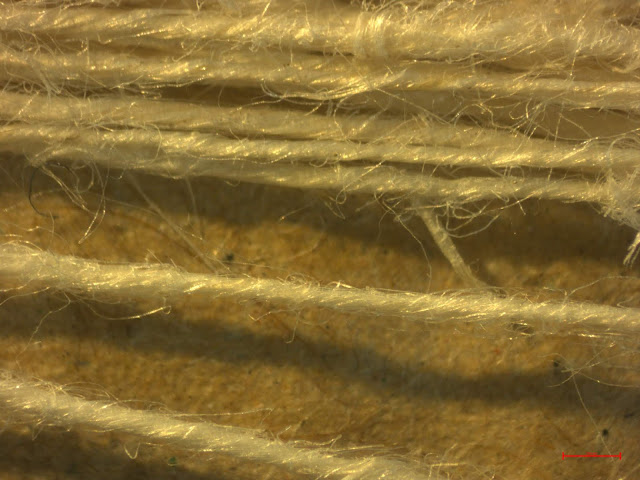
Here is my handspun linen that I used as a test. I photographed this with a camera mounted onto a stereomicroscope. (That's why it is a little fuzzy)

I decided that it would be good to start the experiment at this known upper limit when testing the linen because I could more easily link this back to wool and the other experiments conducted previously. But I was still stuck at this point where I needed to have a dense warp setup and didn't know how else to get the experiment going. I did the next best thing, which was 'fake' it. And I know that sounds a bit unscientific, but this particular problem was unimportant for the main question I was looking at since a starting band was not the focus. I had assumed that I should start with a tablet woven border, but there is no archaeological evidence for this in my case study sites. By removing this assumption, I could deal with the problem of getting the correct warp density I needed. 

Continued in Part 3!

Experimental Archaeology and Textile Studies: Part 1

This post is part of a series and I'm breaking it into sections for easier reading. If you have questions about a specific aspect, it'll also be easier to spot the information you want to know more about in a comment.

First, there are some important differences between the way I do experiments for Expertly Dyed and the way I must do experiments in academia. I'll get into the reasons why in a later episode and will post a video/blog explaining those differences specifically.

For now, I wanted to share Phase 1 of a two phase experiment I conducted during late August and part of September this year. Normally when I setup an experiment for Expertly Dyed, I apply a lot of craft knowledge and intuition and do a fair amount of 'let's see if this works'. I think many fellow crafters (of any sort, not just those who like textiles) will agree that this is often a legitimate way of exploring a craft. In fact, it is also a way that we explore the world as infants. We do this casually as we create recipes while standing at the stove and when we reach for the garlic granules, on a whim, we might substitute onion granules to see what that's like. We do these things naturally and implicitly and rarely do we ever consider our actions in a meta sort of way. 

Experimental archaeology in academia is not done this way. It has to be very well researched and there needs to be a lot of setup before you begin, or else you wind up digging yourself into a hole without a ladder and an imminent flood quickly approaches. Variables must be isolated and controlled so you can ensure that you can investigate the relationship between your independent and dependent variables. So, in my Phase 1, I produced a very skinny strip of linen fabric using heavy loomweights on my supervisor's warp-weighted loom. It is seemingly a silly step from a crafter's perspective because it seems completely irrelevant to your overarching goal, which is simply to weave something. I know that weavers will do tests to check their setup before they embark on a large project, just the same as a knitter will check their gauge before knitting a pattern that relies on fit. 

However, the nature of my experiments (which I will describe in a continuation of this series) required that I test my experiment parameters before I actually began the experiment. It was designed to be overly cautious because I did not have the luxury of time and I had my finances to consider as part of the experimental design. I used the case study sites that I’m researching as part of my PhD, which are Danebury and the Environs Sites. I selected these sites because they were all excavated by the same principle investigator (Barry Cunliffe) and well archived, and they could give me a sense of the ways textile tools were used and treated upon deposition within a small bounded landscape.

Here are a few considerations that I made for the initial design:

1.     I wanted to use the heavier loomweights from my dataset, which hovered around the 2000g mark. I am not aware of any published experiments where loomweights of this magnitude are used; many non-textile scholars have questioned whether such heavy loomweights could perform as such. Further, I opted to use a clay weight as my model since I had access to air dry clay, a suitable proxy, rather than chalk (which is the predominant material use for Danebury loomweights). I modelled the shape to be triangular, in part because this shape has been contested as whether it was suitable as a loomweight or as oven architecture. To be brief, clay triangular weights at the Danebury sites are sometimes found associated with collapsed ovens, leading to the contestation that they were originally used as loomweights. In reality, these objects (and other textile tools) are found in a variety of contexts so it isn't a very clear distinction. A previous proof-of-concept experiment I conducted at the start of 2018 suggested their utility on the warp-weighted loom. Taking this idea further, I reasoned that it would be appropriate to use this shape on the loom to determine its suitability for this function.
2.     As quick as it may be to spin yarn with a wheel, it is not as fast to spin with a spindle—at least for me. Because spinning wheels are a more modern invention, I had to use more simple methods. Instead of spinning a thousand yards or more of yarn with a spindle, I opted to use another proxy. My lovely Golding ring spindle is approximately the same size, shape, and mass as a Danebury spindle whorl. Then came the question of material choice. I settled on flax for two reasons: 1) it hasn’t been investigated as a fiber source for Iron Age Britain—because wool is often the only fiber sufficiently discussed for textile use during this period—and was likely still important in select cases during the Iron Age; and 2) it can tolerate approximately double the amount of tension that wool can support before breaking—this is important if I’m investigating new territory with heavy loomweights. So I spent about 15 hours spinning flax with my proxy spindle. I found a comparable unbleached, wet spun flax yarn of similar gauge online and used that as my test yarn.
3.     It is uncertain whether a long-handled comb was used during the process of weaving, and we have next-to-no evidence of a weaving sword during this time. However, any weaver will tell you that you need some way of packing the weft. For my Stage 1, I only used a weaving sword to pack the weft, but I did commission an antler comb that was modeled from a Danebury example for the Stage 2 experiment.
4.     Needles, again, are a complicated matter. Needles can be used for a variety of tasks and there is no clear evidence of their use at Danebury for textile production. Some look like they would be great for sewing or darning, while others are certainly not. I did use a steel needle that was of a similar length and width (a typical darning needle) to attach the warp threads to the loom and for experimenting with hemming techniques.

Here is one of the air dried clay loomweights that I modeled from an Iron Age equivalent.

With that, I had my basic setup for the Stage 1 part of my experiment. I am gliding over some of the reasons I chose what I did and why I think my decisions are valid for the point of my experiment, which is this: Can flax yarns spun with Danebury spindles be tensioned with heavy loomweights without breaking?

Continued in Part 2!

Monday, May 11, 2015

Woven Mohair: The Rug is Finished

I am done, and the results are stunning. Mr. IT Guy is going to set his feet on luxury:


I knew that the mohair fibers would lose more vm with the weaving, washing, fulling, and drying process. I was pleasantly surprised when I checked the rug for dryness--essentially all of the vm was gone!

The fulling process allowed the rug to develop some strength. I had originally struggled with weaving the weft too tightly, but this mohair has allowed me to practice beating the weft so it doesn't get too tight (and thus, too firm). When I first took this rug off the loom, it was extremely flexible and perhaps a bit loose. Here is the unfulled version:


Here is the fulled version:


You can see how the weft looks tighter, presumably because the warp shrunk just slightly. The bits of lock which stick out of the novelty mohair yarn have reached across to its neighbors to fill in the gaps, in a dendritic way. This fabric looks and feels more dense than the original rug without losing its supple flexibility. Further, it is obvious from these photos that the shine has not diminished much during this fulling process.


The mohair rug took on a slightly fuzzier appearance after the fulling, but it is more like a halo than an eyelash yarn. Again, is still looks like a Berber rug to me, in color and in texture.


My final thoughts. Weaving with mohair is a grand pleasure to work with. The extra work to remove vm at each stage along the way was worth my effort. This mohair is the opposite of 'less than stellar'--simply, it's stunning.

The next time I buy mohair, I will be discerning, as I always should be, but I won't be so allergic to seeing vm stuck in the locks. A little bit of vm is easily worked out of the locks without destroying its incredible texture and lock formation--mohair seems to naturally curl up together. You can bet that when I get my hands on one or two mohair fleeces, I will definitely make myself a soft blanket.

Monday, April 27, 2015

Weaving Mohair: Halfway Through A Rug

I've reached the halfway point with my mohair rug weaving project, and it's time to convey some impressions on my progress and observations thus far. I have learned many things weaving mohair. First, I love it! I love watching the texture develop as I weave. I had imagined how this rug would turn out before I even began, but it's turning out more fabulous than I originally thought. It may be a shame that it'll be hidden under a computer desk... As you can see in the following pictures, there is an obvious difference in the two yarns for this rug project (top of photo: mohair, bottom of photo: Lincoln):


Mohair is incredibly shiny and smooth. It reflects light better than the Lincoln I used (and it should be rather obvious from my photos), and is probably most reflective in its lock form. Combed mohair top which has been worsted spun will also produce a very reflective yarn too, though with less texture. The second thing I've learned about weaving with mohair is that I prefer to keep mohair as a single, rather than as a plied yarn. Keeping the weft as a single allows the light to bounce off a larger piece of uninterrupted mohair (this concept also applies to silk)--this rug glows.


This rustically spun mohair single has helped me with one huge pitfall which I have suffered from: getting the right amount of beating. You can underbeat or overbeat a weft yarn, and the former will produce a very loose fabric with a weft which slides easily; the latter will produce a very stiff, weft faced fabric. Those aspects produce desirable fabrics occasionally, but I'm looking for something which is 'even', neither too loose nor too tight. The large diameter has allowed me to produce fabric that is flexible and not slippery.


 You can see how even the spacing is between the warp and weft in this picture:


Mmm, look at that texture! I love how the little bits of mohair pop out of the fabric, and I love how the little bits of green give the fabric a Berber characteristic.


I'll be back again when I'm all finished weaving and I've taken the rug off the loom. The idea with this rug was to make a selvage (so, without fringe) which will get stitched under the rug. I want to minimize fluff around the fan intake areas on the pc box...Mr. IT Guy already has to deal with my fiber mess, so let's not make him upset. :)

Sunday, March 29, 2015

What to Do With Less Than Stellar Mohair?

This probably happens to most of us. We buy a fleece, part or whole, online or in person, get it home, then really look at it. And sometimes, we think it just needs a good washing and it'll be better. In the back of our minds, there is a niggle of doubt. So, let me tell you a short story about how this mohair came into my possession.

A billion years ago, on ravelry and facebook, I read from Namaste Farms that 'dandruff' in mohair was actually lice, not skin flakes. Of course, neither of those is acceptable in a fleece, but one is worse than the other--lice will eat the fiber and weaken it. When I set out to buy mohair again, I decided to buy samples from specific animals to double check their fleece for lice, then when none was present, I planned to buy a pound or more of that specific animal's fleece. Great idea in theory, but doesn't always work in real life. So, I had 3 samples, all of which were fantastic, then I bought a pound of apricot locks and realized that it was quite dirty. At the time, I thought it was mostly vm...but that vm wasn't alone.

After rediscovering this mohair at Christmas, I washed the locks to remove more dirt and vm and...lice. Then I picked open the locks and washed it all again. And doing my best whenever I can to shake the debris out of the locks. Even after the spinning, there is still enough leftover for you to notice it in the finished yarn.


It could be that this shepherd didn't realize what was sent to me, because I doubt that a shepherd who caters to handspinners would last long in the fiber world if vm/lice fiber was sent out each time. I will assume that this was an anomaly, because I like to give people the benefit of the doubt. Most people aren't outright mean or scammers.


It looks like a wonderful, super soft and squishy yarn, right? Well, it is. Except for when you bring the yarn up to your nose--mostly, you'll notice that it is still inundated with tiny bits of vm. When I encountered a random cluster of lice eggs, I threw those locks into the trash. I know, into the trash. I like to save and reuse and reinvent fiber everywhere I can, but not this time. By doing that, I at least was able to save most of the rest of the locks, covered in vm as it were.


There are some darker bits of vm that you might be able to see in the picture below. There was a lot of things happening to this poor goat's fleece. Within some of the heavy vm tangled locks, which were also thrown away, I found true skin flakes, large and yellowish-white, which looked like the animal had scratched at the lice until he/she bled, then the skin scabbed over.


Aside from the lice, scabs, and copious amounts of vegetable matter, the mohair is extremely soft. That makes me thing that the animal had the appropriate diet for growing his/her fleece, but since I do not personally raise goats, I can't tell you for certain. So, after all of the washing and shaking and picking and spinning and washing and shaking, the finished yarn contains only about 10-20% of the original amount of gross things. What am I going to do with it? By now, you're probably a tad grossed out, and I am a little bit too.

With the mostly clean yarn, I plan to make a soft rug for Mr. IT Guy's feet when he's busy working at his computer. The floor under the linoleum in our apartment is just concrete, so it hurts your feet if you've been sitting for a while (even if he gets up and walks around for get the blood flow back into his legs, sitting with your barefeet on hard concrete all day can be painful). Mohair spun by the lock doesn't hold up well as a warp yarn, so I chose my remaining Lincoln locks for making a strong, 2-ply warp yarn.


Do you see that little halo of fiber around this skein? I spun the Lincoln from the lock, mostly worsted but occasionally from the fold. Lincoln doesn't flex and bend in the same way merino does, because it's coarser, so the bent locks poof out of the yarn into a halo like this. I did this for two reasons: 1) I wanted to just get it spun quickly, so I didn't worry about the preparation as much; and 2) I wanted to give the mohair something to latch onto when I did the final washing stage.


Here is my Kromski Harp loom all ready to go:


I wove the first two inches with the leftover Lincoln yarn. I plan to tuck the ends under the rug so there isn't any fringe. Since the Lincoln is the thinner of the two yarns, I wove the ends with that so the finished rug won't be so bumpy.


It'll be a quick weaving project. Big yarns are like that. I love how the Lincoln is turning out...kind of makes me want to make a future rug with it! Although this was not the intended use of my mohair, I'm glad I didn't throw it all away. I will only buy mohair in person from now on, and I will not buy any when I can't inspect with my eyes, hands, and nose. Buying mohair can be tricky for new spinners, so if you're planning to buy some, double check with a trusted expert first. My pick from now on? Namaste Farms. 

Sunday, December 28, 2014

The Christmas Scarf

Sometimes I just throw myself in feet first into a project. I kind of did that this year with the scarf I made for my sister-in-law. It motivates me to learn what I need to do to complete it, and it gives me a very identifiable end date...a hard deadline. Making homemade gifts before Christmas is upon you can be a little stressful, despite all of the years we've done it, and this project was among the more stressful projects I've completed. The weaving was fun and changing out of the colors was interesting. And since it was for a gift, it was important that it looked perfect! In the end, I learned many things (I'll elaborate a little below) about how to do color changes with weaving and the result was better than expect (and very well received!)


When I embarked on this project, I initially took one skein of handspun from my stash for the weft. Then I thought that might be a little too boring for my sister-in-law, who works as a top level landscape architect at a swanky firm in Philly and is also an amazing abstract painter, so I rummaged through my handspun stash for a bigger variety of weft yarns to sift through as I wove. She would love it anyway, but I wanted to really give her a statement scarf. I think I nailed it!

Here's how I started the scarf with my Kromski Harp loom:


I'm getting the hang of making a slightly looser weave. I kind of messed up a little on a previous project (I'll talk about that later), but this scarf turned out perfectly flexible and soft.


Sometimes, I have a hard time realizing what I'm reading and turning it into the setup when it comes to weaving. I used to be unable to wrap my head around the description for making a heel for knitted socks. After reading several posts about how to make string heddles, I finally put the things I had been reading into context when I was sitting there at my warped loom and making all kinds of weird loops with my waste yarn. I give you, my version of a string heddle! You loop every other yarn with the waste yarn, put it on a heddle stick (or anything you have lying around, like I did), then to secure the strings, I made a simple crochet chain along the top:


I wasn't sure how I was going to deal with weaving in all of the ends I would be making with this project. While I was weaving, I just always added in a new yarn from the right side so the tails all hung out on the right side. I made sure to leave enough of a tail so I could weave the tail in all the way to the opposite edge. I was worried about having so many short tails to weave in and what that might do the finished project--I didn't want it to be lopsided!


As far as weaving in the ends goes, I just wrapped the end over the last warp yarn and ran it back through the weaving, wrapping the tail yarn around the woven yarn. It gave it a plied look. I secured the tail through the last warp yarn on the opposite side of the weaving by pulling the tail yarn through the middle of the warp yarn (the tail yarn bisects the warp yarn perpendicularly). I hope that makes sense! I didn't get a shot of this securing method because I was trying to finish the project and take it off the loom before I headed to America.


In the picture above and below, you should be able to see a few lines where the yarn looks extra puffy. That is where I doubled the yarn back on itself to weave in the tail. The thin yarns blended in more smoothly, but I needed to do something different for the thicker yarns. For the thick yarns, I untwisted the fiber, drafted the fiber thinner, retwisted it, then wove the thinner yarn back through the thicker yarn, burying it inside the weft yarn. I may need to do a video on this since it's difficult to explain clearly. For the plied yarn, I pulled each ply apart and wove them in like I did for the bulky singles. When I got all of the yarns woven into the scarf, I kept the ends long. I washed the scarf, dried it, then reshaped it and rolled it flat with a rolling pin. Once it was completely dry, I snipped all of the tails close to the fabric. This step allows me to only cut the ends once, not twice. There are a lot of woven in bits!


I finished the fringe with knots at the top, and kept the length on the long side--about six inches. The scarf was around 72 inches, 6 feet, and the fringe bumped that up to a total length of about seven feet. Needless to say, you could wrap this around two times and still have plenty of length left over to tuck and twist and wrap and fold however you wish. It's glamorous for LA style, yet warm enough for chilly Philly. My sister-in-law travels a lot, so this versatile scarf will always be rolling in her carry-on!

I hope your holiday projects went well, and as always, feel free to share your works of art over on Facebook!

Tuesday, September 16, 2014

Table Runner Project

After a long time spinning, I can finally start weaving a table runner. In a previous post, I talked about how long it took me to spin all of the weft yarn for this project, which took 67 hours. Thankfully, tabby weaving goes by extremely quickly! I haven't been keeping track of how long it takes to weave, but at this point, I'm nearing the two-thirds mark.

I started the project with tiny little skeins of sample yarn I accumulated from the Phat Fiber box several years ago. I had no idea what to do with them at the time, so I just took some notes about how others dyed top, carded batts, and how they named their creations. As a side note, that step has been extremely useful for me in learning how to make my own dyed top more colorful and my batts more interesting. To make cohesive looking yarns from the samples, I grouped them by color. I spun singles, then made traditional 3-ply yarns with the three different singles. As a result, the yarns were colorful without being too garish. I even reused some yarns from other projects which happened to be the right size.


I think I had around 450 yards for the warp yarns, which were around 96 inches (2.7m) long. I used every slat in the heddle, which came to 160 ends in total. I'm still not extremely comfortable with the weaving terminology yet, since this is only my third weaving project (so forgive me if I'm saying things wrong). :) Here's the beautiful white merino weft yarn again:


After all of the weft yarn I thought I needed was done, I started warping my Harp. I'm getting faster at getting the tension just right when I walk the warp (I don't have the part I need for the other way of winding the warp), but it still took an hour and a half to do... Then I began weaving. I am happy with how the table runner is turning out so far:


The pattern of the warp just barely shows up through the white. It almost looks like plaid! Below is a close up of the warp poking through the fabric.


When you're weaving, you need to create some slack in the weft before you beat it into place, and you do that by placing the yarn at an angle. I'm still practicing this step, since it's the one where I forget to be consistent. I tend to shoot for at least thirty degrees, but it sometimes gets as high as forty-five degrees. It impacts the width of the garment, and if it's constantly changing, the edges will be all wiggly. Oh well. That's a beginner for you. :)

Here is a closeup of the warp threads under tension. They're a little crazy.


The overall fabric will be subdued by comparison, which is what I hoped would happen. I'm very excited about colorful things, but there is such a thing as color clashing in the fiber world. The white of the undyed merino really brings this piece together, and the bits of contrasting colors in the warp give it an unexpected patterned look to it. Though the yarns are mostly smooth, some spots have a little slub or bump which pokes through the weft, giving it a rustic, organic look. If you look at the fabric at just the right angle to the sun, you can see the little sparkle of angelina.


Originally I thought this would be a table runner, and it still might be a table runner in the end. Our kneeling table has a giant crack going down the middle of it, and I thought this project would be a great way to cover it up (and to keep it from eating crumbs and earphone cords). But this yarn is so soft, I kind of want the table runner to moonlight as a shawl from time to time. Hmm...we'll see. I'll definitely post pictures when it's off the loom and ready to be used!

P.S. Here is the video I posted recently where I talk a little more about the yarn and the project: