Showing posts with label tips. Show all posts

Tuesday, September 17, 2019

Castlemilk Moorit wool: A Pleasure or a Pain?

Have you seen the video I posted about Castlemilk Moorit wool yet? If not, take a look below. In this post, I wanted to add some supplementary details about the wool and sheep, and some photos, that didn't make it into the video. The camera is pretty good, but in this case, it really didn't capture the differences I was describing. Here's the video:


First, if you want to read along, you can find the book on Amazon. Although the book covers each breed briefly, there's enough research there to launch your own personal study of breeds. That was the inspiration for the Fiber Talk series in the first place because words cannot replace tacit experience. Let your fingers do the 'reading'!

Now, here are the bits I couldn't effectively put into the video. In the photo below, you can see the color differences between the Castlemilk Moorit (foreground) and the Manx Loughtan (background). They do have a similar loft, though the Manx feels finer (the crimp feels more bendable than the crimp of the Castlemilk).


Here's how different the Castlemilk can look when overdyed (apologies for the bluish cast, it was actually a sunny day in Leicester). The differences are subtle, but I did love how enriched the greens looked:


However, the way that Manx can take on color is quite impressive. The greens for this one were slightly saddened in contrast to the more yellowish greens in Castlemilk, but that's to do with the dye mixture, not the fleece color.


As you can see, the overdye for the Manx was stronger than it was for the Castlemilk. When I dyed the Castlemilk, I aimed for 1.5% DOS (depth of shade) as a minimum, but you can tell how comparatively brown it still is. Here's the side-by-side comparison of the two:


The major difference I see is where the dye will adhere. In the Manx, it seems to be concentrated at the tips, but the whole microfibril (individual sheep hair) also takes the color, though not as strongly as at the tips. It could be just my perception of the color but it may also be a result of the way this fleece can take dyes. To contrast this, the Castlemilk will follow a similar suit, but the length of the microfibril won't be as consistent in how it takes color. In fact, some hairs do not look like they've taken any color.

Dyeing colored fleeces is always tricky. Grey fleeces tend to be a spread of white and black hairs, so it is the white ones that can establish a dramatic color shift, and the black hairs make the overall impression of the color more subdued. However, a brown fleece like these are fairly consistently brown from hair to hair. So, how well the brown will take the dye will vary. More testing with dyes is required, including subjecting the wool to the same dye bath. With that, there's always a risk that one breed will take up the color faster than the other, but that is also an interesting point to consider.

Was it a pleasure or a pain to work with? Well, as I mentioned in the video, I wasn't really in love with Castlemilk Moorit by the time I had spun nearly a pound of it. I didn't think it was a pain since it was a quick spin. I'm left hanging. I don't think I was able to fully explore the capabilities of this fleece and that's why I feel like I'm grasping for something...more.

From the Fleece and Fiber Sourcebook (2011), p. 157.
Castlemilk Moorit falls into the Northern European Short-Tailed family. The animals have horns and a reddish brown coat (from the Fleece and Fiber Sourcebook, p. 157: moorit translates 'as red as the moors'). The micron range can be quite variable, and I think this is the result of having Shetland as part of the bloodline mixture. I'm still learning about the differences between Shetland fleeces, where some are more woolly and others a mixture of hair and down (essentially, dual coated). The variability in Castlemilk Moorit, then, could be the result of some of the dual coated aspects cropping up in some individuals. In my fleece, I did note very coarse hairs with a downy-like undercoat, despite the rest of the fleece being generally woolly. You can see something of this variability in the fleece samples in the Sourcebook too:

Fleece and Fiber Sourcebook (2011), p. 158
I'll do a review on Manx and Shetland in the near future too. I have two gorgeous Manx fleeces which will be in the shop as soon as my drum carder arrives. I'll also dye some. I have very little Shetland, so I will probably be spinning that for review. They produce such small fleeces anyway, but with Shetland Wool Week around the corner, I'm hoping to get some from somewhere...I'll keep you posted on that. :)

Anyway, I hope this supplementary has helped you understand some of the nuance in this breed. It's hard to really know when all you can do is see and hear about a wool, so it's best for you to try it. I've never seen Castlemilk Moorit for sale as yarn, so if you're eager to try it out, get into contact with a spinner and a shepherd and create more avenues to praise this breed's fleece. I still believe there's more to explore with it. Thanks for reading, and post questions and comments below too!


Wednesday, September 9, 2015

Revisiting Gotland Wool: What is it Saying?

I talked about Gotland wool earlier this year, and I even talked about it on Fiber Talk:


Now that I've worked with more of it, I'd like to add a few things. First, I know that with many breeds, there will be a variety of qualities and characteristics the individual fleeces might exhibit, and that might be further compounded if the shepherd/ess is making crosses or upgrading bloodlines. If you're working with an older animal's fleece, it'll feel very different than a lamb's fleece. These points are all worth keeping in mind when working with any particular breed (with some exceptions, where fleece characteristics are tightly controlled).


Second, your experience with a wool will vary according to how you prep the wool and how you spin it. And last, what is your Gotland telling you? I actually debated about whether I should comb or card this fleece, since the locks were on the longer side. I decided to card it because I wanted the finished yarn to be fluffier, and the batt would help me spin a loftier yarn. After doing my cotton spinning challenge, I began making larger samples for testing techniques and the like. So, with this fiber feeling so soft, naturally, I wanted to highlight that aspect as much as possible in the twist. The batt fluffed up considerably after removing it from my drum carder...it begged to be spun with a delicate hand.


This fleece came from a soft, baby Gotland sheep from the UK. This coloring is impeccable for making a wonderful heathered gray yarn, as you can see in the photos. The fibers smoothed right through my fingers, so I kept the intake low and had on my largest whorls, but kept my fingers deft so I didn't impart too much twist.

I kept the single twist low and the ply twist low, which had an unexpected result. In most wools I've spun, when you spin/ply with low twist, you'll get a poofy yarn where the fibers poof in the same way. But I haven't really done this with a curly fleece before now. After I washed the plied skein, I noticed that little bits of curl would reactivate--but they wouldn't all reactivate as a cohesive curl. It was a bit like watching a kid walk a dog, where each had different ideas about which way to go. Maybe you can see what I'm talking about with this closeup:


Without any tension, this yarn seems to meander through the length, rather than just be poofy, as I would expect a fiber like merino to do if spun similarly. Does that make sense? The yarn bends one direction for half an inch, then it bends in a different direction, and so on. It takes on a wiggly appearance instead of a poofy or round one. I have some super curly Cotswold, so I kind of wonder if it'll do the same thing if I spin it similarly. :)

My yarn weighed 85g and had 452 yards. Since I don't have a spinner's control card right now, I figured out how many yards per 100g I had by setting up a proportion (hey, I'm using algebra!), which gave me 525 yds/100g (or, 5.25 yds/g; 2378 yds/pound). So, my yarn comes to about a heavy lace weight yarn, according to the Wikipedia yarn weights page. Once I knit up a swatch, I'll see what the stitch gauge can tell me about the gauge of the yarn...is it really a heavy lace weight yarn?


Let's talk about the prickle factor for a second. Gotland is typically listed in the upper 20s-lower 30s on the micron scale, but this seems to be a wool similar to Icelandic: if you keep the twist lower (think soft-spun), you can minimize the prickle factor of your yarn. My fleece came from a super soft baby lamb, so mine is probably in the low-mid 20s, so keep in mind the age of your sheep when you decide to spin Gotland. I probably could have spun this Gotland with more twist, but I'm still quite pleased with the final yarn. I think a low twist yarn really brings out the particular curly characteristics of this wool. Part of my breed study lessons come from letting the wool speak to me; in this case, I'm glad I listened! So, what has been your experience with Gotland? Have you worked with it more since we last talked about it? Post in the comments below and share with your friends!

Places to find me:

Email: expertlydyed@zoho.com
Etsy: http://www.expertlydyed.etsy.com
Facebook: https://www.facebook.com/expertlydyed
Twitter: https://twitter.com/JenniferBeamer2
Pinterest: http://www.pinterest.com/edexpertlydyed/
Instagram: http://instagram.com/expertlydyed
Ravelry: http://www.ravelry.com/groups/expertly-dyed-friends

Thursday, August 27, 2015

What Can Corriedale Do For Me?

Corriedale is a wonderful mid-grade wool that can do just about anything...that is, if you can find the right Corriedale. "Corriedale" is commonly found (cheaply) at yarn stores and is absolutely fantastic for sweaters, hats, scarves, mittens...just about everything. But Corriedale has a wonderful range of micron counts, if you have the chance to pick a raw fleece. It can range from the low 20s to the low/mid 30s, but generally falls in the 25-29 micron range.  It's a strong, sturdy wool that is extremely greasy--but that shouldn't make you run away, screaming. Where am I going with this? Corriedale has more versatility than one would realize at first.

If you don't know much about Corriedale, you're welcome to watch the video I made recently to catch you up to speed:


Now that I've had the chance to spin Corriedale myself, I now look at commercially prepared Corriedale top and yarns differently. Whenever you use a commercially prepared top of a specific breed, it represents the average qualities of that breed. For breeds like merino, there are many categories of top which you can find available: 23 micron, 21 micron (fine), 18.5 micron (superfine). But there aren't such categories with Corriedale, which is a breed that could use fineness divisions. I'm not looking to change how mills divide up Corriedale--there just isn't the demand nor the significant amounts of Corriedale to justify such a change-- but as spinners, we ought to be aware of the incredible resource we have available to play with.

Remember when I mentioned that I kept more lanolin on my Corriedale than I typically do? It made for smooth spinning and it helped me keep the fly-aways in check as I was spinning a true worsted yarn. But I wasn't sure how I felt about keeping all of that lanolin in the final yarn--it was fine for spinning, but the yarn was stiff (which might be fantastic for weaving yarns!) and felt slightly tacky. Because lanolin has a yellow-ish tint, it will change the color of the yarn, and it'll prevent the effective take-up of dye by the yarn; both things are worth keeping in mind. After spinning up my Corriedale batt into a worsted-ish 2-ply, I decided to go ahead and test it by scouring it. Turns out, you can scour a yarn just like you would scour a raw fleece. The yarn bloomed as expected, but the fly-aways were still reduced than they might have been otherwise. I'm going to scour my true worsted yarn now that I've proven to myself that it can be done, and with great results.

Corriedale has a lot of potential and there is a lot of variety. Between the micron count, easy processing, and smooth spinning, it could be just about anything you want, if you find the right fleece. What's your experience with Corriedale? Post in the comments below!

Friday, August 21, 2015

Review: Spin-Off Spring 2015

My blog always takes a dive during the summer months for some reason. Well, let's get back on track, shall we? :) This particular issue of Spin-Off celebrates the 'stache. Oops, not that one. Stash. Right, that overflowing bin of fibers and colors and so much potential. Sometimes I feel like I'm indulging myself when I look at the giant box which is my stash. Is it too much? Non-spinners would probably think I have a hoarding problem. When I list the breeds in my stash, I realize how little it is: Merino, Polwarth, Montdale, Gotland, Hampshire, Cormo, Bamboo, Silk, Churro, and various crosses. For so many breeds, I only have a teeny bit. As I've mentioned before, there are so many different breeds, sometimes with disparate uses, so keeping a variety of breeds on hand is useful when deciding which fiber to buy for a project.


But what to do with those little bits of this and that? What about all of those bits of dyed wools in your stash after a project? Well, you have lots of choices, and you don't need any blending tools either (but those will help you transform your stash too!). In the "Color Playground" article, the author, Jillian Moreno, talks about combining colors together either in the ply or the draft. This has been mentioned before in previous issues of Spin-Off and isn't a new idea, but it's worth considering when you're looking at your stash and you don't have enough of a colorway to turn into a substantial project, like a scarf or shawl. In the draft, you have even more options for crafting your yarns based on the colors you've chosen--split one colorway into many strips and keep the other colorway whole. Then spin them both together and get a fractal plied look to the single yarn. Ply with itself (2-ply, Navajo-ply), or spin a second/third yarn and ply those together. Keep this tip up your sleeve.


What if you have some bits of leftover handspun? I like to use these for tiny projects and weaving projects, but what if they're too garish to combine into one project? Roll up your sleeves and drag out an old pot--it's dyeing time! You can overdye yarns with any dye you're comfortable using, but the specific article in this issue ("Naturally Beautiful Together") uses natural dyes to unify the colors. When you overdye different yarns in the same dyebath, they all take on that shade of whatever color, giving that batch a common color. It's important to keep in mind how different colors are made so you can achieve the desired results (secondary and tertiary colors), though you can overdye multiple times to deepen the tone of your finished yarns. Each time will darken the colors, so keep that in mind too. There's plenty of quick information to get you started dyeing naturally (with tea!) in this article, so be sure to read it if you're interested!


The last article I want to touch on is "Two Threads Are Better Than One". In the past, I've used a silk single to ply with a wool single to create a fun yarn with the inherent beauty of each type of fiber. So, perhaps think about making a wool/silk (or wool/alpaca, silk/angora) yarn where they aren't blended at all except in the ply. You can still eliminate some of the negatives of different fibers by combining them together in this manner, but without needing to blend them thoroughly before spinning. This article is full of combo tips and project ideas for your finished yarns. I'll definitely keep some of these tips in the back of my mind when I'm considering what to spin next.


When your significant other/family/friend/stranger looks at your stash and remarks on its size, feel free to respond with the comment that the fibers in your stash are just waiting to be a thousand or more things--a veritable goldmine, if you will.

Thursday, July 23, 2015

Book Review: The Fleece and Fiber Sourcebook

There are a few things that every spinner should have on his or her book shelf. A book of spun samples. How to spin various kinds of yarns. And a book like this which introduces you to the wide world of fibers. The Fleece and Fiber Sourcebook primarily deals with an introductory, though mostly comprehensive, look at sheep wools. The sections at the end of the book discuss non-sheep fibers in a similar vein, those from goats, camelids, rabbits, and such. I am fairly well-versed in a few types of wool that I have used extensively over the years, but even I learned a few new things about those fibers from reading this book.


Most reference books aren't exciting to read (well, in a way they are), but I really found this book to be a page-turner. The first chapter introduces various useful terms, disambiguated the commercial world of wool from the that of the handspinner, and gave a quick zoological lesson about wool and the animals who make it. It is fully colorized, so each page has a picture of something, whether it's the raw/washed locks, sample swatches, and/or a picture of the cutie pie sheepies themselves. This is incredibly useful as we can associate the wool to the image of the breed of sheep (when applicable--not all breeds listed will have images of both animal and lock). It is nice to see how the samples turn out when you start with the raw lock.


The general format for each sheep breed is a blurb about the history of that breed, along with some interesting tidbits specific to that breed. There is information about fleece weight, fiber micron, dyeability, suggested spinning techniques, and advice about knitting/crocheting/weaving/felting. On occasion, there is an interesting story about a sheep or wool. For example, in the entry about Merino sheep, there is a cute story about the famous Shrek the Sheep.

The book starts off with the sheep breeds, which is primarily organized by sheep families. There are many sheep which don't fall into these categories, but may still have similar fleece qualities. Knowing the families of sheep will be useful in a plethora of ways as you educate yourself about how the different wools relate to one another. 


When the book turns to other wool-producing animals, more than 2/3 of the way through the book, there is a mini introduction for that specific type of animal, whether its goats, camelids, or rabbits. Though these sections aren't as vast as the sheep section, there is a great deal of information here too (there just typically aren't as many breeds of angora as there are sheep, I suppose). 

The Sourcebook is meant to be a quick reference since it doesn't delve into each breed for several pages--most will only have a dedicated 2-3 pages, some more, some far less. It makes up for depth with its breadth. It's a great starting point for your fiber study, and if you have only worked with a few handfuls of fibers, this reference book will be a boon companion.


My only criticism about this book is the lack of quick reference. There is a typical index in the back of the book, but it's time consuming to thumb through at a glance because it lists more than just the breed names. The table of contents is also difficult to search through if you don't immediately know how a fiber is categorized. I'll probably make a hand-written quick reference version so I can find a breed alphabetically instead.

For the price ($35 USD), it is a steal. You'll still need to experiment with fleeces on your own and build up your personal reference, but it's good to have on your shelf. Whether you're just getting started with spinning, need a refresher about a specific breed, or you need to identify some mystery wool, this book will be comprehensive enough for your needs. 

Tuesday, June 30, 2015

Silk Spinning Challenge! Halfway Point

Okay, so I realize that we're about halfway through the spinning challenge now, but then I moved halfway around the world again. If you're interested in spinning silk, and want some buddies to spin with, join us over on Ravelry. There will be mystery prizes when I get them made (I had to unpack all of my tools and get it all set up). Things are rolling almost at a normal speed!

Silk is one of those categories of fiber that a lot of people shy away from for a long time because they hear that it is a slippery and often difficult to spin fiber. And it's not cheap, so if you mess it up, it's tough to just jump in if you're not confident with your spinning skills. I've been in that spot. No matter what you spin, there's a chance it won't turn out like you want it--even now, I spin yarns that don't turn out like I imagined, but that's a rare occurrence. So, when you realize that there's a chance you might mess it up, you're more free to just jump in. But we can minimize this chance of messing it up by working on it together. Here's my first finished silk yarn:


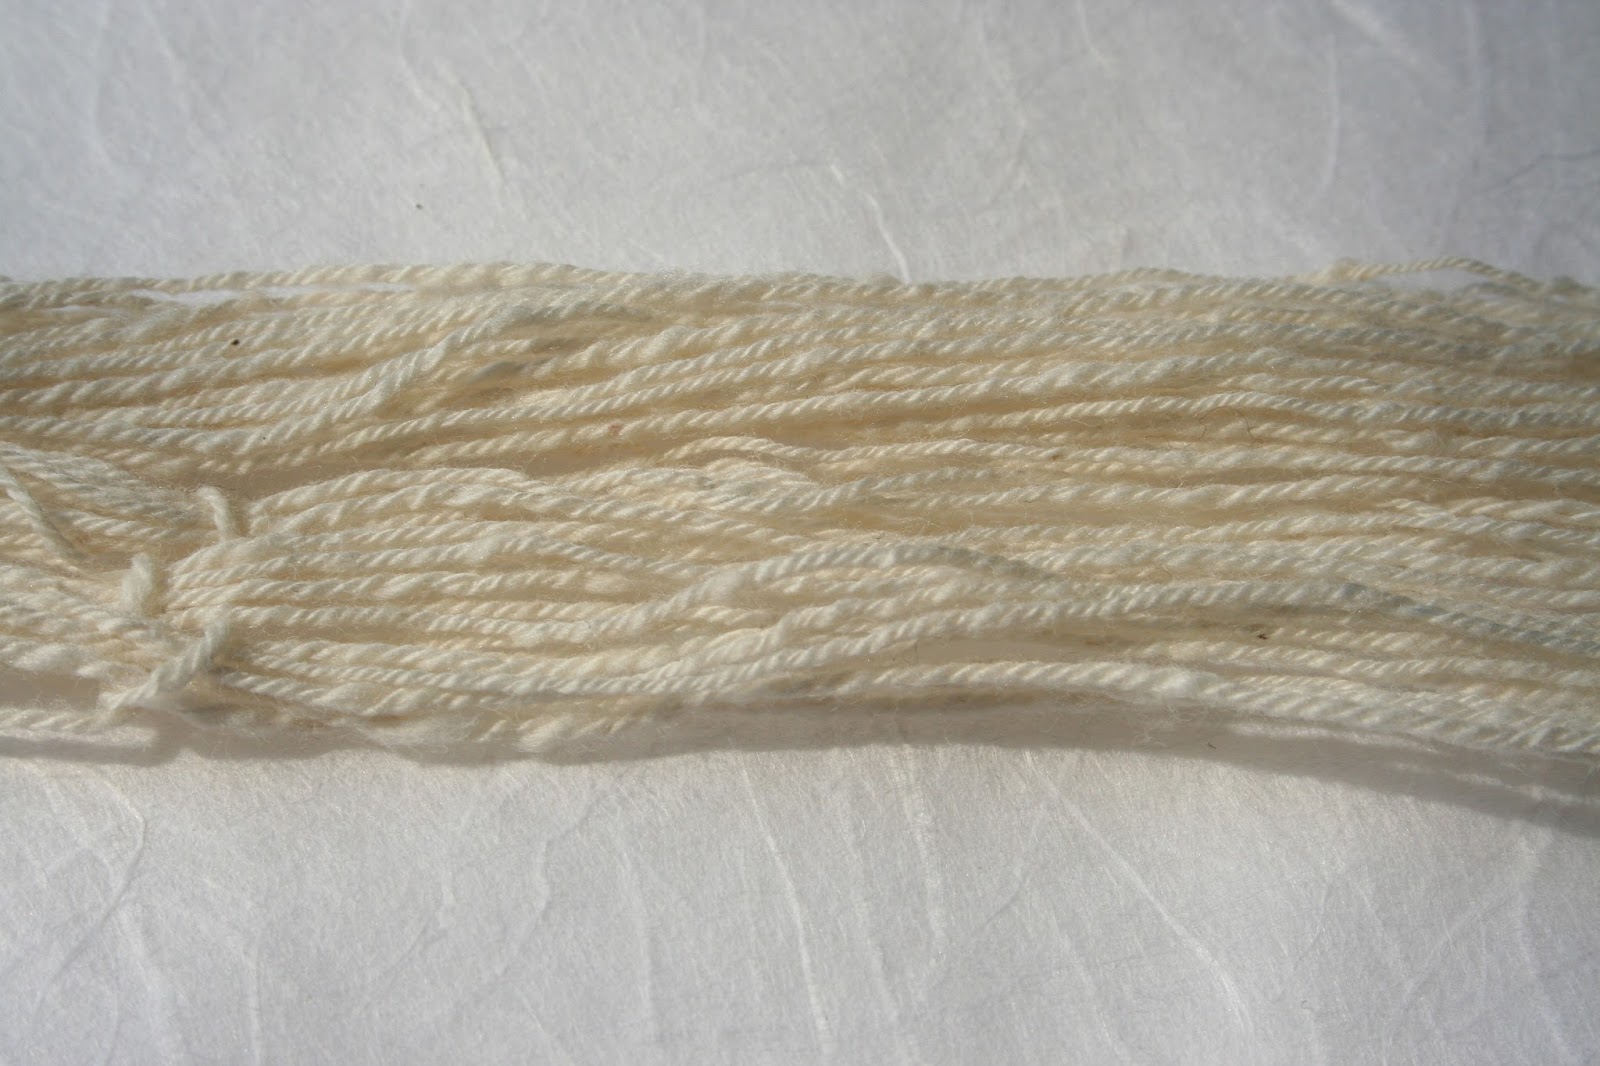
It looks a bit different than silk you may have used, and that's because I used silk hankies instead of combed silk top. For beginners, silk hankies can help you bridge the gap into spinning silk top. It's more forgiving in some ways, but you do have to learn a new skill set. Drafting hankies is way different than drafting other fibers, but when it comes to the spinning and plying, you don't have to worry about the twist amounts as much so you're free to focus on the differences between silk and wool.

I will do a video and show you how I like to draft out hankies so I don't get blisters or make my hands sore, which are common problems when you first start spinning silk hankies. I try to use more natural pulling motions to prevent strain on the shoulders, and I use the pad of my hand instead of my fingers to reduce the chance of blisters, cuts (silk is a very strong fiber!), and sore fingers. I will schedule it for tomorrow, and we'll see how that goes. I'm working without my main laptop, so I'll have to double check the quality.

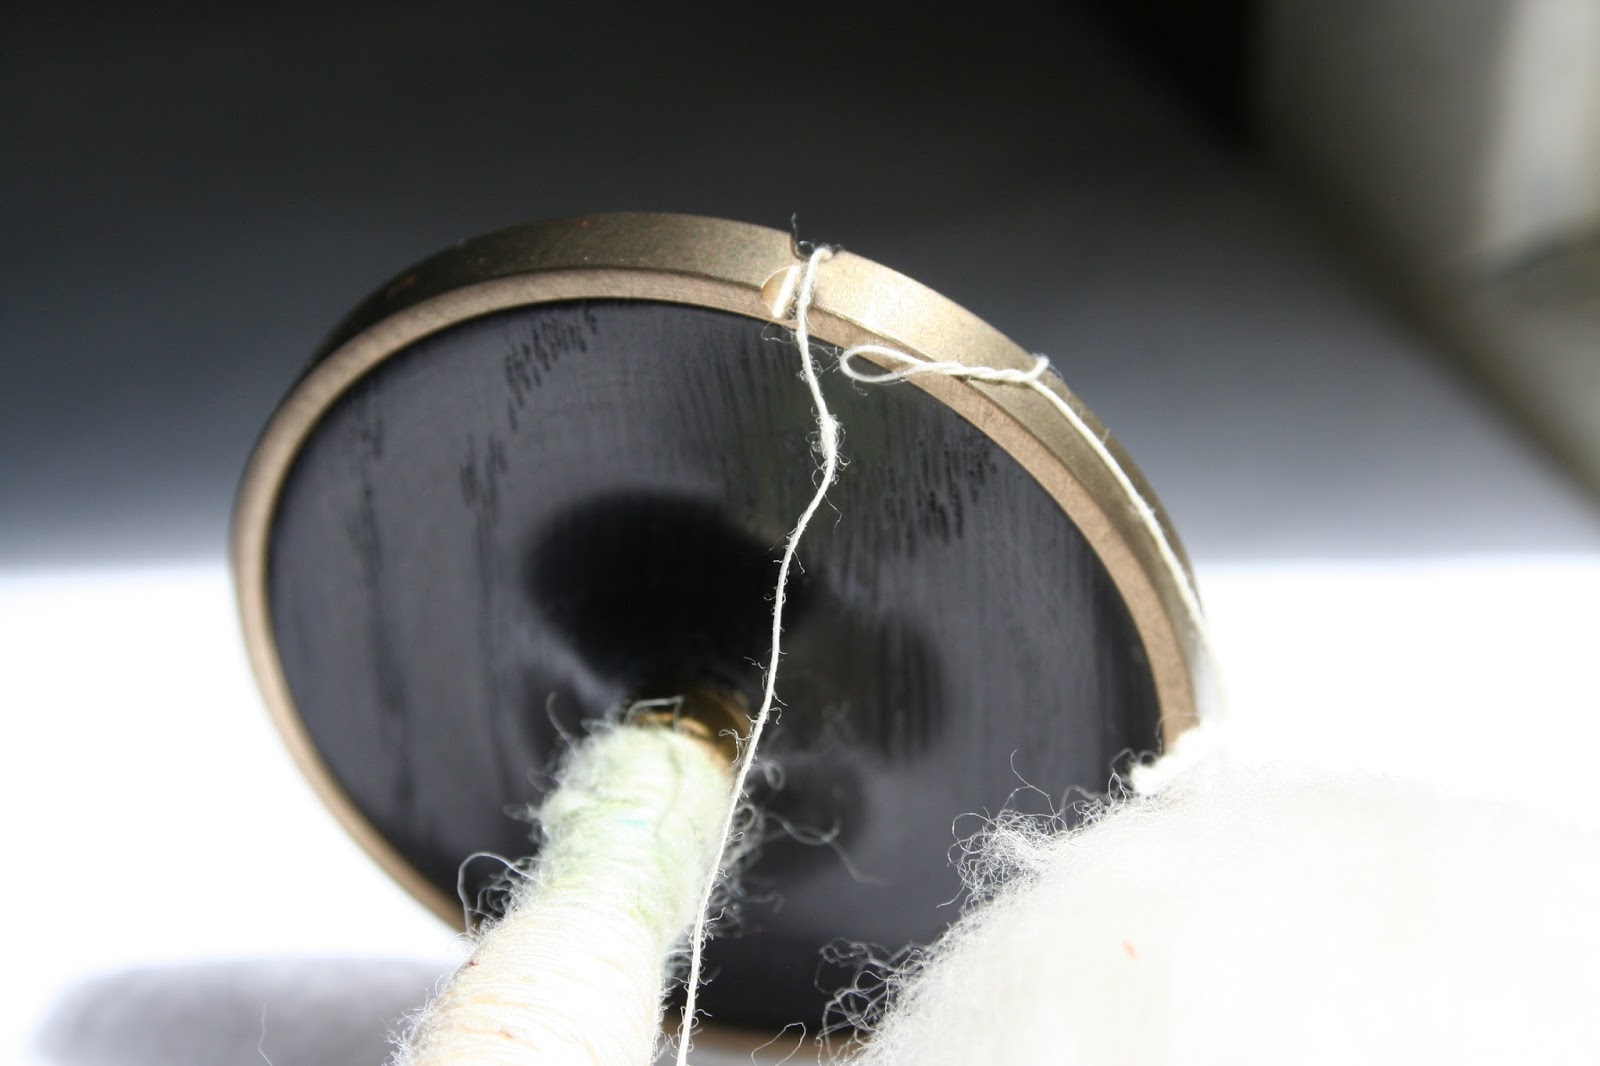
Here is my challenge yarn, still on the spindle.


It's very easy to spin silk hankies with a drop spindle, and due to silk's strength, you can make a thinner weight yarn with a heavier spindle and it'll be fine. Silk will still snap if there is too much twist in a thin spot (or if you pull too much on the silk), but you don't necessarily need a lace weight spindle to spin a lace weight silk hankie yarn.


Pros and cons of spinning silk hankies. The pros:

  • Generally less expensive than silk top
  • Has the characteristics of silk (shine/drape/thermal properties/so on)
  • Easy to spin (and ply)
  • You can add more or less twists per inch, to make a softer or firmer yarn.
  • Easy to dye and takes colors well
  • Singles can be spun very thin or very thick and it won't draft apart
Cons:
  • The noils prevent a smooth, uninterrupted surface, so it has that 'rustic' look
  • Drafting is more difficult and requires a skill you won't use for most other fibers
  • You can't draft if there is any twist in the hankie, and difficult to do at the wheel
  • It sticks to everything, so you should always spin with lotion nearby


However, silk hankies aren't best for everyone. Some won't like the noil texture which interrupts it's smoothness and shine. Spinning silk top will be worth the extra effort for some, and that's totally okay! Spinning silk top is a smooth experience, and the silk yarn practically makes itself when you learn to deal with its slipperiness. If you have spun fibers like alpaca and angora, you will be able to use those skills when spinning silk combed top. For your first time spinning silk, I recommend using tussah silk because it tends to grab neighbor fibers a little better than finer silks (like mulberry silk).

So, is silk top going to work for you as your first silk yarn? The pros:

  • It's very shiny and spins up into a smooth yarn
  • No noils
  • Drafting at the wheel is very easy and similar to drafting other fibers
  • Takes dyes well
  • Has all of the properties of silk
  • You can easily find silk top online
Cons:
  • It's more expensive than hankies
  • You can't find other silks like muga or eri silk as easily
  • It's very slippery and spindles are prone to dropping if you don't watch the twist carefully
  • You can't spin any gauge of silk as a single--thick singles will pill and begin to fall apart

The point is, silk hankies and silk top are both great for those interested in learning how to spin silk. You don't have to start out with one or the other, but if you know some of the pros/cons of each, you can choose the silk you want to start with based on your skills/interests/budget. And if you do run into a problem, stop by and we'll help you sort it out!


Thursday, June 18, 2015

Review: PLY Magazine Autumn 2014 Issue

This particular issue of PLY magazine was interesting. The theme was Community, and what that term has meant through time. When I first bought this issue, I wondered how the theme would teach me both about fibers and the fiber arts community. I mean, on the face of it, I know what community means as it relates to the spinning community or the weaving community. PLY magazines so far have been based around spinning techniques, preparation methods, and breeds, so this issue seems a bit anachronistic. But let's see how it fits into the other PLY themes thus far.


In other issues of PLY, there is usually an article some historical (or even prehistorical) connection with fiber arts. Within a community of herders, crafters, bakers, mothers, fathers, and so on; you'll have weavers, spinners, and dyers. Specifically, we want to know more about the spinning community among these ancient peoples. Spinning was a more integral and critical part of their lives than it is for us today, but their spinning circles were probably very similar to ours today. We gather, spin, chat, and help each other. We welcome and inspire new spinners. We help older spinners who may not have the strength to card their own wool anymore. In that respect, the spinning community is an ancient one, and though we may spin soy fiber and dog hair, we are very much the same community we always used to be. The article about Mesoamerican and South American spinning communities (written by Christina Pappas) delves more specifically into this idea of community.


Then there's the idea of subcommunities, living within the general category of spinning community. Shetland wool was presented because it a challenging wool to categorize, based on the terminology used, variability of the fleece itself, and the confusion of labeling in commercial products. My own personal experience with Shetland has been full of frustration (annoyance, maybe?) because I couldn't understand what Shetland was. Every time I got an explanation from one person and moved onto the next, it was like I was hearing about a different animal. Deb Robson, author of the article Shetland Wool, concisely describes the plethora of characteristics you'll encounter when you step into Shetland territory--it is very much its own community, full of those who are familiar with the language, textures, and capabilities of the wool. But the language they do speak is the same all spinners speak: if you want to know more about Shetland, their eyes will light up and they will be pleased tell you everything you need to know about Shetland wool.


One article in particular struck me personally, since the project fits within my own mission. I want to increase public awareness for spinning, dyeing, knitting, fiber arts, and wools. If anyone is willing to give me 10 minutes of their time, I will teach them how to spin. Robyn Love wrote about her project, Spindle 7, where she rode a New York train (the #7) and spun on her drop spindle. If anyone expressed interest, she would teach them to spin, and if they wanted to keep going, she would send them off with wool and spindle. There is a great diversity of languages and cultures who ride that train, and she talked about how those experiences effected her. You don't need to speak the same verbal language to teach someone to spin, since the language being spoken is that of: draft, twist, yarn.

And then there are modern communities, those of us who digitize our stashes on Ravelry, who blog our experiences in lengthy posts, who drag our friends to fiber festivals, and who drive an hour to spin with guild members in the next big city. We come together and spin for charities (like Spinzilla), we share our sports spirit when we challenge ourselves with our favorite cyclists (like during Tour de France/Fleece), or when fellow spinners are going through financial/emotional/medical hardships. Our community spans across socioeconomic barriers, gender barriers, and language barriers, With the Internet, we can have a thriving global community and share in traditional styles and techniques of other places in the world. You aren't alone. We're here, and this issue really shows that.


As far as colorwork, techniques, and patterns goes, this issue is also packed full of those things which will boost your knowledge about fibers and some ways you can use them. But if you're wondering about what our spinning community is, where it is, and how to be in it, this issue is definitely for you. My original skepticism vanished as I continued to read this issue. Sometimes we need to sit back and see what our spinning community is, how it has grown/diminished/morphed/shifted/changed, so we can be comforted by it when things don't go well, with whatever life throws at us.


If you need a community, we're here on Ravelry.

Saturday, May 23, 2015

Tax Day Cotton Spinning Challenge: Results!

The Cotton Spinning challenge is over, and I'm really glad ya'll motivated me to try out cotton. Many of you who began with me were beginners, and we all learned something new: a love/hate relationship was formed, in some cases, and others realized that cotton spinning isn't for them (yet). This challenge didn't seem to breed any new cotton lovers, but I'll talk about that later.

First, let's talk about my rationale when I approached this topic. As I mentioned before, I didn't want to do much research about how to prep, spin, and set cotton yarn, since I wanted to rely on my spinner's intuition. You can read more about this in my first and second posts. When I combined my spinner's intuition and my research, I got my seventh (and final) sample for this challenge. It represents how I have implemented all the things I learned about spinning, but it also shows me that I was mostly on the right track from the get-go--I was just missing  a few helpful tips.


In the seventh sample, I started with a well-beat wad of cotton and rolled it up into a ball. The cotton beating whipped air into the whole mass, effectively separating the fibers (attenuating the fibers) so they wouldn't mass up together during the spinning process. To do the beating, I took the cleaned, hand picked cotton (last pictures of the second post) and placed a firm pillow between my knees. I grabbed a long dowel and literally just beat the cotton with it. When the mass got too big, I folded it over on itself and beat it some more. If you make things like pastry dough, you'll understand my process. Eventually, it became a smooth, even batting. I folded it into thirds and rolled it up into a ball.

The resulting yarn was a bit fuzzy, but still quite smooth and even:


Here's the 'cotton ball' I ended up making. Notice how clean it is? This beating method did an excellent job reorganizing the fibers into a disorganized mess. The drafting for this sample was the easiest of all and took the least amount of spinning time.


So, I spun a grand total of 1 ounce of fiber. Not a whole lot of fiber, but I learned much from it and I can apply this expertise to project-oriented goals. I still want to make a tea towel! :) Here's what cotton needs, but this is neither an exhaustive list nor the only way to spin it.

  1. Cotton likes twist like we like fiber. To wit, it needs a ton of twist. Do you think you have enough? Better add more twist. All of my samples improved when I added more and more twist. I spun and plied my samples very tightly and by the time I made it to my seventh sample, I finally grasped how much twist my cotton needed.
  2. Plies are your friend. If you want a thicker yarn, make it so by adding plies rather than spinning thicker singles (as a side note, though, Stephanie Gaustad talked about setting twist in the issue of PLY I recently reviewed, and the cotton sample they showed was a soft spun cotton single...which knitted up into a beautiful swatch). If you're having trouble working with your cotton yarn, try plies instead of thicker yarns first.
  3. Boil the yarn! That's right, cotton loves it hot hot hot! In my first samples, I set it like I would wool yarn because I wasn't sure what it needed. After further research, I learned that cotton needed to simmer in very hot, soapy water for 30-40 minutes, and only after that would it be considered set. As a side note, you could steam the yarn, though it would still take a bit longer than if you steam set wool yarn. It also brightens the color of the yarn.
Commence the slideshow! I was often frustrated with spinning cotton, but I also had a lot of fun too. I'll point out my favorite bit and worse bit of each sample--if I didn't have any fun, I probably wouldn't have stuck with cotton spinning this whole month. I made an effort to spin a little of it each day. 

Sample 1:


This sample was made before I did any current research. The stuff I learned several years ago was what I had to go by, but at least I succeeded in making yarn. :)

Thing I loved: It is an incredibly soft and squishy yarn. It would definitely keep you warm and snuggly if you had a whole bunch of this yarn woven into a blanket. Thing I disliked: It was hard stopping the spinning to remove the vm, so I spun it into the yarn anyway. It also likely weakened the yarn.

Sample 2:


This sample was similar enough to sample 1 (though it certainly has more twist!) for me to have the same likes/dislikes as sample 1. It's only slightly more tightly spun than sample 1...I was still very timid about the amount of twist it needed.

Sample 3:


This third sample is noticeably rounder than the first two samples, and that's partly because the singles are a bit thicker. I had a hard time spinning a thinner worsted spun single because it was difficult to keep up with the twist while I was drafting it thinner.

I love the smoothness of this sample, but it doesn't have the 'cotton' texture I come to expect from cotton yarn...it doesn't look as organic as the above samples.

Sample 4:


It may not look like it, but this sample was spun with more twist than all the other samples so far. As for the drafting, it was easier to make it thinner than with the worsted technique, but I suffered from clumping as the cotton drafted from the puni. This is when I decided to experiment a little with the puni-making process. For this one, I carded a fair amount of cotton onto a small dog brush, then rolled it around 2 size US 5 knitting needles. Maybe the punis were just too big somehow?

I love the nubbly texture that this particular sample made, but it really wasn't what I was going for.

Sample 5:


This sample was also the one I chose to make larger, so I could see what spinning cotton for a larger project would be like. I also took this opportunity to experiment with rolling up punis. I finally settled on 1g of fiber rolled around a pair of US 2 dpns. Before I was done rolling, I would take one of the needles out of the puni and roll it tighter so it was just the diameter of the single needle. I was able to draft a little smoother from the smaller punis (though, I think for a different reason that I originally thought), so I concluded that puni density mattered at this point.

I love that I as able to make a larger sample and compare my skills throughout just this single sample, but you can tell where my cotton spinning needs more practice (the parts which look extremely loose). I thought I had spun the singles with enough twist so that I could ply it easily from a center-pull ball, but I was wrong. The yarn snapped in about three places and drafted apart in two places. I'm not sure what caused the yarn to snap because it would seem that it didn't have enough twist to cause a snap in the first place--maybe I yanked on it too hard when I was giving each single even tension?

Sample 6:


This sample was the first to combine the various techniques I had learned during this process. I went back to my organic cotton and set out to clean it really well so that I could make smoother punis and spin and smoother yarn. I also threw timidity out the window and went for broke with twist...This turned out to be the tightest of all the samples so far. It's cleaner, tighter, and even smoother than the other samples (except the worsted-spun sample). I still missed a few noils and bits of vm, so I think I could have done even better when I was scrutinizing the cotton before I carded it. Those bits are a pain to remove as you're spinning. I also switched to setting the yarn in roaring hot soapy water. The result was a soft, bright, and completely comfortable cotton yarn.

I love the nobbly texture of this cotton (and its whiteness), but I still wish I could have made it smoother.

Sample 7:


For this last sample, I spent much more time during the preparation stage than for any of the other samples. I think the result is telling. It's smooth, clean, and just looks like cotton yarn. I also opted to Navajo ply (chain ply) it because 1) I needed to have something other than a 2-ply in my sample book for cotton; and 2) my cotton bud Angela was having trouble with it. I think the key is to start with a smooth cotton yarn if you plan to N-ply with it. If it isn't smooth, the bumps will get caught on the crochet chain loops, and as you pull it through, it could snap more easily.

Using my spindle, I just literally stopped adding any twist, made about 3-4 chain loops so I could make the N-ply, then I added my ply twist to that bit. I found it extremely difficult to chain ply as the spindle was actively spinning, so this stop-and-go method worked well for me. It's probably the case that I'm just so new to working with chain-plying cotton that I encountered so much difficulty keeping the spindle turning. This stop-and-go method seems to be best for beginners.

I love how this sample turned out. It really is the culmination of everything I have learned this past month spinning cotton. Many of my spinning intuitions helped me along in this process, and what I couldn't just figure out on my own, I learned from reading and watching people use culturally different techniques. I'll continue working out how to make these cotton balls in the future so they don't take quite so long to make. If I can make them faster, then perhaps I'll always keep some cotton on a spare spindle.

I also wanted to share how different the white cottons I was using were. The top one here (sample 7) is made from the loose, organic cotton, and the bottom one (sample 5) was made from the combed top cotton:


The top one is considerably whiter than the bottom one, which is more pinkish-yellow. I have read that setting cotton yarn in hot soapy water for 30-40 minutes will also lighten the final color. Because the bottom yarn was set like wool (warm soapy water for 10 minutes), it could be exhibiting its original color. I should break sample 5 into two pieces and set one of them in hot water, then compare again.


I really have come far since sample 1. They look like they were spun by two different people!

There you have it, the Tax Day Cotton Spinning Challenge is now complete. I have a more intimate rapport with cotton today, and I couldn't have done it without the motivation from all of you, my friends and fans in the community. Thank you to everyone who spun a little cotton with me, and even if you found that cotton wasn't your thing, I'm glad you had the courage to dive in head first with me. Really, I appreciate your willingness to try new things with me!