Showing posts with label dyeing. Show all posts

Thursday, November 20, 2014

Dye Brand Color Comparisons

The dye brand testing is over, at least for the goals I originally set, so now it's time to chat about the characteristics of the colors produced from each brand. (If you haven't followed my testing, here are the links for the reviews of Brand 1, Brand 2, and Brand 3.) It's easy to assess the differences in colors when you look at them in person, but since computer monitors might be tuned to different parameters than mine, I'll do my best to describe the colors. Here we go, The Yellows!:


Brand 2 is missing because the dye powder refused to be combined with water to form a solution. Now, Brand 1 and 3 yellows turned out to be nearly the exact same shade. That isn't too surprising, since most dye companies will have similar yellows. The thing which I noticed most between these two yellows is the quality of the color. If I compare the wool or nylon fibers, the yellows are very similar. However, when I look at the two silk samples, I can tell that the yellow from Brand 3 yielded a stronger hue than the yellow from Brand 1. That said, Brand 1 covered the fiber more evenly than Brand 3 (there were fewer white spots on the Brand 1 samples).

The Reds!:


I actually liked all of the reds, and I was a little surprised how similar they turned out to be. Brand 1 (on the left) turned out to be a paler ruby red, especially on the merino. For all of Brand 1 dyes, the colors turned out significantly paler on the merino than the other fibers I used. Brand 2 was the perfect sexy red you would see on the lips of an attractive model with smooth skin...and you would be extremely tempted to buy that lipstick. The goopy consistency of the dye solution didn't make the fiber sticky, which I feared, but the goopy-ness made me worry that I wouldn't get consistent colors from batch to batch. It turned out a bit more splotchy than Brand 3. Dye Brand 3 had the best dye coverage on the fiber, but it isn't quite so ruby red as Brand 2--Brand 3 turned out to be slightly more orange-y on the nylon fibers--it turned out ruby red on the merino and silk.

The Blues!:


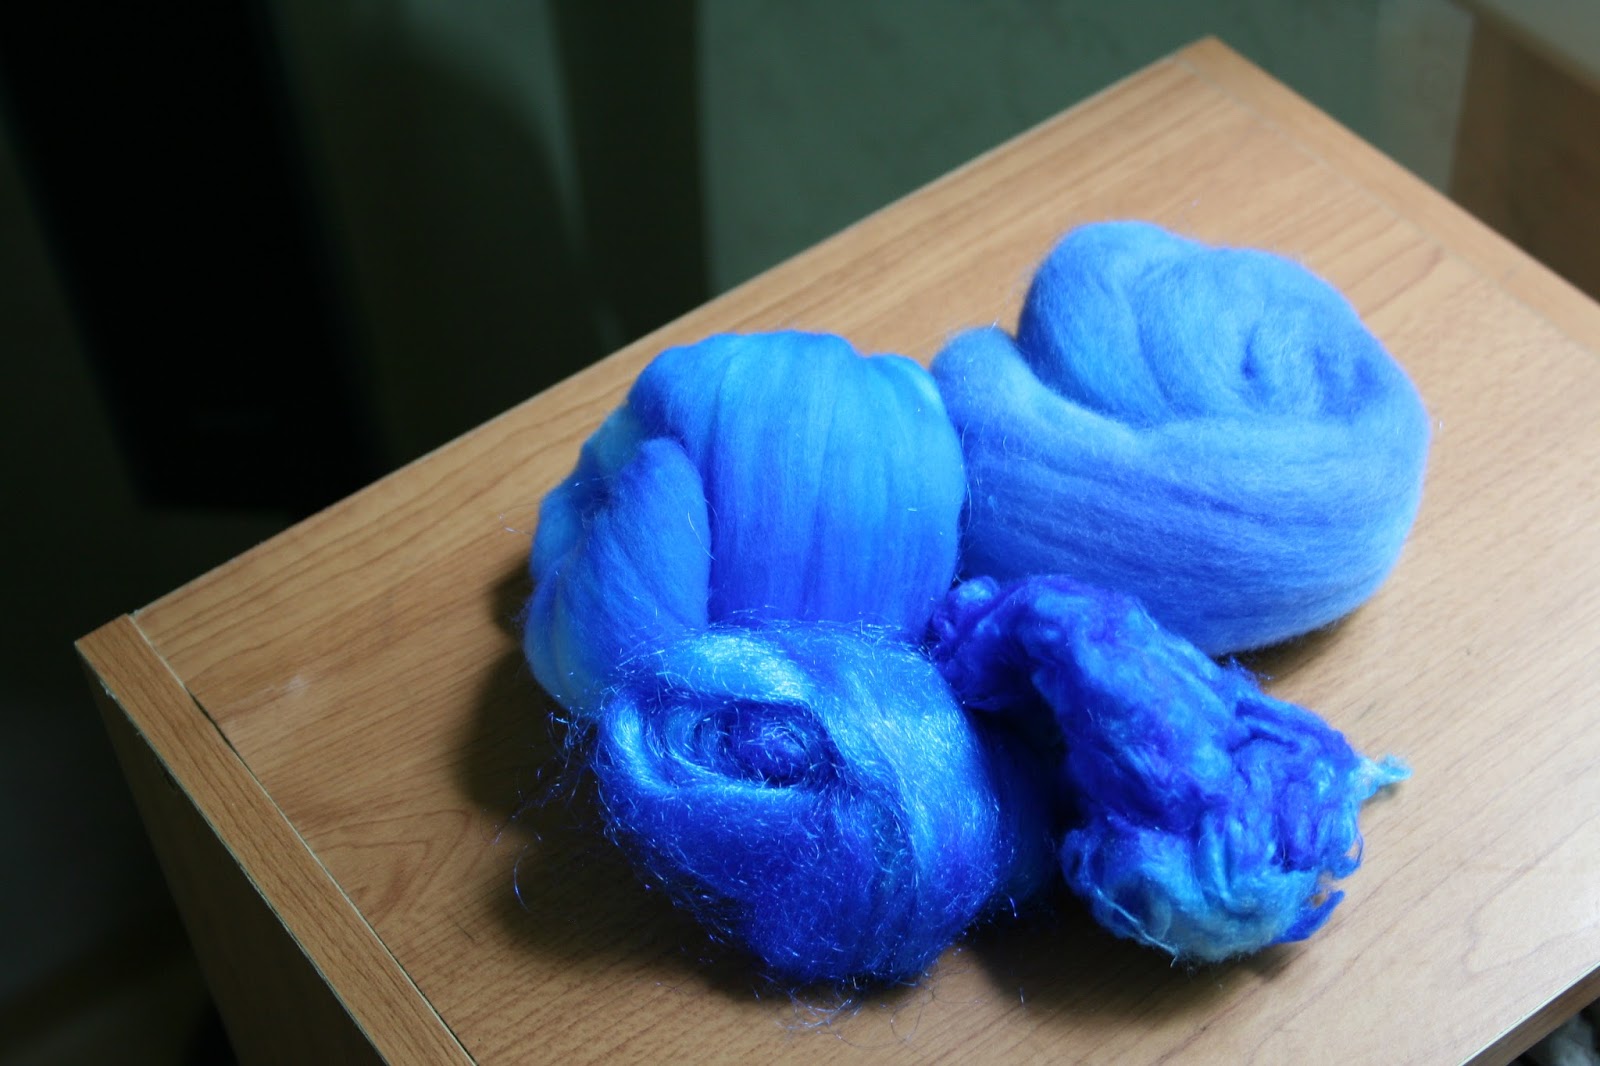
The blues were a pleasant surprise. The blue from Brand 1 reminds me of the deep sapphire blue of the Heart of the Ocean (<---you remember this reference, right? It was the hottest item in 1999), but only on the silk (which was splotchy) and the icicle nylon. The dye didn't take very well on the merino (which looks grey-ish blue) or the BFL. Brand 2 reminds me of the caribbean ocean. It has that tropical hue which makes you think about sandy beaches and vacation. It also dyed the fibers extremely well. Brand 3 turned out to have a mix of 1 and 2 colors, so it's a brighter sapphire blue color than Brand 1. It didn't dye the merino as deeply as I hoped, but the resulting blue is a nice middle-of-the-road hue.

The Blacks!:


First, black is a difficult color to obtain on wool in general. Further, to get a deep shade, you usually need a 3-4% DOS (depth of shade = saturation of color), but in all of these samples, I used a 1.5% DOS so I could compare how well the dyes dyed the fibers. When I want to make a darker black in the future, I'll increase the DOS. Brand 1 produced yellowish blacks, though this yellow tint was diminished on the icicle nylon sample. The merino black was most severely tinted yellow when compared to the others. Brand 2 has no yellow tint, but it dyed the fibers the poorest of all the samples. The merino actually just looks grey, and I don't think it would turn out significantly darker even with a deeper DOS. Brand 3 also has a yellowish tint, but it is only a slight tint--it can only really be seen on the faux cashmere. The merino dyed to the best, darkest, shade than the other two. I expect the 3-4% DOS with dye Brand 3 to return the best results overall.

I know pictures on a computer screen aren't the best way to discern the differences between slight shade differences, but I hope I have elucidated some of the reasons why I went with dye Brand 3. So, what's my plan for these samples? Well, I don't really need to keep the full ounce for each color of each brand, so I think I'll be making some batts in the near future. Yay! Have you found these posts helpful? Let me know in the comments below!

Monday, November 3, 2014

Review: Spin-Off Spring 2014 Issue

Like the Autumn 2013 issue of PLY magazine, this issue of Spin-Off features colorwork as its primary theme. It has been interesting to see how these particular issues differ, since the PLY issue seems to focus on the well-rounded approach to colorwork--blending, spinning, plying--whereas this issue seems to focus primarily on dyeing and blending to achieve a variety of colors. Both issues work very well in tandem, so if you're really interested in building your colorwork arsenal, these two issues are wonderful resources to have in your library.


Stepping into a new world, color blending can seem very daunting. I have to admit that I encountered some timidity when performing my first color experiments. I kept in mind the color rules of my high school art class...blue and red make purple, yellow and blue make green. But this is a very limiting way of experimenting with color. Luckily, I had two great resources on hand right after I started combining colors on my borrowed drum carder. I had a Munsell color chart (from my school library) which helped me identify hue, saturation, and value of my archaeological surrogate samples I made for the experiments for my master's dissertation. That color chart help me understand how to identify whether a color was bright or dark, and now I can identify the value of a color without a color chart on hand. Now, I know that most people won't have this kind of chart in their home library, but if you're very serious about understanding color, it would be worth looking for it through your local library (and probably interlibrary loan). However, it isn't necessary to have used it to understand color--but it it'll take more time and experimentation to really understand those three indicators of color: hue, saturation, and value. Hue refers to the specific color, saturation refers to the intensity, and value refers to the lightness/darkness.

The second valuable resource was a dvd I got for Christmas one year: Color Works for Spinners by Deb Menz. She's a wonderful teacher, and I love her crazy red hair. She's soft spoken, but really knows her stuff. I felt myself listening raptly as she plainly explained hue, saturation, and value, while also demonstrating it on camera. She chose a color she wanted to make, then chose appropriate mixing colors to achieve the hue, saturation, and value for the desired color. She didn't always get it right, but she talked about how to identify what a blend needs to get the right color. The Munsell color chart and Deb's instruction are what really helped me break out of the high school art class mentality regarding color (also, I'm not implying that all high school art teachers are created equal).

Yet, these magazines will send you on your way to blending and creating beautiful colors. The first article I found most salient for budding colorists was the "Never-Ending Blending" article. You start out with a set of primary colors, then blend together the two adjacent colors evenly (evenly = 50/50 blend of the two parent colors). The more you do this kind of blending, the more gradual the gradient between colors will become. For example, if you start blending yellow and red, your first color blend will be orange. If you blend yellow with orange, your second color blend will be a golden orange color. But this is when you need to break the rules of art class. You don't always have to start with the same three primary colors: yellow, red, and blue. Sure, you can get a wide range of colors, but the blending is still limited. As the author attempted, try using a different set of three primary colors. One of the experiments used the three colors of printer cartridges: yellow, cyan, and magenta. Those color blends will be otherwise impossible to make if you started out with yellow, red, and blue.


If you start out with bright colors, you'll get bright blends, and vice versa with dark colors. Experiment with adding in white or black to your blends in increments of 10% (like, 90/10, 80/20) to change the value of your color. For example, if you wanted to darken an orange, you could combine 9g of orange with 1g of black wool. If you wanted to make it very dark, you could combine 5g of orange with 5g of black. You would lighten the orange similarly by combining it with white.

These blending experiments provide an excellent setup for experimenting with making tweed yarns. Tweed can refer to the color of the yarn and it can also refer to the texture of the yarn. For example, tweed the color is made by completely blending together several colors to get one, semi-homogenous color. This yarn would appear to be one color from a distance, but many colors upon closer examination. Tweed the texture is made by adding small noils into the fiber mixture, sometimes in a variety of colors, then spinning it into yarn. This will give the yarn a nubbly appearance. The article "Blending and Spinning Tweed Yarns" introduced me to the proper names for these two types of tweeds: Harris tweed refers to tweed the color, and Donegal tweed refers to tweed the texture (as well as color). Adding the principles behind preparing tweed batts will enhance your colorwork overall, and is a nice way to help mix and match different batts together.


Finally, the article I found very useful for natural dyeing was the article called "Making Dyestock Solutions from Natural Dyes." In a nutshell, it tells you what you need to know to figure out a formula for standardizing your dyestock--which might be challenging given that the extraction of color from natural dye sources can produce a variable yield. With all natural dyes, you won't get 100% consistency from batch to batch. But you can come close. If you keep notes about your dye stock and the depth of shade (DOS) for various saturations, you will produce similar results from batch to batch. As with the above articles on color blending, you can mix and match your naturally dyed fiber to create new colors, and blend them with professionally dyed wool to stretch your naturally dyed colors.


After reading the PLY issue on colorwork, I didn't think I would gain much from reading this issue of Spin-Off. Given their very different approaches on the same theme, I'm happy to have both of these issues in my library. The last thing I need is a shelf full of duplicates.

I hope you enjoyed this review; more reviews will be coming later. I can't do justice to these magazines, so if you find the things I talk about in this review interesting, get your hands on a copy. Hop over to Facebook if you want to share your own personal thoughts about colorwork and your experiences.

Monday, September 29, 2014

Dye Brand Names Revealed!

Blind reviews are fantastic for removing biases during the testing phase of products, but then you want to know what the brand names are. I was a little nervous about this fact, because what if it was a well-known brand which I didn't think was good? Or, what if the brand I end up liking is ridiculously expensive? Well, these are considerations you should probably at least think about when you embark on this kind of adventure, but if you end up choosing the most expensive brand available, isn't it worth the money to have stress-free dye days? I'm going to go with 'yes.'

So, let's do the big reveal now. Keep in mind that these are just my opinions and personal experiences, and do not reflect the results of the entire dyeing community. I may have received a bad batch of dye or I'm just not using them the way that others do. Brand 1 is Atul Colors from India. 

Brand 1: Atul Colors
This particular dye brand gave me the primary colors I would expect, and reminded me of an elementary school. They dyed the fibers very well, but I was a little disappointed that the merino didn't take the dye as well as the BFL. The second biggest issue I had with this dye company was that the red dye solution was goopy and the black dye left large specks of coagulated dye in the dyebath after it was done dyeing. Again, this dye may not have liked being in a solution, so perhaps it would have worked out better if I just used the dye as powder instead. In regards to the merino problem, I might try dyeing only merino to verify that it just fixes the dye more slowly than the BFL. This difference in rate of color fixing is important to know, and now if I dye a BFL/merino blend batt, I will probably get two different shades of the same color--you could really have fun with this, and if it's predictable, you can dye the two different shades of one color in the same dyebath. That would save you some time and effort!

Brand 2: Sandos Colors
Brand 2 is Sandos Colors from India. Aside from my problems with the yellow dye not forming a solution, this brand dyed very well. I loved how the blue turned out, and it was very different than the blue from Brand 1. Since it was so different, it gave me lots of ideas for combing colors, and probably would have produced beautiful tropical colors instead of the 'regular' ones (think about normal Starbursts versus tropical Startbursts). It may very well be worth requesting for new yellow dye from this company and trying it again without making a solution first. If this brand's yellow is finicky, I might be able to deal with it to see how the yellow color turns out on the fiber. This brand was an extremely close second out of the three I tested. I might just buy the blue from this brand because I love it so much!

Brand 3: Miyakozome Acid Dyes (wool and silk)
Brand 3: Miyakozome Acid Dyes (cellulose)
Brand 3 is Miyakozome Acid Dyes from Japan. These were the dyes I was most pleased with using. Given their lack of problems and great coverage, they were the reason I swooned for Brand 3. I talk at length about why I think this brand can dye both wool/silk and plant fibers in my review of Brand 3. I don't really have many cons to say about this brand, except that I think it may be the most expensive brand out of the three I tested. In this case, I think the higher price tag makes the hassle-free dyeing experience even better for me.

Would I ever use Brand 1 or 2? The short answer is yes. Though I experienced some problems with those dyes, it doesn't mean the whole brand is awful or worthless. Some of the dye powders might require more attention, and I may have to substitute colors of one brand to use with a different brand. The dyes from India are very inexpensive, so it may be worth it to buy cheaper dyes and mix and match colors to get the results I want. If I'm a hobby dyer and only dye 6 weeks out of the year during the summer, these will probably fit my requirements easily.

Brand 3 is a clear winner when it comes to the consistency of the dye solutions and the ease of dyeing, but the yellow and blue aren't as nice as the colors of Brand 1 and 2, respectively. At some point in the future, I'll probably buy the blue from Brand 2 because I think it has a lot of potential in creating fun colorways. Even though I'm going to choose Brand 3 as my primary dye company, I will by no means forget the great colors I got from Brands 1 and 2.

Thank you to everyone who has followed these testing experiments over the last several months. I wish I could have worked on them at a faster pace, but life happens. If this has inspired you to do some testing on your own, and especially if you decide to do things differently, post your own results in the comments below, or post them to Facebook so we can all learn something new.  

Monday, August 25, 2014

Dye Testing: Brand 3 Results

That's it, I'm done! I can finally say that I'm glad this testing phase is over and I can begin doing the fun part of dyeing...making beautiful new colorways. I've mentioned before how important the testing phase is for me, and how it can help you put your dollars into the company that suits your needs, but it is boring. But before I get onto the interesting stuff, I have to finish up with the review for Brand #3, plus I'm going to do a review of each color group, since that was the main defining factor for my final brand choice.

First, let's talk about the things I liked about this brand. All of the dyes could be mixed up into dye solutions without problems. Both of the other brands had some difficulty in this area, which I mention here and here. This is extremely important to me since I don't want to work with dry powders. I plan to live well into my 100s (and, of course, keep my wit) and I don't want to breathe in dye powder every time I want to dye some fiber. Plus, it gets everywhere.

Top: Merino
Middle: Faux cashmere, Icicle nylon
Bottom: Silk noil
For every color, the dyes were completely exhausted for the animal/nylon fibers. There weren't any strange residues leftover, and the fibers felt the same after dyeing as they did before dyeing. Sometimes dyes can make the fibers feel harsh or tacky--not something you want to find out after dyeing a whole prime fleece.

Top: Cotton, Flax
Bottom: Tencel, Hemp
Not only did the colors exhaust from the dyebath, but the colors themselves were clearly saturated on the fiber. I was having trouble getting the black to look black on the merino fiber for the first two brands, but Brand #3 really pulled through. I could increase the DOS (depth of shade) when I want to dye merino black so I can get a deeper black, but at least it didn't turn out gray.

Top: Lincoln locks
Middle: Merino
Bottom: Icicle nylon, Silk noil, Faux cashmere
As with all of my other samples from Brand #1 and #2, I tried to keep a consistent variety of fibers among each color and each brand. For all of the Brand #3 dyes, I used merino, faux cashmere (nylon), icicle (shiny nylon), and silk noil. Those are the same fibers I used in Brand #1 and #2 samples as well. Aside from the yellow, which didn't take the dye well because I didn't wet the fiber completely before dyeing, all of the colors dyed the fibers very evenly. As a result, Brand #3 turns out to be an extremely well-rounded set of dyes.

Top: Cotton, Flax
Bottom: Tencel, Hemp
But there is just one other interesting thing about Brand #3 that I need to talk about. It can also dye plant fibers, which is kind of like computer magic to me. I'm sure to a chemist this might make sense, just like how a computer makes sense to a computer scientist, but it baffles me. Here's why: animal fibers and plant fibers require very different dyeing conditions in order to fix dye to the fiber and have it be color- and wash-fast.

Wool requires an acid and heat to bind the dye to the surface of the fiber permanently. Plant fibers require a base and no heat to bind the dye to the surface permanently. What happens when a base and an acid meet together? Well, you get a third grade science project better known as 'The Volcano.' So, you can't dye both types of fiber in their respective environments at the same time, which leads dye manufacturers to create acid dyes (wool dyes) and procion dyes (tie dyes, plants dyes). And yet, Brand #3 has managed to do something I didn't think chemistry and the laws of nature would allow.

Top: Faux cashmere, Merino
Bottom: Icicle nylon, Silk noil
In order to dye both kinds of fiber groups, you need to create a dye which can be jammed into the fiber's receptor sites when in the presence of a specific mordant. For wool, that mordant is some kind of acid like vinegar or citric acid. When the conditions are right, the presence of an acid and the vat is brought to the right temperature (about 180-200F), the fiber's receptor sites are introduced to the dye particles and the acid plays a major role in solidifying their marriage. The heat ensures that there is enough time to form the chemical bond (usually held at that temperature for 30-60 minutes), and afterwards, it becomes permanent. How permanent? Archaeologists have found 7,000 year old textiles which still have traces of dye on them. Whoa.

Top: Cotton, Flax
Bottom: Tencel, Hemp
So, if that's how you bond a dye to wool, what about cotton and flax? Well, they're the picky noble ladies of the fiber world. The suitor has to be just right and require a very long (by comparison) courting session before they'll accept a tentative marriage. Hmm, let's say that again but without the metaphors. Plant fibers also need to have their receptor sites altered, and in the presence of a base like alum, they're more likely to accept the dye permanently. But they need a bit more time, like 24 hours. And they prefer a cool or tepid environment. Plant fibers are notorious for being difficult to dye, and the well-calculated dyebaths they're put into still won't exhaust completely. Flax is the worst, though the others aren't much better.

Top: Faux cashmere, Merino
Bottom: Icicle nylon, Silk noil
After thinking this chemistry stuff through (again), I think I understand how dye Brand #3 works. Broadbase dyes like Rit will have several different dyes mixed together so it'll dye any fiber, including man-made ones--but the biggest problem here is that it'll never fully exhaust. Since Brand #3 will dye both animal and plant fibers specifically, they must have designed the dye to exhaust well in an acidic environment, but also work decently well in a basic environment too. This isn't a huge stretch to assume if you consider the process of dyeing with natural dyes. With a switch in pH environments, addition or removal of heat, and a change in the duration of the dyebath, you can use the same natural dyes for both fiber groups. I think Brand #3 achieved this versatility by keeping those principles in mind.

Top: Tencel, Cotton
Bottom: Hemp, Flax
At any rate, I think that's what is happening with Brand #3. I could be wrong, and I'd be thrilled to be corrected by someone who knows what's going on, but it has been a nice little brain buster for the last few weeks. Now, without further adieu, I'll give you my choice of brand: #3. I know, big surprise, especially after reading all of my rambling. I'll reveal the names of the brands when I talk about each color in the next post, since I have some things to say about that and I've clearly already written a book with this post. Look for that post in the near future. If you read this whole post, thumbs up to you! :D

Friday, July 18, 2014

Dye Testing: Brand 2 Results

The results are in for Brand #2 dyes! I have to say, things didn't start out too well for this brand. For the life of me, I couldn't get the yellow dye to mix with the water to make a solution. I tried all of the tricks I know, but I still couldn't get the powder blobs to make friends with the water. Even after letting it settle for a day, it continued to refuse to play nice. So, I wasn't able to dye with this powder. The red, blue, and black worked just fine, and had decent coverage just like Brand #1 did. It still didn't dye the merino as well as I wanted it to, but I'll talk about the differences when I finish Brand #3 (I've only just started on those).

Here we go, red, blue, and black:


For the sake of consistency, I dyed the same kind of fibers for each color: merino, silk noil, icicle nylon, faux cashmere (nylon). Without any additions to make the dye take more evenly, this brand dyed very evenly. It dyed the icicle nylon and merino the best, even if the merino doesn't look as saturated as the rest.

I really like the blue from this brand. It's very different than the Brand #1 blue, which is more stereotypical of primary blue. Brand #2 blue has a wonderful Caribbean vibe, and I think it has a lot of potential as a primary color. The red and black turned out very similarly to Brand #1, so nothing too interesting there.

For me, this brand of dyes is like comparing bing cherries to rainier cherries--both are delicious, but one is slightly sweeter than the other. I eat both kinds of cherries with a voracious appetite--go ahead, ask me how long it takes for me to eat 5kg of cherries--and I can't really choose if both are available to me. Those are the days when I buy both. :) So, I'm kind of torn with these two brands so far. Brand #1's black was horrible, and so was Brand #2's yellow. I kind of want to meld these two brands into one so I can be the epitome of happy.

Brand #3 is in the process of being tested, and so far I kind of like the idea of it being able to dye both protein and cellulose fibers. For those of you Facebook fans who have already gotten a preview picture of Brand #3's yellow, you know that I'm a little confused how this dye works for both types of fiber. Well, I guess it's time to get out the dyepot...

Wednesday, May 21, 2014

Dye Testing: Brand 1 Results

As many of you know, I'm in the process of testing some acid dyes from different brands to see which one I like best, and which will fit my needs. I have 3 brands to test, and the results so far are interesting. I'm testing out only the primary colors offered by each brand, plus black, so I can get custom colors by blending the primary colors together. I'm fairly confident that at this point I don't really need to have a huge variety of colors on hand to mix into new colors.

I've tested all of Brand 1 dyes, yellow, red, blue, and black:


In general, this brand dyes fairly well. But I have two problems with this brand. The first is, it doesn't dye the merino very well, and I'm not sure why. In all of these samples, I dyed BFL, merino, faux cashmere, icicle, and silk noil in order to be consistent. It's quite possible that merino has a longer dye absorption time than the other fibers, since in every case, the merino turned out lighter than the other wool sample (BFL). A smoother surface will cause more solid reflection of light, thereby giving the fiber a dark, shiny appearance. Silk is notorious for this property. Still, I'm not quite satisfied, and I want the colors on the merino to be darker.

One solution is to only put merino in the dyebath at a time, but that's too limiting for my tastes. The other is to just not use this brand for my dyeing needs, since historically, I always dye merino. The second problem occurred with the black dye. I always create dye solutions (dye mixed with water) so I don't need to mess with dye powders, and I always shake them well both when I create the mixture and before I measure out what I need. The black dye looked like it should, thoroughly mixed, without lumps, and smooth instead of goopy.

When I was removing the fibers from the dyebath, however, there were these large, nearly solid pieces of black dye floating in the water. I've never seen this before, and I'm also curious why this happened. I'm not much of a chemist, but I do have a working knowledge of how chemistry works. A high temperature could break down the dye molecules, resulting in this strange clumping of the dye bits which didn't attach to the fiber...but since I was dyeing silk, and silk shouldn't be heated above 180F, I'm fairly confident that the dyebath didn't get too hot. And if it did get too hot for the dye at 180F, how am I supposed to use this dye color at all? That's the minimum temperature for wool to take on the dye, and the maximum temperature for silk.

The goal of this whole process is to see which of these dye brands will work for me without needing to purchase from different companies. With the black dye not working for me at all, and the merino problem, I'm afraid that this brand isn't the one for me.

I just have one more sample to dye for Brand 2, then I'll post the results from that testing soon. Sorry for the huge gap in posting here, but my momma came to visit us for about 2 weeks and we were mega busy. I'll post some interesting things I found around Seoul while she was here, and give you a nice taste of her gorgeous pictures--she's an excellent photographer!