Showing posts with label magazine. Show all posts

Friday, August 21, 2015

Review: Spin-Off Spring 2015

My blog always takes a dive during the summer months for some reason. Well, let's get back on track, shall we? :) This particular issue of Spin-Off celebrates the 'stache. Oops, not that one. Stash. Right, that overflowing bin of fibers and colors and so much potential. Sometimes I feel like I'm indulging myself when I look at the giant box which is my stash. Is it too much? Non-spinners would probably think I have a hoarding problem. When I list the breeds in my stash, I realize how little it is: Merino, Polwarth, Montdale, Gotland, Hampshire, Cormo, Bamboo, Silk, Churro, and various crosses. For so many breeds, I only have a teeny bit. As I've mentioned before, there are so many different breeds, sometimes with disparate uses, so keeping a variety of breeds on hand is useful when deciding which fiber to buy for a project.


But what to do with those little bits of this and that? What about all of those bits of dyed wools in your stash after a project? Well, you have lots of choices, and you don't need any blending tools either (but those will help you transform your stash too!). In the "Color Playground" article, the author, Jillian Moreno, talks about combining colors together either in the ply or the draft. This has been mentioned before in previous issues of Spin-Off and isn't a new idea, but it's worth considering when you're looking at your stash and you don't have enough of a colorway to turn into a substantial project, like a scarf or shawl. In the draft, you have even more options for crafting your yarns based on the colors you've chosen--split one colorway into many strips and keep the other colorway whole. Then spin them both together and get a fractal plied look to the single yarn. Ply with itself (2-ply, Navajo-ply), or spin a second/third yarn and ply those together. Keep this tip up your sleeve.


What if you have some bits of leftover handspun? I like to use these for tiny projects and weaving projects, but what if they're too garish to combine into one project? Roll up your sleeves and drag out an old pot--it's dyeing time! You can overdye yarns with any dye you're comfortable using, but the specific article in this issue ("Naturally Beautiful Together") uses natural dyes to unify the colors. When you overdye different yarns in the same dyebath, they all take on that shade of whatever color, giving that batch a common color. It's important to keep in mind how different colors are made so you can achieve the desired results (secondary and tertiary colors), though you can overdye multiple times to deepen the tone of your finished yarns. Each time will darken the colors, so keep that in mind too. There's plenty of quick information to get you started dyeing naturally (with tea!) in this article, so be sure to read it if you're interested!


The last article I want to touch on is "Two Threads Are Better Than One". In the past, I've used a silk single to ply with a wool single to create a fun yarn with the inherent beauty of each type of fiber. So, perhaps think about making a wool/silk (or wool/alpaca, silk/angora) yarn where they aren't blended at all except in the ply. You can still eliminate some of the negatives of different fibers by combining them together in this manner, but without needing to blend them thoroughly before spinning. This article is full of combo tips and project ideas for your finished yarns. I'll definitely keep some of these tips in the back of my mind when I'm considering what to spin next.


When your significant other/family/friend/stranger looks at your stash and remarks on its size, feel free to respond with the comment that the fibers in your stash are just waiting to be a thousand or more things--a veritable goldmine, if you will.

Thursday, June 18, 2015

Review: PLY Magazine Autumn 2014 Issue

This particular issue of PLY magazine was interesting. The theme was Community, and what that term has meant through time. When I first bought this issue, I wondered how the theme would teach me both about fibers and the fiber arts community. I mean, on the face of it, I know what community means as it relates to the spinning community or the weaving community. PLY magazines so far have been based around spinning techniques, preparation methods, and breeds, so this issue seems a bit anachronistic. But let's see how it fits into the other PLY themes thus far.


In other issues of PLY, there is usually an article some historical (or even prehistorical) connection with fiber arts. Within a community of herders, crafters, bakers, mothers, fathers, and so on; you'll have weavers, spinners, and dyers. Specifically, we want to know more about the spinning community among these ancient peoples. Spinning was a more integral and critical part of their lives than it is for us today, but their spinning circles were probably very similar to ours today. We gather, spin, chat, and help each other. We welcome and inspire new spinners. We help older spinners who may not have the strength to card their own wool anymore. In that respect, the spinning community is an ancient one, and though we may spin soy fiber and dog hair, we are very much the same community we always used to be. The article about Mesoamerican and South American spinning communities (written by Christina Pappas) delves more specifically into this idea of community.


Then there's the idea of subcommunities, living within the general category of spinning community. Shetland wool was presented because it a challenging wool to categorize, based on the terminology used, variability of the fleece itself, and the confusion of labeling in commercial products. My own personal experience with Shetland has been full of frustration (annoyance, maybe?) because I couldn't understand what Shetland was. Every time I got an explanation from one person and moved onto the next, it was like I was hearing about a different animal. Deb Robson, author of the article Shetland Wool, concisely describes the plethora of characteristics you'll encounter when you step into Shetland territory--it is very much its own community, full of those who are familiar with the language, textures, and capabilities of the wool. But the language they do speak is the same all spinners speak: if you want to know more about Shetland, their eyes will light up and they will be pleased tell you everything you need to know about Shetland wool.


One article in particular struck me personally, since the project fits within my own mission. I want to increase public awareness for spinning, dyeing, knitting, fiber arts, and wools. If anyone is willing to give me 10 minutes of their time, I will teach them how to spin. Robyn Love wrote about her project, Spindle 7, where she rode a New York train (the #7) and spun on her drop spindle. If anyone expressed interest, she would teach them to spin, and if they wanted to keep going, she would send them off with wool and spindle. There is a great diversity of languages and cultures who ride that train, and she talked about how those experiences effected her. You don't need to speak the same verbal language to teach someone to spin, since the language being spoken is that of: draft, twist, yarn.

And then there are modern communities, those of us who digitize our stashes on Ravelry, who blog our experiences in lengthy posts, who drag our friends to fiber festivals, and who drive an hour to spin with guild members in the next big city. We come together and spin for charities (like Spinzilla), we share our sports spirit when we challenge ourselves with our favorite cyclists (like during Tour de France/Fleece), or when fellow spinners are going through financial/emotional/medical hardships. Our community spans across socioeconomic barriers, gender barriers, and language barriers, With the Internet, we can have a thriving global community and share in traditional styles and techniques of other places in the world. You aren't alone. We're here, and this issue really shows that.


As far as colorwork, techniques, and patterns goes, this issue is also packed full of those things which will boost your knowledge about fibers and some ways you can use them. But if you're wondering about what our spinning community is, where it is, and how to be in it, this issue is definitely for you. My original skepticism vanished as I continued to read this issue. Sometimes we need to sit back and see what our spinning community is, how it has grown/diminished/morphed/shifted/changed, so we can be comforted by it when things don't go well, with whatever life throws at us.


If you need a community, we're here on Ravelry.

Monday, May 18, 2015

Review: PLY Magazine Summer 2014 Issue

This issue was all about twist. I don't consider twist so much when I set about to make yarn. In principle, I do consider twist, but I don't actively think about twist as a primary aspect of my yarn. I tend to make my yarn organically, meaning that I just let the fiber speak to me and spin it so it feels right. That doesn't translate well to others, so it's important that we can talk about twist objectively. That's exactly what this issue does. Since I can't reprint the whole issue here, or write a summary which does the topic justice, I will say that you ought to buy this issue if you want to make consistent yarns, no matter what fiber you're working with--especially if your fiber preparation contains a whole slew of different fiber lengths and micron count. So, I will be talking about the articles which made me think the most.


First up, we have "Intuiting Twist" by Lexi Boeger. She challenges the reader to blend up (by hand or hackle) a wide variety of fibers. Don't hold back--anything goes, so long as it falls outside of your comfort zone. As you spin, pay attention to how much twist the fiber is willing to take, then allow it to be taken up by the wheel. The uptake won't be at a consistent rate--it's dependent upon the specific lock you're spinning...and it's okay if you can't remember which lock it is! The point is to observe how much that particular length of fiber wants to take and not overdo it.


I tend to do this when I have a carded batt which is made of long sari silk bits and shorter merino bits, but this is clearly an extreme example. I've been spinning fiber hackled from bits and bobs, including bits of yarn. Here's the art roving I made (will be part of a video soon!):


The next article I found most interesting was a collection of tips from Amelia Garripoli, of Ask the Bellwether, There are some incredible little bits which you learn along your path as you dig deeper into the mechanics of spinning. These tips are gold, and are often the kind of things you learn when you talk to master spinners (whether they have a certification or not--experience is the operative idea here) about specific topics. My extra little tip to add: Don't spin a difficult fiber when you're frustrated, angry, or upset. If spinning isn't helping to calm you down and relax you, spinning while you're agitated will only result in bad yarn and many regrets.

The last article I want to touch on is "Tame Your Yarn (by setting the twist)." At some point, we get into a routine: draft, twist, ply, wrap, set, knit. But what purpose does setting have in reference to yarn? Well, this article by Stephanie Gaustad delves into the reasons for setting, as well as pointing out reasons why you might not want to set the yarn. Additionally, she talks about setting the twist for different fiber types, for protein and cellulose fibers.


Setting the twist dramatically impacts the look and feel of the yarn, but it also affects the fabric it produces (as you can see in the incredibly biased swatch above). So, though you might be locked in a routine where you set your yarn before using it, why not look for projects which would look interesting with an unset yarn (Stephanie suggests: collapsed weave scarves, hemp/flax scrubbies, or even lace projects).

I probably won't consider twist much more than I already do, but I'll add it to my process when I spin large quantities of yarn which require consistency. I am tantalized by collapsed weave projects, so now I want to make some gauzy scarves that have a lot of visual interest...this time, the interest comes from the weaving process rather than just using textured yarn.

There you have it, another great reference magazine that ought to be on your shelf. At first, I was a bit skeptical that PLY would take my heart and run away with it, but I am truly smitten with them. I come away from each issue informed and eager to try at least one new thing. If you have been a contributor to PLY, I want to thank you for helping to build such wonderful reference material which is accessible to every spinner!

Wednesday, April 8, 2015

Review: PLY Magazine Spring 2014 Issue

Back in January, I set aside time to do all of my magazine reviews so I was all caught up, but for some odd reason, I completely forgot. No, it's not my age...I think I should write down the lists for things I need to do all in one spot, instead of keeping to-do lists in a couple of different places. So, this review is about 3 months late. Forgive me! Regardless, this issue, the Silk issue, is totally worth reading, no matter when my review of it comes out.

Where to start. I always get fired up after reading one of these issues and each issue has so much content that it's difficult for me to keep my review on point. Afterall, what's the point of me re-writing the whole magazine in summarized form? I've stressed several times before how crucial it is to put lots of relevant pictures into a magazine of this type, and they surely delivered, again, in this issue about silk.


Today I learned that I don't know much about silk. Sure, I knew about it's properties, keeping you warm when it was warm, and keeping you cool when it was cool. And I know about how much silk you need to make a shiny wool blend. But I didn't know there was an anatomy to silk cocoons. But first, let's talk about from where the silk comes. It is extruded from the mouth of a silk worm, liquid in form and then extruded, solidifying as it becomes exposed to the air. And there isn't just one kind of silk worm, there are at least four kinds which are used with high demand. Bombyx, comprising the majority of the silk world, tussah, the warm champagne silk which comes in a far distant second contributor to the silk world, eri, otherwise known in India as 'poor man's silk', and muga, a dark, fantastically golden silk. Much of the silk which falls into our hands as combed top is actually the not-as-good silk leftover from silk reeling.

The first article I want to talk about is S, Z, and Why? because it addresses an issue of twist and determines whether silk has a good side, or if twist direction carries no significant impact. Why do we twist yarn in the Z direction and ply in the S direction? Well, there might be hidden reasons for spinning a fiber one direction rather than the other but we don't consider them because we're used to spinning silk only one way. PLY is about taking established notions and turning them on their head, all in the quest to uncover the 'why' of X or Y; I love that, and the scientist in me gets all giddy when they experiment with established notions. All four types of silk were spun for this experiment, where each silk type were spun in both ssZ and zzS plied yarns. ssZ is short hand for s-spun singles and plied in the Z direction. The author makes several insightful observations, and it was shown in this experiment that twist/ply direction impacts spun silk in various ways. It was a fascinating read and I plan to get some silk to try this experiment for myself after our cotton spinning challenge is over.


I just had to throw this picture of natural dyed silk into this review post. If you get the chance to do some natural dyeing, definitely make silk one of the things you dye. It's very cool to see how the different silks took up the dye colors...they're not all equal!


This next article, Science in your spin: silk under a microscope, there is some technical jargon which might be difficult for non-science readers to completely understand, but it is written for all audiences. I read it twice because I don't typically work with molecular sized artifacts. This article unpacks the differences of between the silks on the molecular level so we can understand why they're so different. The feel different, for a reason. They shine differently, for a reason. And it's all explained in this article. The coolest tidbit I got from this article is the fact that tussah silk has microscopic striations along the fiber, which is probably why it is referred to as a 'toothy' silk...and probably why I have so much more success spinning it the way I want, as opposed to mulberry (bombyx) silk. Remember when I mentioned that silk cocoons have an anatomy? Evidently, the silk thread becomes thinner as the worm spins his cocoon, so that the exterior silk is thick and weak and the interior silk is thin and strong, and the crystalline structure of the silk as it's extruded greatly impact its thickness (or in the case of bombyx silk, thinness).


The last article is one which is dear to me, because it basically told me I'm not crazy. Years ago, I made a silk/cheviot blend yarn, and you can still find it on Etsy (someone, please buy it! lol). When I was first getting started with blending my own wools, I received a lot of negativity in regards to my idea of blending a fiber like silk with a medium coarse wool like cheviot. I thought it would emphasize the best qualities of both types of fibers, yet others professed that it was a waste of silk. The article Calculating the Silken Ratio experimented with adding silk to various other fibers, in this case, wool, to determine which ratio is the best to bring out the desirable qualities of the ingredients. The wool you're bringing to the mix has its own luster and behavior, which goes into the calculation for determining how much silk to add to achieve the desired result. BFL and silk is a common blend, and you'll typically find it in an 85/15 or 80/20 BFL/silk blend ratio, because BFL is already a lustrous wool. Fine wools tend to be less lustrous due to crimp, so more silk is needed to achieve similar results. So, the next time you find yourself standing at your blending device with silk in one hand and wool in the other, give it a blend and see how it turns out.


There is so much more information in these hundred pages than I can justly review here. If I could, I would break this a 3-part review...but I can imagine that many of you are inspired enough to hunt down this copy for your resource library; and I can't blame you for it either! I have one more PLY issue on my bookshelf to review, so I'll get that done this month. I'm three issues behind the release schedule, so it's time to order some more! I can't wait until I'm a bit more settled so I can just get a subscription. Stop by my Ravelry group, Expertly Dyed Friends, to discuss this some more!

Friday, February 13, 2015

Review: Spin-Off Magazine Fall 2014 Issue

And, here we have another issue to talk about! I'm nearly caught up with the Spin-Off magazines, but then I'll need to double back and work on the PLY reviews. This issue had a few interesting articles about mechanics, but I didn't find it to be as strongly a connected theme as the last issue was. If you want to know more about the tools of the trade, and how to fix them when they don't work quite right, this issue is great for that.


The Winding Well article is superb for those who have difficulty understanding how to wind fresh yarn onto a drop spindle, building a firm and stable cop as you go. I learned the hard way; there is a clear best way to wind the yarn onto the shaft so it doesn't get loosey-goosey (or worse, the outside yarns get buried deep within the inside yarns). No matter which spindle type you use (top, bottom, support, etc.), the X wind on will make your spinning experience smooth and problem-free. Additionally, the author discusses the proper way to wind on freshly spun yarn so you neither add nor subtract twist from the yarn. It seems like a simple fact about spinning, but it often gets overlooked. Have you ever had the toilet paper on the roll suddenly start unrolling, only to stop short of completely emptying onto the ground by the glue on the cardboard roll? Right, me neither. Anyway, this picture shows what you're doing when you change the orientation of the spindle when you wind on yarn:


Several people have asked me about blending boards, and I have professed that they fill a specific niche, which lies somewhere between hand cards and drum carders. There are things you can do with a blending board which would be difficult to reproduce with the other tools. It's not just a cheaper version of a drum carder, nor is it an oversized hand card. Blending boards really shine when you want to make several rolags at once, with lots of color blocks and well-placed texture. If you want to know more about the testing process, this article offers an abridged view of all three tools in making these kind of rolags.


Ever since I began weaving, I became more interested in the weaving patterns in the Spin-Off magazines. This Autumn Leaves scarf/shawl is stunning in its simplicity, though I have to admit, I don't really understand how to make an inlay while weaving. Even after reading the instructions twice, I still don't think I comprehend. Oh well, that's why the Internet invented YouTube. Nevertheless, I think this weaving project is within my weaving skills--ie, beginner. I'm still not sure how I feel about the length (it seems a little short), but it does seem like a cuddle-worthy shawl.


In the end, I think this issue is most useful for those who are interested in tools, their use, and reuse (ie, antiques). If you're just getting started with spinning, this article may not be the best reference, though there is a great article about up-take speed and tension for those who are thinking about getting a spinning wheel. Care to share your responses to this issue? Share the discussion below or over on Facebook

Wednesday, February 4, 2015

Review: Spin-Off Summer 2014 Issue

So, I really liked this issue of Spin-Off. The theme for this issue revolves around the fibers of the world. I like learning about the history of fiber in various regions of the world, and their associated spinning/weaving/knitting traditions. We don't always have the luxury of visiting these remote locations to see the traditions spring alive, and this issue takes you on a whirlwind journey to several countries, though time as well.


Historically, my reviews contain my personal response to a subset of articles. But, since I'm writing this post after I already posted about Icelandic wool, I would like to do a little more than just a review. Now, I probably know only a little more than the average person about Vikings due to my background in the archaeology of Europe. But something I don't know about, is what remains of their legacy in Iceland. When Iceland was settled by early Vikings, they brought with them sheep and goats, among other household tools and goods. More importantly, they brought with them their fiber crafts, some of which have experienced a recent revival.


Only Icelandic sheep are allowed to live in Iceland, which means no other sheep are allowed to be imported--to wit, they're a national treasure. Iceland evokes images of a primitive, bucolic setting where sheep roam hills, living happy, healthy lives. And the result is in their fleeces! According to the authors, Marianne Guckelsberger and Robin Russo, Icelandic sheep produce the finest, heaviest fleeces if shorn in the fall. I shall add this to my list when I go hunting for a pound or two of Icelandic fleece! What's more, these sheep are the direct descendants of the original sheep brought to the island by the Vikings, more than a thousand years ago.


However, as much as the Icelandic sheep thrive, the Icelandic goats wither. Their numbers plummeted and were only recently revived, but due to their relative obscurity, their existence is in a fragile state. I like to be onboard with conserving rare breeds of sheep and goat where I can, so I was very pleased to discover that shortly after the release of this issue, an Indiegogo campaign was launched. It was well-received, and due to everyone's contributions, the herd will be safe for a while longer. That said, it is by continued exposure that breeds like these stay as close to the spotlight as possible. I gleaned more history from this article than I have from other sources. Additionally, I liked the extra story to boot.

The next article I want to share is the one regarding flax. I've been swayed by the romanticism of raising/growing my own fiber animals/plants, and flax is one I've had on my list for a few years. If you want a hobby patch of flax, this little article offers plenty to get you started. Better yet, if you want to teach your kids the great value of farming, you can grow your little patch for multi-faceted learning. Harvesting flax at the perfect moment produces a soft, pliant fiber, ready to be spun and woven into the finest of linens. Though, to get this fine cloth, you have to sacrifice the plants ability to reproduce--that is, you harvest before it can go to seed. Obviously, you can't just only grow flax for linen, since you'll quickly run out of seed. This is where the valuable learning lesson comes in: when do you decide how much to harvest to use and how much to save for future plantings. What about food? If flax is allowed to seed, it produces a coarse, rough fiber, more suitable for bags, ropes, and the like, not necessarily for clothing. Something I learned when I was young was to appreciate handmade items, having learned how to stitch and sew by the age of seven.


The purpose the authors intended was in a similar vein. They wanted to show the community all of the steps involved in making flax into linen, and the community reciprocated by helping out during certain phases. The best part of their project was the resulting public awareness.

The last thing I wanted to comment on is in regards to the forgotten spinning traditions of the Native Americans of the Southeast. We don't often hear of such traditions from this part of our nation, mainly due to poor preservation conditions (it's humid, but not the right kind of wet needed for wet preservation), the delicacies of the craft itself, and, perhaps, a milder interest than in other parts of America. Nevertheless, preservation of textiles does occur, though of impressions rather than in the actual artifact. I've mentioned this before in my discussion of warp weighted looms. It is quite fascinating to see the great variety of impressions, while also knowing that people were pressing fabric into clay in the New World and the Old World, though cultural contact between them was unlikely to have been the cause of the inspiration.


While it is interesting to me to read what other archaeologists say about textiles who are textile artists themselves, what I do not like to read is that "archaeologists ignored the textile traditions of the southeastern United States because they could not find many textiles" (Pappas, 2014: 43). It seems like such a small thing, to say that archaeologists ignore something, but I like to have the record straight: no doubt, this is one of many reasons why the textile traditions of the southeastern US are understudied. Unfortunately, these kinds of words can be poisonous to my profession, which is why I generally don't approve of tv shows which angle scientists negatively--usually, they get something wrong, and it perpetuates in the public's opinion. So, I hope that when/if you read this particular article, you keep my comments in mind. Archaeologists are just as passionate about their work as you and I are about wool and yarn. And for me, that's doubly so!


Well, I hope you enjoyed this slightly different review of a (semi) recent Spin-Off magazine. If there's anything more you would like to share, post in the comments below, or over on Facebook.

Pappas, C. (2014, Summer). Forgotten tradition: spinning prehistory in the american southwest. Spin-Off Magazine, 38(2), 42-45.

Monday, November 3, 2014

Review: Spin-Off Spring 2014 Issue

Like the Autumn 2013 issue of PLY magazine, this issue of Spin-Off features colorwork as its primary theme. It has been interesting to see how these particular issues differ, since the PLY issue seems to focus on the well-rounded approach to colorwork--blending, spinning, plying--whereas this issue seems to focus primarily on dyeing and blending to achieve a variety of colors. Both issues work very well in tandem, so if you're really interested in building your colorwork arsenal, these two issues are wonderful resources to have in your library.


Stepping into a new world, color blending can seem very daunting. I have to admit that I encountered some timidity when performing my first color experiments. I kept in mind the color rules of my high school art class...blue and red make purple, yellow and blue make green. But this is a very limiting way of experimenting with color. Luckily, I had two great resources on hand right after I started combining colors on my borrowed drum carder. I had a Munsell color chart (from my school library) which helped me identify hue, saturation, and value of my archaeological surrogate samples I made for the experiments for my master's dissertation. That color chart help me understand how to identify whether a color was bright or dark, and now I can identify the value of a color without a color chart on hand. Now, I know that most people won't have this kind of chart in their home library, but if you're very serious about understanding color, it would be worth looking for it through your local library (and probably interlibrary loan). However, it isn't necessary to have used it to understand color--but it it'll take more time and experimentation to really understand those three indicators of color: hue, saturation, and value. Hue refers to the specific color, saturation refers to the intensity, and value refers to the lightness/darkness.

The second valuable resource was a dvd I got for Christmas one year: Color Works for Spinners by Deb Menz. She's a wonderful teacher, and I love her crazy red hair. She's soft spoken, but really knows her stuff. I felt myself listening raptly as she plainly explained hue, saturation, and value, while also demonstrating it on camera. She chose a color she wanted to make, then chose appropriate mixing colors to achieve the hue, saturation, and value for the desired color. She didn't always get it right, but she talked about how to identify what a blend needs to get the right color. The Munsell color chart and Deb's instruction are what really helped me break out of the high school art class mentality regarding color (also, I'm not implying that all high school art teachers are created equal).

Yet, these magazines will send you on your way to blending and creating beautiful colors. The first article I found most salient for budding colorists was the "Never-Ending Blending" article. You start out with a set of primary colors, then blend together the two adjacent colors evenly (evenly = 50/50 blend of the two parent colors). The more you do this kind of blending, the more gradual the gradient between colors will become. For example, if you start blending yellow and red, your first color blend will be orange. If you blend yellow with orange, your second color blend will be a golden orange color. But this is when you need to break the rules of art class. You don't always have to start with the same three primary colors: yellow, red, and blue. Sure, you can get a wide range of colors, but the blending is still limited. As the author attempted, try using a different set of three primary colors. One of the experiments used the three colors of printer cartridges: yellow, cyan, and magenta. Those color blends will be otherwise impossible to make if you started out with yellow, red, and blue.


If you start out with bright colors, you'll get bright blends, and vice versa with dark colors. Experiment with adding in white or black to your blends in increments of 10% (like, 90/10, 80/20) to change the value of your color. For example, if you wanted to darken an orange, you could combine 9g of orange with 1g of black wool. If you wanted to make it very dark, you could combine 5g of orange with 5g of black. You would lighten the orange similarly by combining it with white.

These blending experiments provide an excellent setup for experimenting with making tweed yarns. Tweed can refer to the color of the yarn and it can also refer to the texture of the yarn. For example, tweed the color is made by completely blending together several colors to get one, semi-homogenous color. This yarn would appear to be one color from a distance, but many colors upon closer examination. Tweed the texture is made by adding small noils into the fiber mixture, sometimes in a variety of colors, then spinning it into yarn. This will give the yarn a nubbly appearance. The article "Blending and Spinning Tweed Yarns" introduced me to the proper names for these two types of tweeds: Harris tweed refers to tweed the color, and Donegal tweed refers to tweed the texture (as well as color). Adding the principles behind preparing tweed batts will enhance your colorwork overall, and is a nice way to help mix and match different batts together.


Finally, the article I found very useful for natural dyeing was the article called "Making Dyestock Solutions from Natural Dyes." In a nutshell, it tells you what you need to know to figure out a formula for standardizing your dyestock--which might be challenging given that the extraction of color from natural dye sources can produce a variable yield. With all natural dyes, you won't get 100% consistency from batch to batch. But you can come close. If you keep notes about your dye stock and the depth of shade (DOS) for various saturations, you will produce similar results from batch to batch. As with the above articles on color blending, you can mix and match your naturally dyed fiber to create new colors, and blend them with professionally dyed wool to stretch your naturally dyed colors.


After reading the PLY issue on colorwork, I didn't think I would gain much from reading this issue of Spin-Off. Given their very different approaches on the same theme, I'm happy to have both of these issues in my library. The last thing I need is a shelf full of duplicates.

I hope you enjoyed this review; more reviews will be coming later. I can't do justice to these magazines, so if you find the things I talk about in this review interesting, get your hands on a copy. Hop over to Facebook if you want to share your own personal thoughts about colorwork and your experiences.

Monday, October 13, 2014

Review: PLY Magazine Winter 2013 Issue, Part 1

I'm really excited to share my thoughts on this issue of PLY Magazine. Normally I would have had this review written up already, but this particular issue, the Woolen issue, has greatly impacted my views of the longdraw method. Since I have lots to say, I'm going to break this review into two posts. The first post will review a selection of the individual articles, and the second post will review my personal experience working through the tutorials presented in this issue. As many of you know by now, I have been unable to spin longdraw successfully, aside from small samples, but more on that later.

The article True woolen talks about what constitutes a woolen yarn. I think that once beginners understand spinning and get their feet wet with the terminology, they encounter the terms worsted and woolen. I understood the general sense of a 'woolen' yarn, and I could describe it, but I didn't exactly understand what a woolen yarn was. This article elucidates what a woolen yarn is, how to make them, what their strengths are, and which fibers are best suited for this type of spinning. The entire winter 2013 issue discusses the various aspects of woolen spinning, but this particular article provides the best overall picture of what makes a woolen yarn, a woolen yarn.


Woolen spinning isn't just for those with spinning wheels either. I've been asked how to spin a woolen yarn with a drop spindle in the past, and I only had vague idea of how it worked. This lovely article by Amelia Garropoli, from AsktheBellweather, talks about a leapfrog method of spinning a woolen yarn, using a strumming motion to control twist. It's a slightly different method for spinning than with a wheel, so the skills aren't as directly transferable as with other methods of spinning (like worsted spinning, for example). I haven't given this method a try yet, since my spindle still has cashmere yarn on it, but it is on my list of things to learn. There are lots of fantastic pictures to illustrate certain points along the tutorial, which is nice for us visual learners.


Color changes the look of a yarn, and the way in which you spin a set of colors can dramatically change the impact of the yarn. There are two articles in this issue which discuss batts/rolags and shows examples of the different ways you can draft and spin a single colorway. I've already talked a little about how to play with colors to get a more interesting yarn in this tutorial. For those of you who are still a little timid combining colors together, this is a fantastic set of experiments to get bold and step outside the box. For me, this introduced a new way of making striped batts which is easier than what I have been doing in the past. I think you'll be seeing more striped batts in the Etsy shop soon!


For anyone seeking to learn more about woolen yarns, which is presented in a logical manner, this issue is for you. I've read lots of blogs and watched lots of videos regarding the longdraw method of spinning, but nothing seemed to click until now. I'll talk more about what clicked for me in my next post.

Again, these magazines provide a wealth of information which I can't entirely comment on here. After each issue I read, I feel fulfilled and enlightened. PLY Magazine balances on the edge between entertaining and informative. Well done. :)

Tuesday, June 17, 2014

Review: PLY Magazine Autumn 2013 Issue

I think I may be in love with these magazines. Seriously. I did an initial impression review a little while ago, and now that I've had time to sit down and read from cover-to-cover, I'm ready to spew forth some thoughts. If you haven't read that initial review, head over and read it now to get some context. I'll be making references to it in this review.


This issue features colorwork as its main topic. I know that other fibery magazines will have a primary theme to each issue, but it never feels like a salient topic in those magazines. I think it has something to do with the ad coverage, thus subduing the importance of the topic slightly. I'm going to hit on this idea when I review the Spring 2014 issue of Spin-Off.

Colorwork is a fantastic topic to delve into, since many beginners ask me the question: How do I spin this dyed combed top/batt? Well, on the one hand, that's easy. On the other, it's complicated. Of course, the easiest way to spin either of those fiber preparations is to pull the fiber into long strips and get spinning. But they don't all really mean to ask me how to spin these fibers; they are asking me how to spin them with color in mind. That's where handspinners set themselves far, far apart from commercial products--you just can't get our kind of creativity mechanically. This is the slump where some beginners find themselves. They want to play around with colors in the way that commercial spinning mills can't, but they are daunted by the incredible meshing of colors masterful spinners can make. Really, there needs to be a teaching aid, some kind of middle ground.

I post on this blog what I can for those spinners who want to challenge themselves with color, but I'm only one person with only my expertise. This Color issue from PLY is the perfect option for those seeking to explore the specific ways to exploit color in yarn. They have a large group of spinners from which to pull various levels of expertise, and everything PLY covers in this issue weaves colorwork into the process. For example, the first article of the magazine covers chain plying to lock in your color changes. It covers the pros/cons of chain plying, how to do it, some tips, and it even has pictures comparing the colorwork of a 2-ply, 3-ply, and chain ply. In fact, there are several pictures in this article which show the reader the various stages of the chain plying process. The combination of (several) pictures and clear text should be enough to take any beginner down the path to chain plying. Better yet, it shows the beginner how you can blend colorwork together with technique--by chain plying, you are in complete control of keeping the colors of a gradient dyed top lined up.


All of the articles in this issue (and in the Winter issue I have as well!) connect with the topic. Some are more prevalent than others, such as color blending and fractal plying, but there is enough connection in order to refer to this entire issue as 'the color issue.' If you're specifically looking for new ways to combine color and preparation and technique, buy this issue. For those who are building a reference shelf, buy this issue. In fact, any spinner who has ever spun anything colorful should have this issue on hand. As a masterful spinner myself, I have learned many things in this issue.

Want to hear a little more? Okay. I'm ready to admit that I fall into spinning traps. You know, the kind of 'home base' traps you revert to when you're tired, trying a thinner/thicker yarn than you feel comfortable with, or when you aren't trying to be too creative with the yarn you're making. My first several yarns were all constructed the same way. Split, draft, spin, repeat. It didn't matter what I spun, either. Early on in my spinning education, I learned how to make drum carded batts. I split, drafted, and spun those in the same way I spun top. This is a classic spinning trap because it was the first way I learned how to spin, and soon it became the only way I thought you could prep fiber for spinning. Many beginners fall into this kind of trap. But it's okay. There's a way out, and you can skip the infinite loop with the PLY article written by Jacey Boggs, Spinning Across the Top: Beyond Stripping.


Keep your hands loose, and your fiber fluffy. As you spin, the fiber will pull off in a left to right/right to left direction. If you've ever bought a gradient dyed braid (where the colors transition from, let's say from green to blue) and wondered how to keep the transitions the same as they are in the braid, spinning across the top makes the perfect technique to use. There are a plethora of pictures showing you the various steps of the back-and-forth technique, as well as plenty of tips and stories to read.

Here's an example of some of the science and research they do for some of their articles.
Here's an example of an advertisement embedded cleverly into a tips/tricks article.
There you have it, the Color issue of PLY in a nutshell. It has been an enlightening experience for me. I'll do more reviews for PLY in the future, and I'll also do reviews for Spin-Off and fibery books I encounter along the way. I still have to read a few books to read before I review those, but they'll make their way here too! :)

Tuesday, April 29, 2014

Unofficial Harry Potter Knits Review: Dragon's Egg Socks

I can't remember exactly when I technically began this project, but I can tell you that it took me roughly 3ish months to finally get the yarn spun for this project. As many of you know, I'm usually a busy person, so getting 500+ yards of a 2-ply lace weight yarn finished in a timely manner isn't feasible. But it's done. You can read about my troubles getting the gauge correct here.

I had been dreaming of these socks for a while, basically since I first saw them in July 2013 while visiting the States. I usually tend to buy knitting magazines when I know that I'll make at least 10-15% of the projects. That brings the price per pattern into the 'reasonable' range. The Unofficial Harry Potter Knits magazine contained about 6-7 projects I really wanted to work on, which came down to about 40% of the patterns in the magazine. The Dragon Egg socks probably would have been my first project if I already had the right yarn and yardage. It turned out to be my second project from this magazine (the Gray Lady cloak being my first), but I'll talk about that other project later. I'm warming up to it.

First, I'll say that what really got me interested in these socks was the fact that they were unisex. I may look very girly, but I'm not super big into girly things like lace (let's not talk about the lace cloak). The pattern had texture and interesting combinations of stitch patterns, but they weren't overtly feminine--a good thing in a unisex sock! The stitches also seemed like they would hold up to my kind of wear and tear. The directions were easy to follow, the stitches themselves weren't anything new, and it seemed like this was a great pattern to use to break away from the standard stockinette stitch or ribbed socks. And I was right.


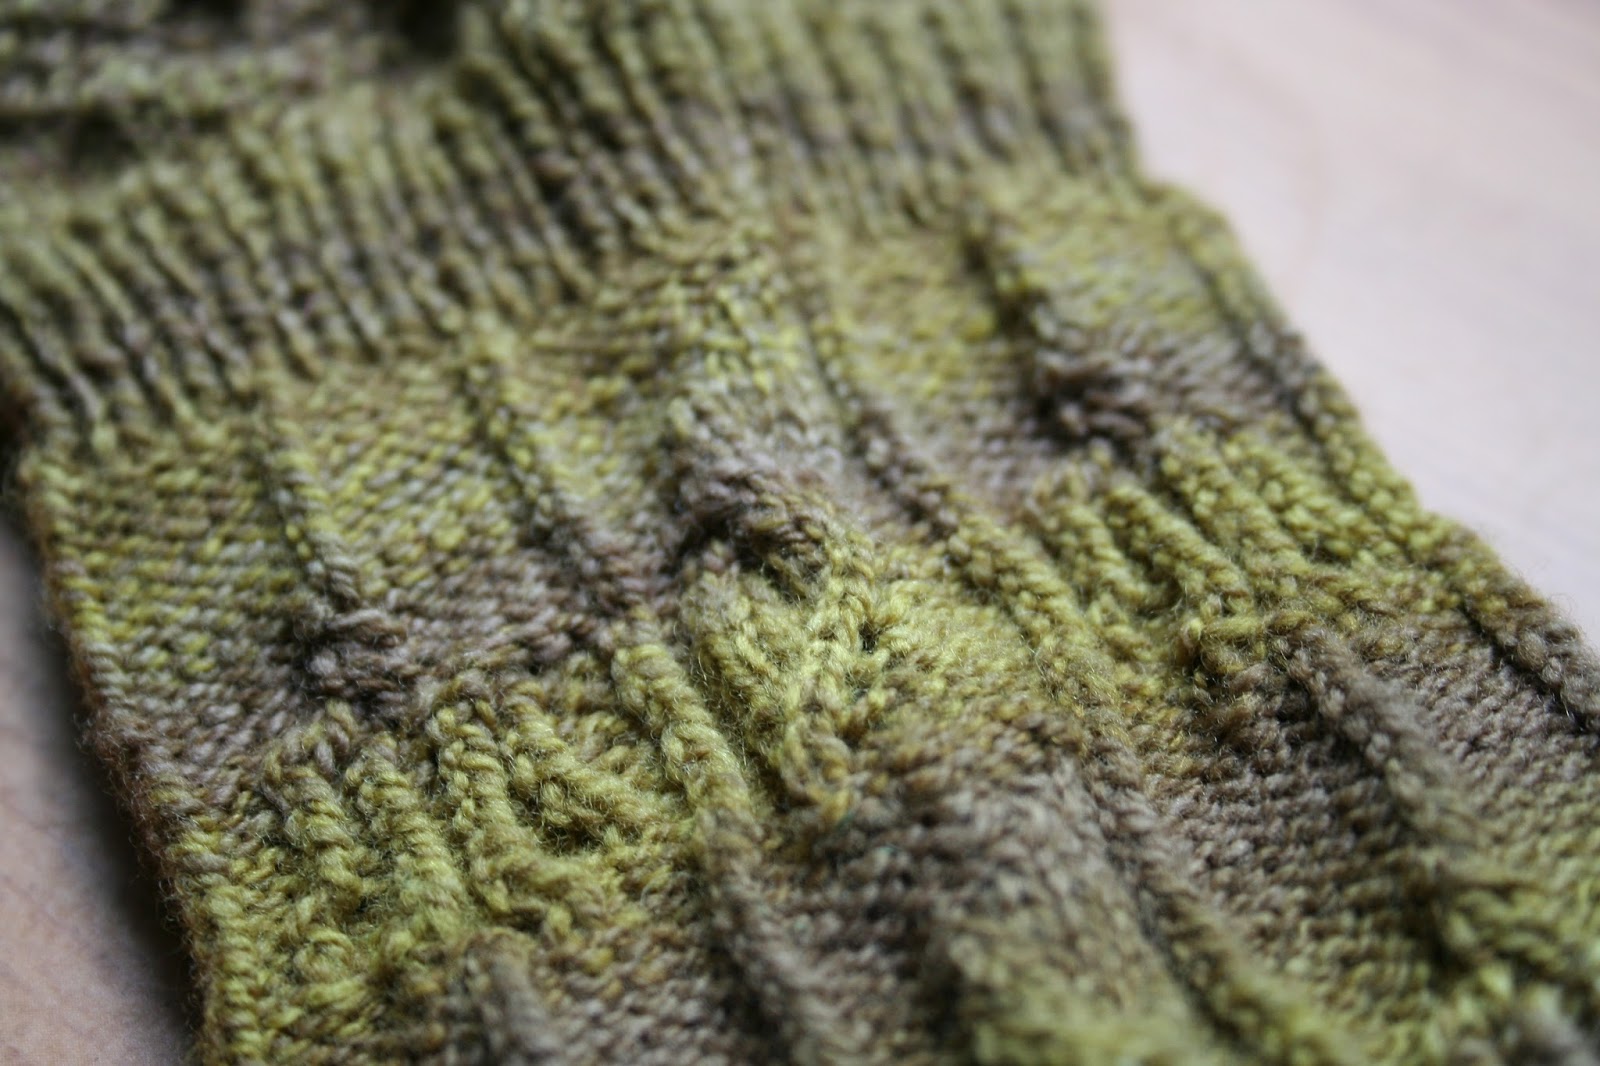
Now, let's talk about bobbles. Apparently, not all bobbles look good with certain yarn/needle combos. My bobbles look funny. I've understood the concept of how to make bobbles for a while now, but this was actually the first time I have made bobbles. I'm not really a fan of them. In fact, in combination with the first chart, the dragon's egg chart, I think they look awful. I almost wish I could just knit my second sock without the dragon's egg chart. The sock bulges at that point and makes the sock look strange. I know I haven't blocked it yet, but I can't imagine it will smooth out too much...but wool can be amazing. We'll see after they're both washed and blocked.


The heel is probably one of my favorite sections of this sock. That's boring, I know. It's a slip stitch heel so it's more durable that a stockinette heel, and because of the slipping of stitches, it has less elasticity than a ribbed heel. I'm convinced that I won't have droopy heel syndrome with these socks, and I'm fairly certain that these heels will last forever. I'm still that obnoxious kid who never unties her shoes before taking them off; a durable heel is key for me.


Last, let's focus on the top-side (Quidditch) pattern after the heel is finished. Remember how I said these are unisex socks? Well, it would probably be better to call these 'socks for the average male foot and for the above average female foot.' Okay, so it also gives the dimensions in the pattern. For the smallest size (ie, the woman's size), knit the Quidditch pattern until the sole length measures 8 inches, or 2 inches smaller than the actual size of the foot. I don't have very large feet (in fact they've shrunk after so much martial arts training and long distance running), so my sock needs to be at 7 inches by the time I begin the decreases for the toe shaping. The Quidditch pattern is (in)conveniently 2 inches long for the whole repeat. Well, poo. My short foot means that I'll have to cut the Quidditch pattern short and in an awkward spot. In the end, I decided to just start knitting the whole rest of the foot in stockinette and decrease when it got to 7 inches. The model has a nice finish where the pattern transitions into toe, but mine has this strange extra bit of nothingness. I guess it looks okay, but now I doubt my decision to just stop the pattern. Perhaps I could have made up something? I'll think about that if I make these again.


Overall, I really liked this pattern. I was never confused for a moment during any of the written or charted instructions. I've made only a couple of pairs of socks, so I'd say that this could easily be a great sock pattern for anyone in my boat. However, I would change a couple of things. I would definitely make these socks again without the dragon egg chart, but I would also add another repeat of the Quidditch chart to keep it at the longer length. I would also devise a truncated version of the Quidditch chart for the last repeat near the toe...perhaps I'd make mini broomsticks or mini snitches. Or something less intricate.


Now, before you tell me I should make both socks and wash/block them before I write a review, I wanted to say that this is the point which makes or breaks a pair of socks. I want to make the second one, but I have serious doubts about my first sock. It looks nice when I try the sock on, but will the dragon egg chart get saggy on my calf? Now is the time to make decisions about whether to make the second one and see how well it turns out after washing and blocking, or to take the first one apart and start over with something you might like better. I'm hesitant, but I'm confident that wool keeps it's shape well while being worn all day. I'm going to make sock #2 just like sock #1. And if I don't like how they wear after actually putting some mileage on them, I'll ask the internet how to remove the cast on edge of a sock and replace it with something else. Because I thought of it, it must exist, right? That's the law of internet information.