Friday, December 6, 2024

Autistic Crafting

In the last few years, I have been reading and researching autism. It started out simple. I wondered why my partner struggled to stay focused long enough to complete a full load of dishes when I asked. Why was it a hassle? I dove into the research on ADHD and learned that neurodivergence can make easy chores, like washing dishes, feel world-ending. It was a lot to adapt to at first, but nearly 3 years later, the dishes just get done now. Then a friend asked me whether I had considered myself autistic. Well, no, considering that this was the first time it had occurred to me to think about it. I didn’t have any developmental delays or any other stereotypical signs. And then I was handed a list of testimonials and asked whether I related to any of them. As it turns out, I related to the majority of them.

handspun hand woven blue texel wool yarn

I have already spoken about this on my Patreon page, so please head there if you’d like to read it in full. I felt like the only way to solve some of my life problems was to understand what autism actually is (and not my un-researched perception of it), decide whether I thought I was autistic, and what I might do about it if so. After a year of fairly intense research, looking at medical reviews of autism in adult women, testimonials, and just reflecting on frustrating interactions I had had in my life and feeling massively misunderstood, I accepted that I was probably autistic. In April 2023, I began implementing strategies to listen to my body and assess how different experiences manifested certain symptoms: extreme fatigue, weight gain, muscle and joint inflammation, anxiety, and brain fog.

After a full year of understanding myself as autistic, I can say that I have no doubt that this is the label that describes me best. I am not diagnosed but my 3 years of research is sufficient for me to say that I would receive a positive diagnosis with a professional. I would like to get diagnosed officially, but the NHS wait times are on the order of 9 months to several years and private options are pricey. Until then, I will continue living my life as an autistic person.

handspun blue texel wool


I have titled this blog entry as ‘Autistic Crafting’ for a specific reason. You may have heard me casually mention the difficulty I sometimes have when trying to make slubby art yarns. My main preference for yarns is that they’re spun consistently. I’ve been told to try spinning with my non-dominant hand (which is a fantastic idea!) so I’m a bit more loose and less controlling of the final result. However, this is something that is natural to me. In a world of chaos, autistic people tend to prefer being able to control their environment where possible. My personal obsession for perfectly even yarns likely stems from my need to form structure and order from chaos. It is how I meditate. I can spin endless miles of plain white wool into a fine yarn and be happy. I can do it while listening to the chaos around me, so long as I can make the perfect yarn.

My repeatable hand dyed yarns are another example of how autism comes into my crafting. I love the idea of randomly dyed yarn, but I can’t bring myself to just…jump into it. Even at the very start, in 2010, I had to exert total control over my dyeing method in order to feel confident that my art could be consistent. My recipes and method of dyeing are the scientific backbone of my business, but equally, it satisfies my autistic need for control over the results. And the artistry created in the resulting hand dyed yarn, well, that’s the anticipated chaos that drew me into hand dyeing yarn in the first place. I have always said I use Science to create Art, hence the brand Expertly Dyed: Art by Science. I feel a bit like I’ve come full circle in understanding myself as a crafter. My brain has been providing subtle hints over the years, but it’s only now clicked.

I could go on, and I probably will comment on autism in crafting in future updates, but for now, consider this an interesting twist to resuming blogging after 2 whole years.

Monday, April 13, 2020

Handwoven Cotton Tea Towels

I have decided that handwoven tea towels is my new favorite thing to weave. If you have dipped your toe into weaving projects, you’ve probably made a few scarves—but have you tried making towels? Tea towels are easy to come by at stores, but a good one that’s absorbent and looks nice might set you back $10. Cotton yarn is relatively cheap and available in a variety of colors (sure, perhaps not in as many colors as we find for wool/silk) and you might be able to make two towels for the same price. The selling feature isn’t the cheap price; I think it resides in the wonderful material qualities of a handwoven towel.


I made two tea towels for about $10 when I was at a weaving workshop at the guild back in late 2017. We followed a series of exercises devised by our teacher, Wendy, to explore the ways we can alternate colors to create interesting patterns. As many of you know, I struggle with anything intricate (eg, lace, colorwork) or requires me to me to be random. Having a method to follow in a sequence (pattern block A, pattern block B…) was great and my towels don’t look too boring. Note: if you want the pattern exercises I followed to make your own sample towels, let me know and I can see about getting permission to publish them.

Aside from the simplicity of the pattern and ease of weaving in tabby, they have held up very well. At first, I was skeptical that they’d last and I did treat them differently as compared to my store-bought towels. After a few months and a few washes, I stopped caring because they held up very well! Two and a half years later, they still look great despite a few spots where the yarns are starting to fray. The fringe, which I was certain would start to fall apart after a few washes, has held together very well too. Overall, I am very please with the result and I hope that I have inspired others to pursue making handwoven tea towels.


Tuesday, March 3, 2020

Long-handled combs

I will be cross-posting to Blogger from my main website for those of you who still have my RSS feed!

Have you ever read a description of something and wondered, “Is that really how they worked?” Curiosity really intrigued me when I began researching the so-called ‘weaving’ combs for my thesis project. They have been a consistent feature in the British Iron Age textile tool assemblage. When I first embarked on my PhD project, I was mainly focused on loomweights and spindle whorls because, as a maker, I was fairly confident that these tools were part of the textile production sequence. But these combs seemed a bit of out place with warp-weighted loom technology. Though I had my doubts regarding their utility, I placed them out of mind until I had made headway on my overall research project. I focused on building up my database of textile tools and gauging how much data I would need to adequately work on the project. I also worked on experiments to begin satisfying my need to understand the physicality of the tools. After the conclusion of my first year researching, I felt it was time to take a look at the combs.


A long-handled comb from Danebury hillfort, UK. This comb has been burned.
Year 2 could be characterized as the year I spent trying to figure out the purpose of these tools by considering the history of their research. Conducting a ‘literature review’ (ie, you read what others have said about some topic and you write about it in an abbreviated essay/chapter) is a fairly recent requirement for research projects these days but I had never felt the true value of such an endeavor until I started reading what others had said about long-handled combs. After seeing the combs in person and examining them under a microscope, I was hooked. I had to learn more and I had to determine a sensible way to examine their functional attributes, beyond their decoration.

Year 3 could be understood as the year of advancing boundaries and seriously critiquing what we know about all the textile tools (loomweights, spindle whorls, long-handled combs, and needles). After a second viewing of these textile tools, I wrote four extensive chapters on the textile tools and still I was unsure what to do about these combs. In a twist, I was able to see them again for a third time. It’s amazing what an extensive literature review and the gestation of thoughts can do for a scholar trying to figure out how to figure something out. I’d like to consider myself an archaeological engineer in a sense because I am presented with something which has an unknown purpose and I’ve been asked to uncover its function. Using applied methods, engineers can take a prototype and create a working version; experimental archaeology affords archaeology a similar option.

Of course, experimentation is always problematic in archaeology because we deal with many unknowns, including how societies interpreted this technology and how they utilized it. Academic research is very slow, but I am beginning to realize that it needs to be slow. Just like how my craft knowledge took several years to develop, my sense of understanding archaeological problems takes time. If you look at my conference and publishing record, I have committed the majority of my research time to long-handled combs and explaining the issues surrounding their interpretation. Keeping my discussion of these combs in balance to the other textile tools I study has sometimes been very hard because I am adamant about not privileging one tool type over the others.

Studying the archaeological record and seeking out the voices, gestures, and intentions captured within each object fuels my need to research. I will keep an open mind as I go.

Saturday, November 23, 2019

Experimental Archaeology and Textile Studies: Part 3

Here's what I did. I made a 16 thread tablet woven starting border. I made 144 warp threads. I cut one end of the warp thread loops to create 72 long threads. I took my needle and threaded each warp thread into the band individually. I sewed this long strip of warp threads onto my loom beam, then carefully separated the warps into front and back threads. 72 in the front, 72 in the back. I tied a loomweight to each bundle, resulting in two loomweights with 72 threads each. 

This was a clunky solution to the problem. I had to deal with an issue I hadn't considered, but now that it was a potential problem I needed to think about for the Stage 2 of the experiment, I had a chance to form a contingency plan for it. The important point here is that I still managed to arrive at the proper setup I required and everything was ready for heddling and weaving. 

Here's where experimental archaeology in academia is very tedious and tiring. If this parameter had been an essential variable, I would not be able to devise such a solution. If I was working with a scrap of textile that had this warp density and a tablet woven starting band, I would not be justified in 'faking' it. As it stands for this experiment, however, it gave me an excellent question to ask senior textile studies researchers what they thought but didn't otherwise impede my progress or time tabling.

The actual weaving process for the Stage 1 pre-experiment went very smoothly. The sample was about 6cm wide and about a meter long. And it looked like a linen seat belt. Lol. Maybe that idea is worth exploring later when the automobile industry looks into more sustainable construction materials for their electric cars... I used a wooden weaving sword to push the weft into place, but archaeologically, there is no evidence for this at my case study sites.  How did an Iron Age weaver push the weft into place? Is a tool even needed? Can an iron/bronze weaving sword do the job? Again, it's something to consider with future research because in this case, it does impact the cloth I was making. 

I finished the strip after a week of weaving 'in my spare time', cut it off the loom, and marveled at what I did. Here are some thoughts I had:


  1. Is the heaviness of a loomweight important to consider by itself, or is it more important to consider how mass is distributed across the thickness more important? At the start of this experiment, it was generally understood that heavy loomweights = coarse fabrics, but a 0.7mm thread is about a fingering weight yarn.
  2. If you can weave with heavy loomweights and linen threads, what happens if you use wool? Wool, as many of you know, is far more elastic than linen.
  3. What is the upper bound of tension that a linen thread can handle which considers its gauge. In other words, how much tension can a 0.7mm linen single handle before it breaks?
  4. How might people have use this very dense cloth? It turned out warp faced, but is that a desirable outcome for an Iron Age population?
And I had more thoughts afterwards too, but these were the ones that seemed most interesting to pursue for now. Because the Stage 1 experiment did what it needed to do to convince me that I had worked out the potential bugs, I could do some creative things with the finished piece. I washed some pieces and left others unwashed. I experimented with different hemming principles and finishing techniques. Here are those results:

This is the finished piece that was folded on itself to show how rigid and dense the cloth was.

Here is a close up of the finished weaving to illustrate how dense the warps are. You can barely see the wefts!


This is a steromicroscopic image (apologies for the quality) of one woven sample that was washed. Note how the yarns have flattened out slightly
This is another steromicroscopic image of the sample where I smoothed the surface with a polished stone. It is more flattened than the above washed sample and the resulting fabric is very soft to the touch.


On this sample, I smeared a stick of beeswax over the surface after the cloth was washed. I thought about how someone might try to waterproof a cloth after it was woven. This is one way to do that, another way might be to dip the cloth in hot beeswax and allow it to dry flat. Anyway, it has a very strange surface, like touching a candle!

I'm sure by now that you probably want more details about the experiment. I'm writing up the parameters of my experiment and the reasons why in more detail, along with the insights this experiment garnered, to be put into a publishable format for a journal (still deciding where to send it). So many nuanced decisions were made during this process and it does convey the complexity involved in textile production--no surprise there, but it does make it difficult to maintain transparency in my methods without having to write an entire book that describes my reasoning to the fullest extent possible. 

I have presented a 'lite' version of this experiment (Stage 2, actually) while I was in Edinburgh at the end of October and got some great feedback, including positive words from Susanna Harris (who helped examine the Must Farm textiles). I've also submitted an abstract to a student conference for experimental archaeology scheduled for March 2020 in Sheffield. I'm hoping that with all the feedback from these sources, I'll get the paper written and submitted to a journal by summer next year. I'm thinking of EXARC as my first choice, but I'm open to other options too.

That itself is another point to make. Publishing the results of experimental work in academia can be very time consuming as well. It could be a full year or so from the time I started the experiment until it is published, if I'm lucky. And here I am publishing some of the details on my blog inside of two months. Also, some of you may recall that I have talked about loomweights and warp-weighted experiments in the past. I did! I have a blog (Part 0, Part 1, Part 2, Part 3, Part 4, Part 5) and video post about it as well. Check those out to see how far I have come with my research and experimental pursuits. I say some wrong things but getting access to academic material was very hard for me in those days.


I'll post more updates about the progress of this project as I make new videos and write up more about the Stage 2 of the experiments. Let me know what you guys thought about this content and whether you thought it was too long/short, too detailed/too vague. Thanks for reading!

Experimental Archaeology and Textile Studies: Part 2

With all the parameters outlined for the experiment design and the research question formatted to be a suitable hypothesis for the experiment, now came the hard part: how does it all 'work' together? Within every experiment, there are several small decisions made as part of this process. For all the preparation made prior to beginning, there will inevitably be contingencies you did not entirely account for.

For example, I decided to begin the warping process by making a tablet woven starting band, performed in the manner as seen by the Lapp weavers from Norway (Hoffman, 1974). To produce their wadmal and grene, they often wove a starting band while simultaneously integrating the warp. Not all weavers that Hoffman studied performed this method, but it does have archaeological presence in other parts of Europe. 


You can see in this photo how dense I needed the warp to be. The starting band also struggled to cope with the heaviness of the loomweight, but this is not a reflection on the experiment, just an issue with how to attach the warp to the loom.

I planned for as many of the possible contingencies I could think of that might go wrong. So, I made sure I had plenty of time to warp. I also had my assorted tools, including scissors, a needle, and my cup of water (for drinking!). I measured my warping pegs on my Kromski Harp loom (32") to confirm that I would get the correct length for my warp (side note: I have no idea how Iron Age people dealt with their warping problems, but this works for the experiment). My tablets (made of thick cardstock) were threaded with the same linen and stretched between two warping pegs. Then I began weaving and warping. After about 10 warps (or five times around the setup), I quickly realized that I wasn't going to achieve the correct density of warp threads I needed. Not even by a long shot!

I had a contingency for which I had no plan. I ended up unweaving everything, calling in my partner to help me (how much 'help' did any individual receive during Iron Age textile production?!), crying, and feeling hopeless. I was time pressed and didn't know how smoothly the rest of the experiment would go if I was already waylaid early on in the process. But, you adapt to adversity. I decided that no matter how I set up the tablet band, the way the cards turn prevents you from achieving a dense weaving setup. How can I get the density I wanted and also get the warp threads onto the loom? 

Let me back up to describe what I wanted the setup to be for the warp tension. After deciding on the loomweight shape and mass, and the spindle and spun yarn I needed, I had to calculate the warp tension for the setup. To keep the tension per thread no higher than 30g per thread, I determined that this would result in 72 threads per loomweight, or 144 threads for the woven fabric (tabby weave setup). This warp tension of 30g was determined by the Center for Textile Research (CTR) experiments to be a suitable upper limit for optimal weaving with wool. Why 72? The CTR experiments also determined that the starting width of your setup should be approximately equal to the total width of your loomweights (again, for optimal weaving). For a 2kg loomweight and a goal of 30g of tension per thread, that meant 72 threads (of about 0.9mm maximum gauge) would be ideal. This is tricky because there's a point where you can't get the warp threads so close that they either overlap or their fiber halo (more prominent in wool threads than in linen threads) causes them to stick and abrade as weaving commences. I spun a yarn that was about 0.7mm and bought a yarn that was similar in gauge (0.6-0.8mm). 


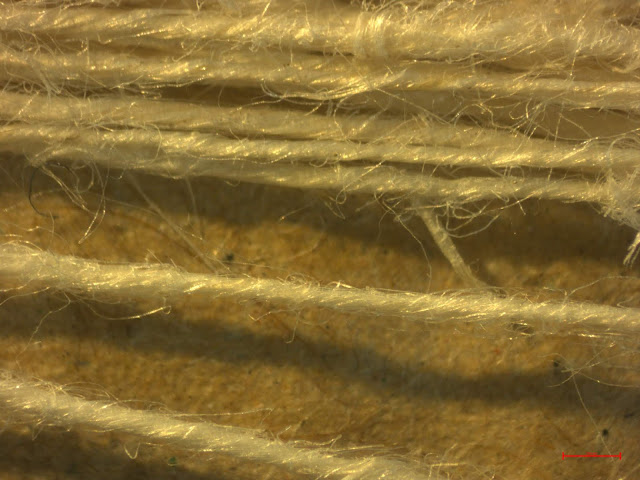
Here is my handspun linen that I used as a test. I photographed this with a camera mounted onto a stereomicroscope. (That's why it is a little fuzzy)

I decided that it would be good to start the experiment at this known upper limit when testing the linen because I could more easily link this back to wool and the other experiments conducted previously. But I was still stuck at this point where I needed to have a dense warp setup and didn't know how else to get the experiment going. I did the next best thing, which was 'fake' it. And I know that sounds a bit unscientific, but this particular problem was unimportant for the main question I was looking at since a starting band was not the focus. I had assumed that I should start with a tablet woven border, but there is no archaeological evidence for this in my case study sites. By removing this assumption, I could deal with the problem of getting the correct warp density I needed. 

Continued in Part 3!

Experimental Archaeology and Textile Studies: Part 1

This post is part of a series and I'm breaking it into sections for easier reading. If you have questions about a specific aspect, it'll also be easier to spot the information you want to know more about in a comment.

First, there are some important differences between the way I do experiments for Expertly Dyed and the way I must do experiments in academia. I'll get into the reasons why in a later episode and will post a video/blog explaining those differences specifically.

For now, I wanted to share Phase 1 of a two phase experiment I conducted during late August and part of September this year. Normally when I setup an experiment for Expertly Dyed, I apply a lot of craft knowledge and intuition and do a fair amount of 'let's see if this works'. I think many fellow crafters (of any sort, not just those who like textiles) will agree that this is often a legitimate way of exploring a craft. In fact, it is also a way that we explore the world as infants. We do this casually as we create recipes while standing at the stove and when we reach for the garlic granules, on a whim, we might substitute onion granules to see what that's like. We do these things naturally and implicitly and rarely do we ever consider our actions in a meta sort of way. 

Experimental archaeology in academia is not done this way. It has to be very well researched and there needs to be a lot of setup before you begin, or else you wind up digging yourself into a hole without a ladder and an imminent flood quickly approaches. Variables must be isolated and controlled so you can ensure that you can investigate the relationship between your independent and dependent variables. So, in my Phase 1, I produced a very skinny strip of linen fabric using heavy loomweights on my supervisor's warp-weighted loom. It is seemingly a silly step from a crafter's perspective because it seems completely irrelevant to your overarching goal, which is simply to weave something. I know that weavers will do tests to check their setup before they embark on a large project, just the same as a knitter will check their gauge before knitting a pattern that relies on fit. 

However, the nature of my experiments (which I will describe in a continuation of this series) required that I test my experiment parameters before I actually began the experiment. It was designed to be overly cautious because I did not have the luxury of time and I had my finances to consider as part of the experimental design. I used the case study sites that I’m researching as part of my PhD, which are Danebury and the Environs Sites. I selected these sites because they were all excavated by the same principle investigator (Barry Cunliffe) and well archived, and they could give me a sense of the ways textile tools were used and treated upon deposition within a small bounded landscape.

Here are a few considerations that I made for the initial design:

1.     I wanted to use the heavier loomweights from my dataset, which hovered around the 2000g mark. I am not aware of any published experiments where loomweights of this magnitude are used; many non-textile scholars have questioned whether such heavy loomweights could perform as such. Further, I opted to use a clay weight as my model since I had access to air dry clay, a suitable proxy, rather than chalk (which is the predominant material use for Danebury loomweights). I modelled the shape to be triangular, in part because this shape has been contested as whether it was suitable as a loomweight or as oven architecture. To be brief, clay triangular weights at the Danebury sites are sometimes found associated with collapsed ovens, leading to the contestation that they were originally used as loomweights. In reality, these objects (and other textile tools) are found in a variety of contexts so it isn't a very clear distinction. A previous proof-of-concept experiment I conducted at the start of 2018 suggested their utility on the warp-weighted loom. Taking this idea further, I reasoned that it would be appropriate to use this shape on the loom to determine its suitability for this function.
2.     As quick as it may be to spin yarn with a wheel, it is not as fast to spin with a spindle—at least for me. Because spinning wheels are a more modern invention, I had to use more simple methods. Instead of spinning a thousand yards or more of yarn with a spindle, I opted to use another proxy. My lovely Golding ring spindle is approximately the same size, shape, and mass as a Danebury spindle whorl. Then came the question of material choice. I settled on flax for two reasons: 1) it hasn’t been investigated as a fiber source for Iron Age Britain—because wool is often the only fiber sufficiently discussed for textile use during this period—and was likely still important in select cases during the Iron Age; and 2) it can tolerate approximately double the amount of tension that wool can support before breaking—this is important if I’m investigating new territory with heavy loomweights. So I spent about 15 hours spinning flax with my proxy spindle. I found a comparable unbleached, wet spun flax yarn of similar gauge online and used that as my test yarn.
3.     It is uncertain whether a long-handled comb was used during the process of weaving, and we have next-to-no evidence of a weaving sword during this time. However, any weaver will tell you that you need some way of packing the weft. For my Stage 1, I only used a weaving sword to pack the weft, but I did commission an antler comb that was modeled from a Danebury example for the Stage 2 experiment.
4.     Needles, again, are a complicated matter. Needles can be used for a variety of tasks and there is no clear evidence of their use at Danebury for textile production. Some look like they would be great for sewing or darning, while others are certainly not. I did use a steel needle that was of a similar length and width (a typical darning needle) to attach the warp threads to the loom and for experimenting with hemming techniques.

Here is one of the air dried clay loomweights that I modeled from an Iron Age equivalent.

With that, I had my basic setup for the Stage 1 part of my experiment. I am gliding over some of the reasons I chose what I did and why I think my decisions are valid for the point of my experiment, which is this: Can flax yarns spun with Danebury spindles be tensioned with heavy loomweights without breaking?

Continued in Part 2!

Tuesday, September 17, 2019

Castlemilk Moorit wool: A Pleasure or a Pain?

Have you seen the video I posted about Castlemilk Moorit wool yet? If not, take a look below. In this post, I wanted to add some supplementary details about the wool and sheep, and some photos, that didn't make it into the video. The camera is pretty good, but in this case, it really didn't capture the differences I was describing. Here's the video:


First, if you want to read along, you can find the book on Amazon. Although the book covers each breed briefly, there's enough research there to launch your own personal study of breeds. That was the inspiration for the Fiber Talk series in the first place because words cannot replace tacit experience. Let your fingers do the 'reading'!

Now, here are the bits I couldn't effectively put into the video. In the photo below, you can see the color differences between the Castlemilk Moorit (foreground) and the Manx Loughtan (background). They do have a similar loft, though the Manx feels finer (the crimp feels more bendable than the crimp of the Castlemilk).


Here's how different the Castlemilk can look when overdyed (apologies for the bluish cast, it was actually a sunny day in Leicester). The differences are subtle, but I did love how enriched the greens looked:


However, the way that Manx can take on color is quite impressive. The greens for this one were slightly saddened in contrast to the more yellowish greens in Castlemilk, but that's to do with the dye mixture, not the fleece color.


As you can see, the overdye for the Manx was stronger than it was for the Castlemilk. When I dyed the Castlemilk, I aimed for 1.5% DOS (depth of shade) as a minimum, but you can tell how comparatively brown it still is. Here's the side-by-side comparison of the two:


The major difference I see is where the dye will adhere. In the Manx, it seems to be concentrated at the tips, but the whole microfibril (individual sheep hair) also takes the color, though not as strongly as at the tips. It could be just my perception of the color but it may also be a result of the way this fleece can take dyes. To contrast this, the Castlemilk will follow a similar suit, but the length of the microfibril won't be as consistent in how it takes color. In fact, some hairs do not look like they've taken any color.

Dyeing colored fleeces is always tricky. Grey fleeces tend to be a spread of white and black hairs, so it is the white ones that can establish a dramatic color shift, and the black hairs make the overall impression of the color more subdued. However, a brown fleece like these are fairly consistently brown from hair to hair. So, how well the brown will take the dye will vary. More testing with dyes is required, including subjecting the wool to the same dye bath. With that, there's always a risk that one breed will take up the color faster than the other, but that is also an interesting point to consider.

Was it a pleasure or a pain to work with? Well, as I mentioned in the video, I wasn't really in love with Castlemilk Moorit by the time I had spun nearly a pound of it. I didn't think it was a pain since it was a quick spin. I'm left hanging. I don't think I was able to fully explore the capabilities of this fleece and that's why I feel like I'm grasping for something...more.

From the Fleece and Fiber Sourcebook (2011), p. 157.
Castlemilk Moorit falls into the Northern European Short-Tailed family. The animals have horns and a reddish brown coat (from the Fleece and Fiber Sourcebook, p. 157: moorit translates 'as red as the moors'). The micron range can be quite variable, and I think this is the result of having Shetland as part of the bloodline mixture. I'm still learning about the differences between Shetland fleeces, where some are more woolly and others a mixture of hair and down (essentially, dual coated). The variability in Castlemilk Moorit, then, could be the result of some of the dual coated aspects cropping up in some individuals. In my fleece, I did note very coarse hairs with a downy-like undercoat, despite the rest of the fleece being generally woolly. You can see something of this variability in the fleece samples in the Sourcebook too:

Fleece and Fiber Sourcebook (2011), p. 158
I'll do a review on Manx and Shetland in the near future too. I have two gorgeous Manx fleeces which will be in the shop as soon as my drum carder arrives. I'll also dye some. I have very little Shetland, so I will probably be spinning that for review. They produce such small fleeces anyway, but with Shetland Wool Week around the corner, I'm hoping to get some from somewhere...I'll keep you posted on that. :)

Anyway, I hope this supplementary has helped you understand some of the nuance in this breed. It's hard to really know when all you can do is see and hear about a wool, so it's best for you to try it. I've never seen Castlemilk Moorit for sale as yarn, so if you're eager to try it out, get into contact with a spinner and a shepherd and create more avenues to praise this breed's fleece. I still believe there's more to explore with it. Thanks for reading, and post questions and comments below too!


Tuesday, September 3, 2019

PhD Life: It isn't glamorous...

...nor is it anything like I had expected. The thought of being Indiana Jones was one reason why I pursued my education seriously. I realized by 8th grade that to be a doctor, you needed to be smart, smarter than everyone else. So, I pushed myself to do the next level higher, taking the high-track classes rather than the average level classes. Each year, I pushed myself to the next level, never caring that I wasn't truly prepared for it. By the time I was a senior, I had taken 4 years of science (advanced biology and chemistry in the same year), 3 years of English, math, history, French, and never once gave myself a study hall. I used an academic waiver to remove the need to take P.E. (Physical Education) and spent all of my evening and weekend time studying until I went to bed. It was rare for me to have completely finished my homework each night. Sometimes I would do it before school started in the morning, or during lunch (when I would spend 30 minutes in the lab). Or sometimes, in the class just before the homework was due.

During this time, I was also a figure skater (had been since I was 2 years old), a member of a couple of clubs, a regular volunteer at the Illinois State Museum Research and Collections Center, and I worked 20 hours a week. I also had boyfriends, friends, and carried on crafting and painting and reading.

My senior year was a turning point. I had just turned 17. I began taking psychology at the local community college on Saturday mornings, for three hours. I front loaded my first semester so I could graduate early. In January 2001, I was officially a college student. I had to juggle a full 15 hour school schedule, high school final exams, a 30 hour a week job, and a boyfriend. In keeping with my goal to become smart, I took three advanced placement classes. By graduation day, June 2002, I went from being 'average' smart, to contending with the top 20% of my class inside of four years.

To say that I was wound like a tight coil would be a severe understatement. I lost a whopping 65 pounds between my sophomore and junior years. Because I had languished under my own whip to become smarter, I didn't always do well. Smart kids (those top 20% and above) ridiculed me when I would receive a failing grade on a homework, quiz, or a test. One particular episode still haunts me today. A teacher publicly congratulated me for improving my vocabulary test from a D to a B by the end of the first semester. I was humiliated at having my grades described to everyone and it did nothing to relieve the ridicule I received on a daily basis from my fellow classmates (though it was usually just a few bullies). I also hated it when some bullies started caring more about me as a person because I 'became hot' by losing weight.

You could say that I had had enough by the start of my senior year. I didn't want to be around people who didn't respect me and what I had accomplished by myself. I didn't have well-educated parents (though they were loving and supportive and made sure I knew about 'the real world'), access to tutors, siblings, or friends who could tutor me for free. I did everything through sheer force of will. And it didn't stop there.

Whenever there has been something 'hard' to do in my life, I will do it. Not for the martyrdom, to make people pity me because my efforts result in few gains. I do it for the passion. Because I am interested. I want to learn more.

I finished my bachelor's degree with a 3.76/4.0 (department GPA) and a 3.48/4.0 (overall GPA) at the University of Illinois at Urbana-Champaign in 2006. My senior year at UIUC was thoroughly loaded with anthropology courses, and with that, about 500-1000 pages of required reading each week. I binge-watched anime on weekends just to have a brain-break. I also took up Kuk Sool Won and achieved first degree black belt the summer after I graduated University (2007).

And then I began pursuing higher education. In 2010, I received an MSc in Museum Studies with Merit from the University of Leicester, after having suffered the financial crisis in 2008/9, switching jobs, and working full time while living just above the poverty line. I began Expertly Dyed as soon as my dissertation was in the mail. I was halfway started when I received confirmation that I passed my degree.

After an educational hiatus, where I worked as a teacher in Korea, an independent fiber consultant, and continued on my Expertly Dyed pursuits (starting my YouTube channel in 2012), I felt that it was time to return to academia and pick up my dream where I left it five years previously.

You're probably wondering why I wanted you to know my educational history from the time I was 13 years old. Some habits die hard.

I completed my MA in Archaeology from the University of Leicester with Distinction in 2016. I presented at two conferences. I also traveled to a new corner of Britain every other weekend. I was a dancer, reenactor, department groupie, and I exercised nearly every day. I went out drinking with friends on weekends. I ate cheese and crackers for dinner on some of my busiest nights. Wednesday pub nights with the department were my one opportunity to eat a proper meal each week. I lost weight. I did nothing crafty: no spinning, knitting, weaving, dyeing...nothing. And yet I studied textile production in Iron Age Britain.

My PhD experience has been the exacerbation of all my previous experiences with education and work/life balance. I work myself to death, I don't spend enough time on me, and some days I'm frankly shocked that I haven't collapsed with exhaustion.

I concocted an entirely unrealistic future for myself when I was 13 and I continued to fall back on those outdated principles until quite recently. I thought I had to become the expert and to know everything. I grappled with impostor syndrome (like many PhD students today). I couldn't handle being told my writing was sloppy or unfocused. I nearly fainted when I was told that 'I needed to be more serious about my research' and that I 'needed to do more'. I was utterly broken. How could someone like me possibly have time to do more and be more serious? I had already received high praise in the form of a Distinction and feedback at conferences. I am 35. I have been serious about my education for 22 years. I have gone far beyond just 'doing more'. What was missing?

My biggest personal issue with my pursuit of a PhD is that I'm not Indiana Jones. Being a doctor isn't about being the smartest, per se, it's more about understanding who you are and what you need. But here's my big moment of self-reflection about my PhD:

I do what I do because I want to do it.

I am halfway through writing my PhD thesis. I have presented at 12 conferences since January 2017, with 3-4 more planned for the remainder of 2019. I have conducted 2 major experiments for my PhD research (which is not an experimental PhD), with 2 more scheduled for September. I have met with senior academics in Iron Age studies and textile studies. I've done these things because I wanted to do them. I want to present high quality research and hold myself accountable because I have deeply critiqued my own work and the work of my predecessors. I want to develop textile archaeology to be the mainstream topic of study it deserves. I can't do this alone, nor am I alone. I am there, in a community, of similarly minded people who do what they do because they want to do it. 

This brings me to my final point about work/life balance. If I was told to do 6 conferences a year by my supervisors, and I had to do it, I would probably stress out. I would cry. I'd be anxious and work 15 hour days and on weekends. If anything were to set me off, I would probably have a complete breakdown with collateral damage. My work would be my life. I'd have no way of disengaging. I would probably binge drink (which I nearly started to do at the start of 2019). And worse, it would feel inescapable.

Something I didn't know about myself is that I am incredibly self-motivated by difficult tasks and I think the reason why I have managed to accomplish so much was because I knew my limits. I enjoy being busy and productive. I like being able to do 10 different activities in a day. I like keeping a schedule. I like being a part of things. When I do feel stressed out, anxious, depressed, exhausted, lethargic, etc., it's because I'm not keeping a good work/life balance that is suitable for ME. 

Sneak peek at the new series I'm launching on YouTube!

It is important to be introspective, and the demanding work of a PhD project can often prevent you from reflecting on yourself, your motivations, your needs. I need to be writing up my chapter on needles right now, but my need to share these thoughts has superseded my need to write my chapter. I won't fret about my chapter writing because I have a plan. It is scheduled to be worked on today. I want to write this chapter on needles. I submitted an abstract for a conference this morning and I worked on a journal article submission. Later, I will finish my weaving experiment today and get ready to pack up for the European Archaeological Association conference. I want to do these things. I am happy, stressed, excited, and a bit anxious. My life as a PhD student is the opposite of glamorous--certainly, no one will be writing 'Love You' on their eyelids any time soon. It's an exercise in coordinating 10 spinning plates with just my two hands. But I know that if it all becomes too much, or I need help reassessing my work/life balance, there are people out there who want to raise awareness for mental health issues among PhD students. 

Tuesday, August 27, 2019

Iron Age Archaeology and Textile Studies: Where have I been?


Hey everyone!

I know it has been so, so long. I haven't gone missing, or gotten distracted. But I have had a severe shortage of time. I've been thoroughly engrossed with my PhD research on textile production during the Iron Age of Britain for the last few years, which has also meant that I haven't been able to do many updates. I worked on relaunching the Expertly Dyed shop last year (my big New Year's Resolution), and I had quietly vowed to relaunch my YouTube channel this year.

Over the coming months, my plan is to reacquaint myself with the past avenues I've used to share my knowledge. It'll be a rough start, but we'll get there. To start, please watch this short promo video so you know where I'm going to start off with.

Iron Age Archaeology and Textile Studies

I also plan to work on some Fiber Talk videos. Living in the UK has given me the unique advantage over my time in Korea to explore a wealth of fibery goodness. There are tons of rare breeds available to my fingertips, and I've already been underway with testing and spinning them. So, please stay tuned for those future videos.

I'll also use this blog to link some of the content I've already created from conference papers I've presented. Having been on both sides of the academic paywall, I'm well aware how difficult it can be to access certain information. For those interested parties, you can find most of my work (until 2018) on my Academia profile. If you want an easier digest of my research, I will be posting versions of my work here, without all the academic puffery that is sometimes needed to show peers that you've done the research. I hope that these two options will be ideal for most of my audience, but if you're still interested in my research and have no idea how to understand what it all means, let me know. Knowledge is useless if you can't properly share it. I'm happy to do this for you.

Thank you to everyone who has supported me during these last four years. It's been a bit of a dead zone in terms of content, but it doesn't mean that I don't miss everything about textile arts, and the Expertly Dyed community in particular. Reading through old comments has lifted my spirits. :)

Places to find me:

Email: expertlydyed@zoho.com
Etsy: http://www.expertlydyed.etsy.com
Facebook: https://www.facebook.com/expertlydyed
Twitter: https://twitter.com/JenniferBeamer2
Pinterest: http://www.pinterest.com/edexpertlydyed/
Instagram: http://instagram.com/expertlydyed
Ravelry: http://www.ravelry.com/groups/expertly-dyed-friends

Wednesday, September 9, 2015

Revisiting Gotland Wool: What is it Saying?

I talked about Gotland wool earlier this year, and I even talked about it on Fiber Talk:


Now that I've worked with more of it, I'd like to add a few things. First, I know that with many breeds, there will be a variety of qualities and characteristics the individual fleeces might exhibit, and that might be further compounded if the shepherd/ess is making crosses or upgrading bloodlines. If you're working with an older animal's fleece, it'll feel very different than a lamb's fleece. These points are all worth keeping in mind when working with any particular breed (with some exceptions, where fleece characteristics are tightly controlled).


Second, your experience with a wool will vary according to how you prep the wool and how you spin it. And last, what is your Gotland telling you? I actually debated about whether I should comb or card this fleece, since the locks were on the longer side. I decided to card it because I wanted the finished yarn to be fluffier, and the batt would help me spin a loftier yarn. After doing my cotton spinning challenge, I began making larger samples for testing techniques and the like. So, with this fiber feeling so soft, naturally, I wanted to highlight that aspect as much as possible in the twist. The batt fluffed up considerably after removing it from my drum carder...it begged to be spun with a delicate hand.


This fleece came from a soft, baby Gotland sheep from the UK. This coloring is impeccable for making a wonderful heathered gray yarn, as you can see in the photos. The fibers smoothed right through my fingers, so I kept the intake low and had on my largest whorls, but kept my fingers deft so I didn't impart too much twist.

I kept the single twist low and the ply twist low, which had an unexpected result. In most wools I've spun, when you spin/ply with low twist, you'll get a poofy yarn where the fibers poof in the same way. But I haven't really done this with a curly fleece before now. After I washed the plied skein, I noticed that little bits of curl would reactivate--but they wouldn't all reactivate as a cohesive curl. It was a bit like watching a kid walk a dog, where each had different ideas about which way to go. Maybe you can see what I'm talking about with this closeup:


Without any tension, this yarn seems to meander through the length, rather than just be poofy, as I would expect a fiber like merino to do if spun similarly. Does that make sense? The yarn bends one direction for half an inch, then it bends in a different direction, and so on. It takes on a wiggly appearance instead of a poofy or round one. I have some super curly Cotswold, so I kind of wonder if it'll do the same thing if I spin it similarly. :)

My yarn weighed 85g and had 452 yards. Since I don't have a spinner's control card right now, I figured out how many yards per 100g I had by setting up a proportion (hey, I'm using algebra!), which gave me 525 yds/100g (or, 5.25 yds/g; 2378 yds/pound). So, my yarn comes to about a heavy lace weight yarn, according to the Wikipedia yarn weights page. Once I knit up a swatch, I'll see what the stitch gauge can tell me about the gauge of the yarn...is it really a heavy lace weight yarn?


Let's talk about the prickle factor for a second. Gotland is typically listed in the upper 20s-lower 30s on the micron scale, but this seems to be a wool similar to Icelandic: if you keep the twist lower (think soft-spun), you can minimize the prickle factor of your yarn. My fleece came from a super soft baby lamb, so mine is probably in the low-mid 20s, so keep in mind the age of your sheep when you decide to spin Gotland. I probably could have spun this Gotland with more twist, but I'm still quite pleased with the final yarn. I think a low twist yarn really brings out the particular curly characteristics of this wool. Part of my breed study lessons come from letting the wool speak to me; in this case, I'm glad I listened! So, what has been your experience with Gotland? Have you worked with it more since we last talked about it? Post in the comments below and share with your friends!

Places to find me:

Email: expertlydyed@zoho.com
Etsy: http://www.expertlydyed.etsy.com
Facebook: https://www.facebook.com/expertlydyed
Twitter: https://twitter.com/JenniferBeamer2
Pinterest: http://www.pinterest.com/edexpertlydyed/
Instagram: http://instagram.com/expertlydyed
Ravelry: http://www.ravelry.com/groups/expertly-dyed-friends

Thursday, August 27, 2015

What Can Corriedale Do For Me?

Corriedale is a wonderful mid-grade wool that can do just about anything...that is, if you can find the right Corriedale. "Corriedale" is commonly found (cheaply) at yarn stores and is absolutely fantastic for sweaters, hats, scarves, mittens...just about everything. But Corriedale has a wonderful range of micron counts, if you have the chance to pick a raw fleece. It can range from the low 20s to the low/mid 30s, but generally falls in the 25-29 micron range.  It's a strong, sturdy wool that is extremely greasy--but that shouldn't make you run away, screaming. Where am I going with this? Corriedale has more versatility than one would realize at first.

If you don't know much about Corriedale, you're welcome to watch the video I made recently to catch you up to speed:


Now that I've had the chance to spin Corriedale myself, I now look at commercially prepared Corriedale top and yarns differently. Whenever you use a commercially prepared top of a specific breed, it represents the average qualities of that breed. For breeds like merino, there are many categories of top which you can find available: 23 micron, 21 micron (fine), 18.5 micron (superfine). But there aren't such categories with Corriedale, which is a breed that could use fineness divisions. I'm not looking to change how mills divide up Corriedale--there just isn't the demand nor the significant amounts of Corriedale to justify such a change-- but as spinners, we ought to be aware of the incredible resource we have available to play with.

Remember when I mentioned that I kept more lanolin on my Corriedale than I typically do? It made for smooth spinning and it helped me keep the fly-aways in check as I was spinning a true worsted yarn. But I wasn't sure how I felt about keeping all of that lanolin in the final yarn--it was fine for spinning, but the yarn was stiff (which might be fantastic for weaving yarns!) and felt slightly tacky. Because lanolin has a yellow-ish tint, it will change the color of the yarn, and it'll prevent the effective take-up of dye by the yarn; both things are worth keeping in mind. After spinning up my Corriedale batt into a worsted-ish 2-ply, I decided to go ahead and test it by scouring it. Turns out, you can scour a yarn just like you would scour a raw fleece. The yarn bloomed as expected, but the fly-aways were still reduced than they might have been otherwise. I'm going to scour my true worsted yarn now that I've proven to myself that it can be done, and with great results.

Corriedale has a lot of potential and there is a lot of variety. Between the micron count, easy processing, and smooth spinning, it could be just about anything you want, if you find the right fleece. What's your experience with Corriedale? Post in the comments below!

Friday, August 21, 2015

Review: Spin-Off Spring 2015

My blog always takes a dive during the summer months for some reason. Well, let's get back on track, shall we? :) This particular issue of Spin-Off celebrates the 'stache. Oops, not that one. Stash. Right, that overflowing bin of fibers and colors and so much potential. Sometimes I feel like I'm indulging myself when I look at the giant box which is my stash. Is it too much? Non-spinners would probably think I have a hoarding problem. When I list the breeds in my stash, I realize how little it is: Merino, Polwarth, Montdale, Gotland, Hampshire, Cormo, Bamboo, Silk, Churro, and various crosses. For so many breeds, I only have a teeny bit. As I've mentioned before, there are so many different breeds, sometimes with disparate uses, so keeping a variety of breeds on hand is useful when deciding which fiber to buy for a project.


But what to do with those little bits of this and that? What about all of those bits of dyed wools in your stash after a project? Well, you have lots of choices, and you don't need any blending tools either (but those will help you transform your stash too!). In the "Color Playground" article, the author, Jillian Moreno, talks about combining colors together either in the ply or the draft. This has been mentioned before in previous issues of Spin-Off and isn't a new idea, but it's worth considering when you're looking at your stash and you don't have enough of a colorway to turn into a substantial project, like a scarf or shawl. In the draft, you have even more options for crafting your yarns based on the colors you've chosen--split one colorway into many strips and keep the other colorway whole. Then spin them both together and get a fractal plied look to the single yarn. Ply with itself (2-ply, Navajo-ply), or spin a second/third yarn and ply those together. Keep this tip up your sleeve.


What if you have some bits of leftover handspun? I like to use these for tiny projects and weaving projects, but what if they're too garish to combine into one project? Roll up your sleeves and drag out an old pot--it's dyeing time! You can overdye yarns with any dye you're comfortable using, but the specific article in this issue ("Naturally Beautiful Together") uses natural dyes to unify the colors. When you overdye different yarns in the same dyebath, they all take on that shade of whatever color, giving that batch a common color. It's important to keep in mind how different colors are made so you can achieve the desired results (secondary and tertiary colors), though you can overdye multiple times to deepen the tone of your finished yarns. Each time will darken the colors, so keep that in mind too. There's plenty of quick information to get you started dyeing naturally (with tea!) in this article, so be sure to read it if you're interested!


The last article I want to touch on is "Two Threads Are Better Than One". In the past, I've used a silk single to ply with a wool single to create a fun yarn with the inherent beauty of each type of fiber. So, perhaps think about making a wool/silk (or wool/alpaca, silk/angora) yarn where they aren't blended at all except in the ply. You can still eliminate some of the negatives of different fibers by combining them together in this manner, but without needing to blend them thoroughly before spinning. This article is full of combo tips and project ideas for your finished yarns. I'll definitely keep some of these tips in the back of my mind when I'm considering what to spin next.


When your significant other/family/friend/stranger looks at your stash and remarks on its size, feel free to respond with the comment that the fibers in your stash are just waiting to be a thousand or more things--a veritable goldmine, if you will.

Thursday, August 6, 2015

Look, Facebook, We Need to Talk

You know that I've been with you since 2005, when you were a way to connect with students at a variety American universities. I was there during all of the transitions, big and small. I watched you grow. I watched you expand and begin including non-university students: moms/dads, grandparents, and kid brothers/sisters. I was skeptical about that move, but I allowed it. When businesses started using you as a platform for reaching their audience on the cheap, I approved. In early 2011, I signed up Expertly Dyed for its own page. Until six months ago, at least, when I noticed that things were going less well. (TL;DR - Skip to the end for details about getting Expertly Dyed notifications)

What happened? Well, let's review the insights. As far back as I can go (July 27, 2013), my organic reach was:
  • 338 people served out of 442 Likes
That means, 76% of my audience was reached that day. Not bad, since some people don't go to Facebook everyday. Let's fast forward a bit and take a look at a year ago:
  • 269 people served out of 821 Likes
That means, 33% of my audience was reached that day. Okay, that's a big difference. Let's do this one more time and see what my insights were like as of a few days ago:
  • 95 people served out of 1236 Likes
You almost don't need to see the percentages to know what I'm driving at. Only 0.08% of my audience was reached on this particular day.

Since I began using Facebook, I have done my best to use the platform to my advantage so there is transparency between what I make and what you want. You want to see more red fibers in my shop? Okay, more red is coming. Want a tutorial about X? Well, that goes on the video queue. What do I think of Y book/magazine? It'll be reviewed on the blog. 

So, here are my gripes. Two days ago, I read a post from Hootsuite about how it's really not that hard to reach your Facebook audience. Well, my insights are telling me a different story. First, it says to 'know your audience'. As a spinner/dyer/knitter/so on, I am deeply entrenched within the community, and I'm also a fan of others who have similar businesses as mine. I'm fairly certain that I know my audience. (Don't believe me? Quiz me.) Then it goes on to say that I should capitalize on videos. As a video creator, I can tell you that I do all in my power to bring you all videos of things you really want to see. On my video post about Botched Dyeing, only 112 people were reached. Many of you specifically asked for that video. Let's review so far. It was a video post with relevant material and what you wanted to see. So why wasn't it served to more of my audience? Even if I posted it at a poor time of the day (which it wasn't), why didn't it reach a greater portion of my audience?

Let's keep looking. Okay, 'taking a stand, joining a conversation' is outside the scope of my business. I refuse to delve deeply into politics, religion, human rights, and so forth, especially on the formal face of my business on Facebook. There's a place for those conversations, but on my business page is not where they belong. Over the course of years, many of you have come to understand (or at least make an educated guess about) my position on things in the world. In the chat thread on Ravelry, its informal nature allows me bring my personal views to light. That is the right place for such discussions, in my opinion, where context is easier to establish than on my Facebook business page. Next, please.

"Listen to me," says Facebook. Oh? Every few months, I have to change how I use your platform because you have changed your algorithm. "I wanna see more pictures!" cries Facebook. The vast majority of my posts contain images or links or videos. Of course, by vast majority, I mean statistically overwhelming majority. "Don't be pushy!" whines Facebook. I completely understand that one. I hate it when people and companies shove their sales and wares in my face. I don't want to get my daily dose of 'buy my stuff!' from pages I have liked. So, Facebook cracked down on those posts so they weren't being served. Great. I run sales specifically for my Facebook and Twitter fans, but I don't overly promote those posts...at most, I will promote a week-long sale about 3 times in that given week. "You're being needy!" complains Facebook. Good news. My content takes a long time to produce, so I usually only post once a day. Occasionally, twice a day.

Here are a few caveats. When I have posted content which tags other businesses, it has paid off with a far grander reach. But it needs to be relevant, and keeping well-connected in that way on a daily basis is extremely challenging for a one-woman show. The one post which has managed to reach nearly my entire audience was the one where I was trying to figure out why my posts weren't getting to you all. That post reached 1364 people, and only 1253 people like my page. Bonus. But I don't want my rant to get the promotion; I want my relevant content to be seen. Facebook, please don't force me to have to go to these extremes every day so I can get even just 10% of my audience reached daily.

I'm not a professional marketer, but I'm smart. I can read, observe, analyze, implement, and discuss the results. I can see what is working, and what isn't. I'm a scientist at heart, so I research and hypothesize about what I think will work to build a following, reach my fans, and develop and maintain a community. I'm not perfect, and I'm willing to accept the fact that I will misunderstand and be imperfect about how to market a business. Five years on, though, I ought to be getting better at marketing and delivering content my audience wants to see. Instead, Facebook would have me believe that I'm clueless in that regard.

Hootsuite, I know you're trying to be helpful, but for many businesses in my spot, posts like this are condescending and rude. I know for a fact that I'm not the only small business experiencing such troubles from Facebook. Though we try to share with each other how we have managed to overcome the algorithm changes Facebook has brought forth, there is clearly something else that we're doing wrong. So, Facebook, if you're listening, what are you going to do for me? Relationships are meant to be balanced, but I fear that the table is tipping far more in your favor. I don't want to end our long-lasting relationship, but I feel like we may be nearing the point of parting as friends.

Oh, and if you're curious about how you can ensure you'll get updates about Expertly Dyed posts on Facebook, go to your profile and scroll down until you see the "Likes" category on the left-hand side of your Timeline. There, you will see a list of your liked pages. Find "Expertly Dyed" and click on "Follow". In the drop down menu for "Liked", select "Get Notifications". 


Now you will get a notification whenever a page you like posts something. I've been going through my liked pages and doing likewise. There is so much content I have missed myself!